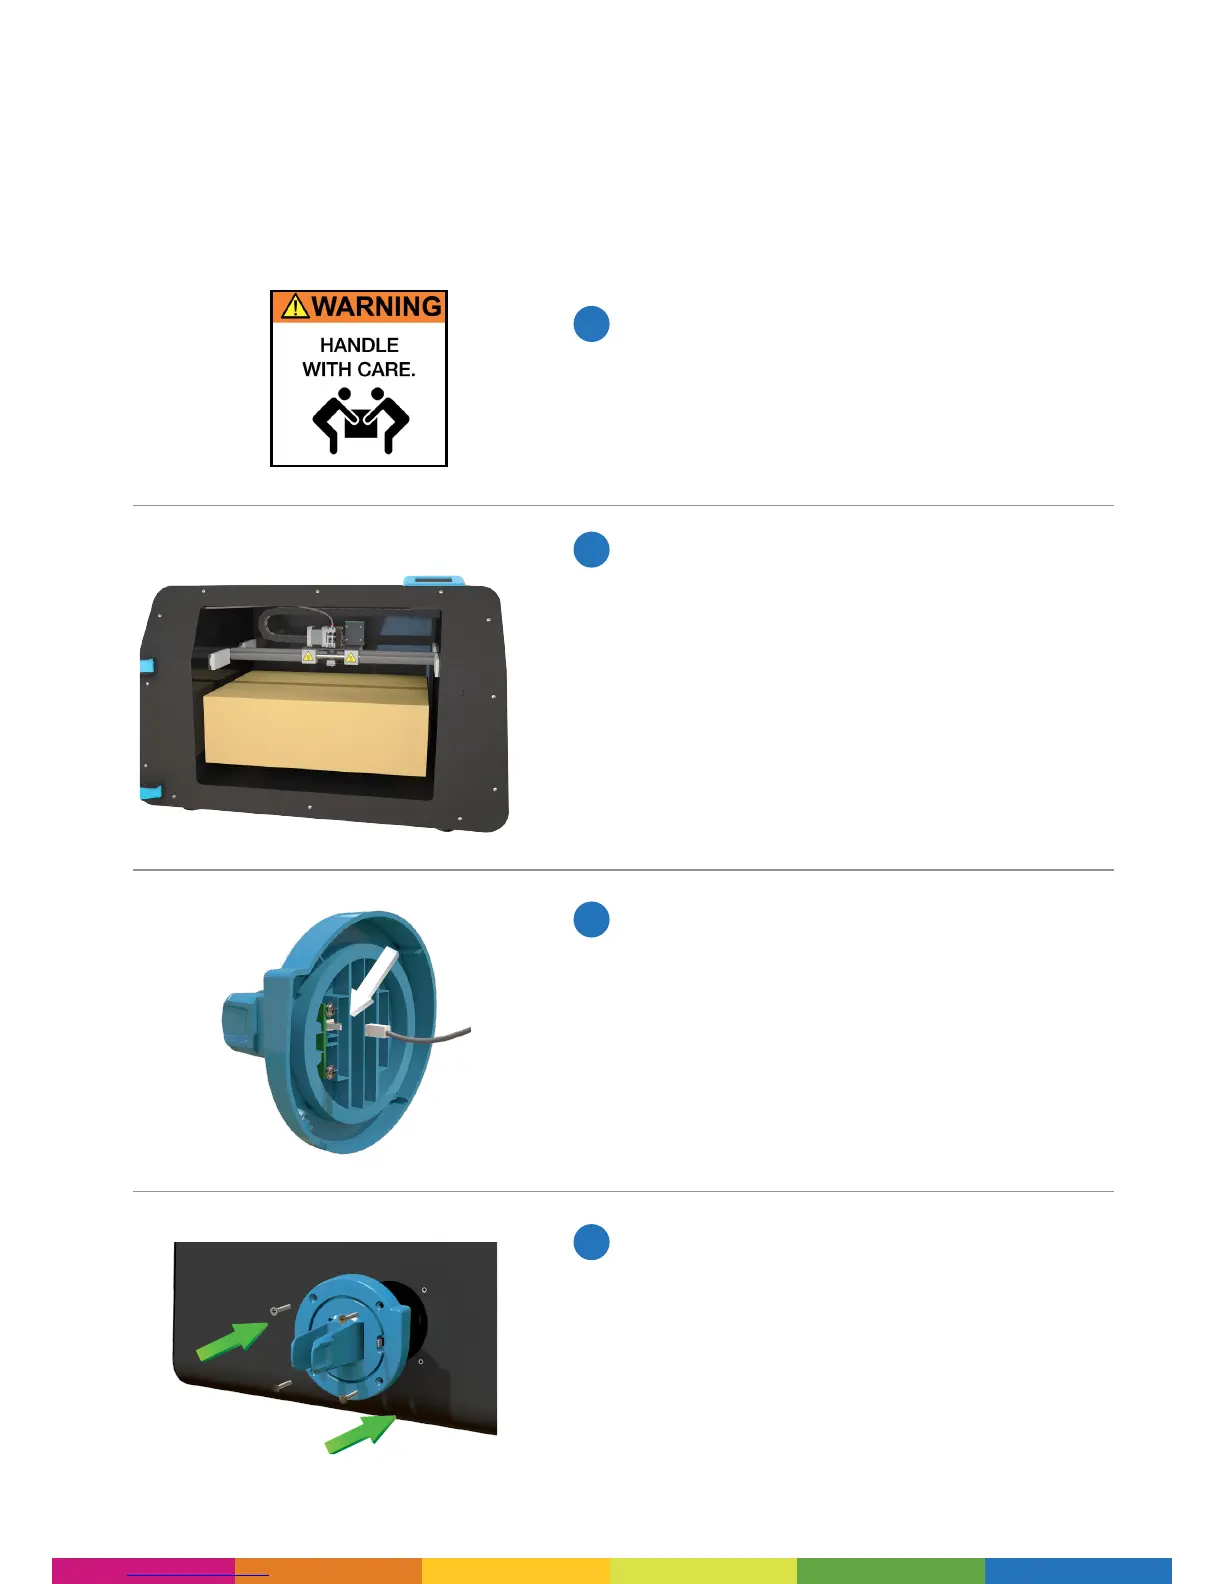
6
Remove the printer from the double lined box.
Please note that two people are required to
remove the printer from the box.
Open the printer door and remove the following
items from the box that you nd inside the
printer:
a. Glass bed
b. Filament cartridge
c. Filament cartridge holder
d. 2m Power cable
e. 24V power adapter
f. Extra long 3m USB cable
g. Four screws for the lament holder
h. Filament tube
i. 1x pack of Z-Axis sheets
Set up the lament holder cable:
Connect the cable connector to the rear of the
lament cartridge holder. Please refer to the
illustration for details and correct orientation.
With the four screws provided attach the
lament cartridge holder to the printer.
Important note: hand tighten only.
PRINTER SET UP
Please follow the steps below to get your Polaroid 3D printer ready for printing. Before you start,
please note that two people are required to remove the printer from the box. Once removed from
the box please ensure that your printer is positioned on a at and stable surface, this helps to
minimise vibration and produce more accurate prints.
1
2
3
4
 Loading...