EasyManua.ls Logo

Polycom VVX 501 - User Manual

Polycom VVX 501
15 pages
Print Icon
To Next Page IconTo Next Page
Loading...
Polycom VVX 501 and VVX 601 – User Guide
What you need to know:
Learn the basics of using your Polycom VVX 501/601 desk phone.
Introduction
The following topics will help you with common questions related to using your Polycom
phone. Please note: The examples and screenshots below are using the VVX 501 model;
however, the instructions for performing the tasks are the same across both the VVX 501
and VVX 601 model phones.
Touchscreen
1.
The touchscreen navigation is based on touch. To select an item, tap it. You can
perform the functions that appear on the screen.
2.
The buttons on the bottom of the screen are referred to as Softkeys. Their functions
are context sensitive, which means that their functions change depending upon your
current menu. For example, if you are conferencing, the screen displays functions
related to the Conference function.

Other manuals for Polycom VVX 501

Question and Answer IconNeed help?

Do you have a question about the Polycom VVX 501 and is the answer not in the manual?

Summary

Touchscreen Navigation and Softkeys

Phone Views and Interface Elements

Feature Keys

Home Key Functionality

Explains the Home key's role in navigating between phone views and accessing the home screen.

Headset Key Operation

Details using the Headset key for calls via analog or Bluetooth headsets and its indicator lights.

Speakerphone Key Usage

Describes the Speakerphone key for hands-free calls and its green activation indicator.

Mute Key Function

Explains the Mute key for local audio control during calls, noting its red activation light.

Placing and Receiving Calls

Managing Calls: Hold and Resume

Call Transfer Methods

Blind Transfer Procedure

Details the steps for transferring a call without prior announcement to the recipient.

Consulted Transfer Procedure

Explains how to announce a call to the recipient before completing the transfer.

Initiating a Three-Way Conference Call

Do Not Disturb Feature

Call Forwarding Configuration

Forwarding via End User Portal

Guides on setting up call forwarding using the End User Portal website and credentials.

Call Park and Retrieval

Accessing Call History

Monitoring User Status

Shared Line Appearance Usage

Managing Personal Directory Contacts

Managing Speed Dial Contacts

Voicemail Management

Setting Up Voicemail

Instructions for initial voicemail setup, including passcode and greeting recording.

Accessing Voicemail Messages

Steps to check for new voicemail messages and retrieve them using the phone interface.

Overview

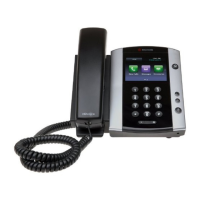
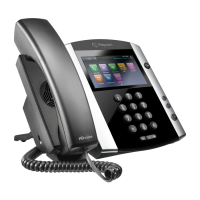
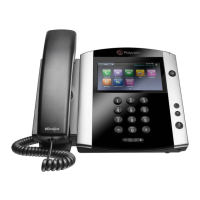
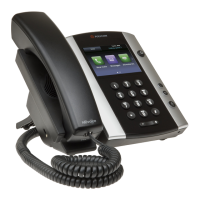
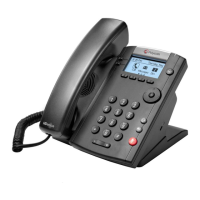
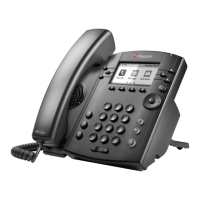
The Polycom VVX 501 and VVX 601 are advanced desk phones designed for business communication, offering a rich set of features to enhance productivity and streamline call management. These devices are equipped with a touchscreen interface, making navigation intuitive and user-friendly. While the examples and screenshots in the manual primarily feature the VVX 501 model, the operational instructions are consistent across both the VVX 501 and VVX 601, ensuring a unified user experience.

Function Description

At its core, the Polycom VVX 501/601 serves as a comprehensive communication hub, enabling users to place, receive, and manage calls efficiently. The device supports various call handling functions, including call transfer (blind and consulted), three-way conferencing, call parking, and call forwarding. It also integrates features like Do Not Disturb (DND) and voicemail, providing users with control over their availability and message management. The phone's design prioritizes ease of use, with a touchscreen that allows for tap-based selection of items and functions displayed on the screen. Softkeys, located at the bottom of the screen, are context-sensitive, meaning their functions adapt to the current menu or call state, offering relevant options at every step.

Usage Features

The Polycom VVX 501/601 offers a variety of usage features tailored to different communication needs.

Touchscreen Navigation: The primary interface is a responsive touchscreen. Users can tap on-screen elements to select them and execute various functions. The softkeys dynamically change their functionality based on the active menu or call context, providing intuitive access to relevant options. For instance, during a conference call, the softkeys will display conference-related functions.

Lines View and Home View: The phone operates with two main display modes:

  • Lines View: This is the default display, showing your phone lines, corresponding buttons, and speed dial favorites. It provides an immediate overview of your active lines and quick access to frequently called contacts.
  • Home View: Accessed by pressing the Home key, this view serves as a central hub for initiating new calls and accessing messages, directories, settings, and applications. Pressing the Home key again from the Home View will cycle back to other phone views, including the Lines View if the phone is idle.

Feature Keys: Dedicated physical keys enhance the phone's usability:

  • Home Key: This key is crucial for navigating between the Home View and other phone views. Pressing it from any screen brings up the Home View, and subsequent presses cycle through other available views. When the phone is idle, pressing it displays the Lines View.
  • Headset Key: Designed for headset users, this key enables placing and receiving calls through a connected headset. It glows green for analog headsets and blue for USB or Bluetooth headsets, indicating activation.
  • Speakerphone Key: This key allows users to place and receive calls using the built-in speakerphone. It glows green when activated, providing a hands-free communication option.
  • Mute Key: Essential for privacy, this key mutes local audio during calls and conferences. It glows red when activated, clearly indicating that your microphone is off.

Placing and Receiving Calls:

  • Placing a Call: To initiate a call, simply pick up the handset, dial the desired number using the keypad, and then select the "Dial" icon on the screen.
  • Receiving a Call: The phone offers multiple ways to answer an incoming call:
    • Lift the handset to answer with the receiver.
    • Press the Speakerphone feature key for hands-free answering.
    • Press the Headset feature key if using an accessory headset.
    • Tap the "Answer" softkey on the touchscreen, which will answer the call using the speakerphone.
  • Answering a Second Incoming Call: If you are already on an active call and receive another incoming call, tapping the "Answer" softkey on the screen will automatically place your first call on hold and connect you to the new call. To retrieve the first call, navigate to the lines view, tap the held call to highlight it, and then tap the "Resume" softkey.

Hold and Resume:

  • Placing a Call on Hold: During an active call, tapping the "Hold" softkey will place the call on hold.
  • Resuming a Call: To resume a held call, tap the "Resume" softkey. If multiple calls are on hold, select the specific call you wish to reconnect with before tapping "Resume." The phone supports "Music On Hold," where callers on hold will hear music if this option is assigned to your profile.

Call Transfer: The phone supports two types of call transfers:

  • Blind Transfer (Unannounced): This transfers a call to another party without prior announcement.
    • Method 1: While on an active call, select "Transfer," then press the "Blind" softkey. Enter the destination number and select the "Dial" icon.
    • Method 2: While on an active call, press and hold the "Transfer" softkey to initiate a blind transfer. Enter the destination number and tap the "Dial" icon.
  • Consulted Transfer (Announced): This allows you to announce the call to the recipient before transferring it. While on an active call, select "Transfer." Enter the destination number and select the "Dial" icon (the caller is automatically placed on hold). Once the receiving party answers, announce the call. To complete the transfer, select the "Transfer" softkey again or simply hang up.

Three-Way Conference Call: To initiate a conference call:

  • While on an active call, tap the "Conference" softkey. The first call is placed on hold.
  • Enter the second number and tap the "Dial" icon.
  • When the second party answers, select the "Conference" softkey to connect all calls.

Do Not Disturb (DND): This feature directs all incoming calls directly to voicemail. To enable DND, select the "DND" softkey. A "Do Not Disturb" icon will appear by your extension line, indicating that the feature is active. To disable it, repeat the same steps. It's important to note that DND functionality may vary based on administrator configuration, potentially affecting inbound calls to other connected devices as well.

Call Forwarding: This feature allows you to forward your business phone to another number, typically your mobile phone. This is managed through the End User Portal (e.g., https://commportal.btel.com/). After logging in, you can specify the number to which all calls should be transferred and save the settings.

Call Park: To park a call:

  • While on an active call, select the "Hold" softkey.
  • Enter *68 and tap the "Dial" icon.
  • When prompted, dial the extension number where you wish to park the call, followed by the pound (#) key. Alternatively, you can simply dial the pound (#) key to park the call against your own number.
  • To retrieve a parked call, dial *88 and tap the "Dial" icon. When prompted, dial the extension number where the call was parked, followed by the pound (#) key, or simply dial the pound (#) key to retrieve a call parked against your own number.

Call History: Users can view recent call history and place calls from these lists. From the Lines View, select the "Call History" icon. Tapping a number in the call history will automatically dial it.

Monitoring: This feature allows users to monitor the on/off-phone status of other users, provided it has been assigned by the administrator. If a monitored user is on the phone, a red notification icon appears next to their name on your phone's display. If they are not on the phone, no symbol will be displayed.

Shared Line Appearance: This feature enables authorized users to place and receive calls from other users' lines. If you share a line with another user, their identity will be displayed, and you can manage calls from that shared line. For example, an executive assistant can handle calls from the executive's line. To place a call from a shared line, tap the shared line and then dial the party's number. To receive a call on a shared line, tap the ringing line and then tap "Answer."

Adding Contacts to Personal Directory:

  • Via Browser: Navigate to the End User portal, log in, locate the Outgoing Calls section, and select "Personal Phone List." Click "Edit," enter the contact's name and number, then click "Add" and "Save."
  • Via CSV Upload: From the End User portal, select "Choose File" to upload a CSV spreadsheet containing contact information.

Adding Contacts to Speed Dial:

  • From the End User portal, locate the Outgoing Calls section and select "Speed Dial List." Click "Edit."
  • Enter the phone number and contact name in the corresponding fields for the desired speed dial slot.
  • Repeat for up to 8 speed dials. The process for adding speed dials may vary depending on whether Speed Dial 8 or Speed Dial 100 is enabled for your profile.

Voicemail:

  • Setting Up Voicemail: From the main screen, tap the "Voicemail Message" icon. Enter your default password, followed by the pound (#) key. Confirm your new passcode, then press pound (#). The system will prompt you to record your first and last name, then press pound (#). When completed, press 1 to access the voicemail main menu, where you can record greetings and retrieve messages.
  • Accessing Voicemail: Pick up the handset. Then tap the "Voicemail Messages" icon. If you have multiple numbers assigned to your phone, select the "Voicemail" icon that corresponds to the message center you wish to access. Enter your voicemail passcode followed by the pound (#) key. Follow the audio prompts to retrieve your voicemail messages. If you forget your passcode, contact your system administrator for a reset.

Maintenance Features

The manual does not explicitly detail maintenance features such as cleaning instructions or troubleshooting steps. However, the mention of contacting a "system administrator" for passcode resets and DND configuration implies that administrative support is available for managing the device's settings and resolving issues. The robust design of Polycom phones generally suggests a low-maintenance device, with most operational adjustments handled through the user interface or administrative portal. Regular software updates, if available, would typically be managed by the system administrator to ensure optimal performance and security.

Polycom VVX 501 Specifications

General IconGeneral
TouchscreenYes
BluetoothNo
Wi-FiNo
Wireless LANNo
Video SupportNo
ConnectivityEthernet, USB
Audio FeaturesAcoustic Clarity Technology
LinesUp to 12 SIP accounts
Ports2 x Ethernet, RJ-9 headset port, USB
PowerPower over Ethernet (PoE) or AC adapter
Audio CodecsG.711, G.722, G.729A, iLBC
SpeakerphoneFull-duplex
Network Interfaces10/100/1000 Mbps Ethernet
Dimensions190 x 150 x 180 mm
WeightApprox. 900 g

Related product manuals