46
K2 K3 | SERVICE MANUAL
INDEX
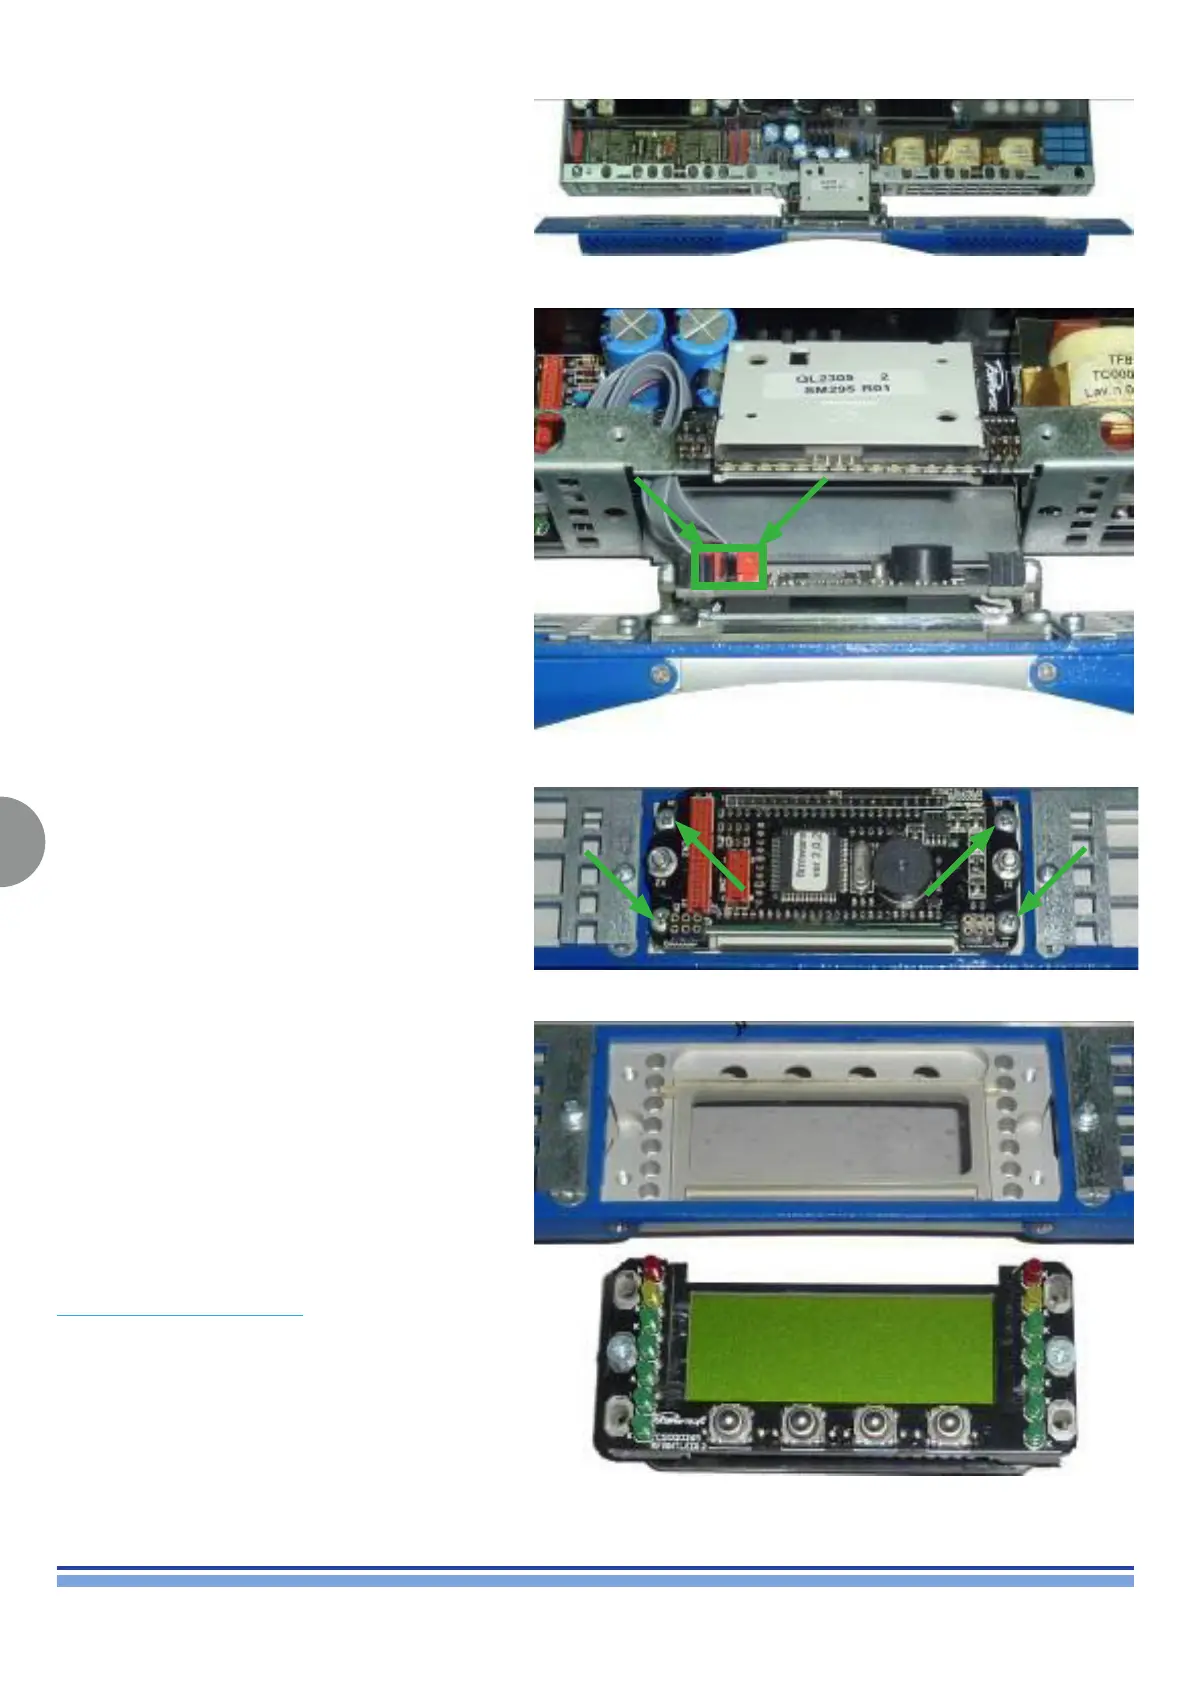
Front panel removed from the amplifier chassis
(Fig. 66)
Remove the display from the front panel by unscrewing
the four screws highlighted in (Fig. 67)
(Fig. 67)
Display removed from front panel
The front panel can now be removed from the main
amplier’s chassis.
When replacing the K-FRONT, please provide Powersoft
the Model and Serial Number of the amplier, since the
K-FRONT will be customized for that specic amp.
The K-FRONT must be replaced entirely when either
one of the following components is faulty: Card Reader,
Pushbuttons, LEDs.
In case of a fault in the Display, such as pixel loss or lack
of luminosity ask for the
KT000888.R DISP. REPAIR KIT
Once the display is replaced, reinstall the rmware as
explained in chapter 9. After the rmware has been
installed, check and set the desired max output voltage
on display by following the on screen indications:
Menu → setting → amplier setting → Max output voltage
→ set the value with the two ± buttons.
Remove the two at cables higlighted in (Fig. 66)