64
K2 K3 | SERVICE MANUAL
INDEX
INDEX
KDSP board installation
It is possible to retrot the optional K-DSP on every K Series
amplier with serial number greater than 19062, older serial
numbers need to be sent to Powersoft, please contact Powersoft
for further informations.
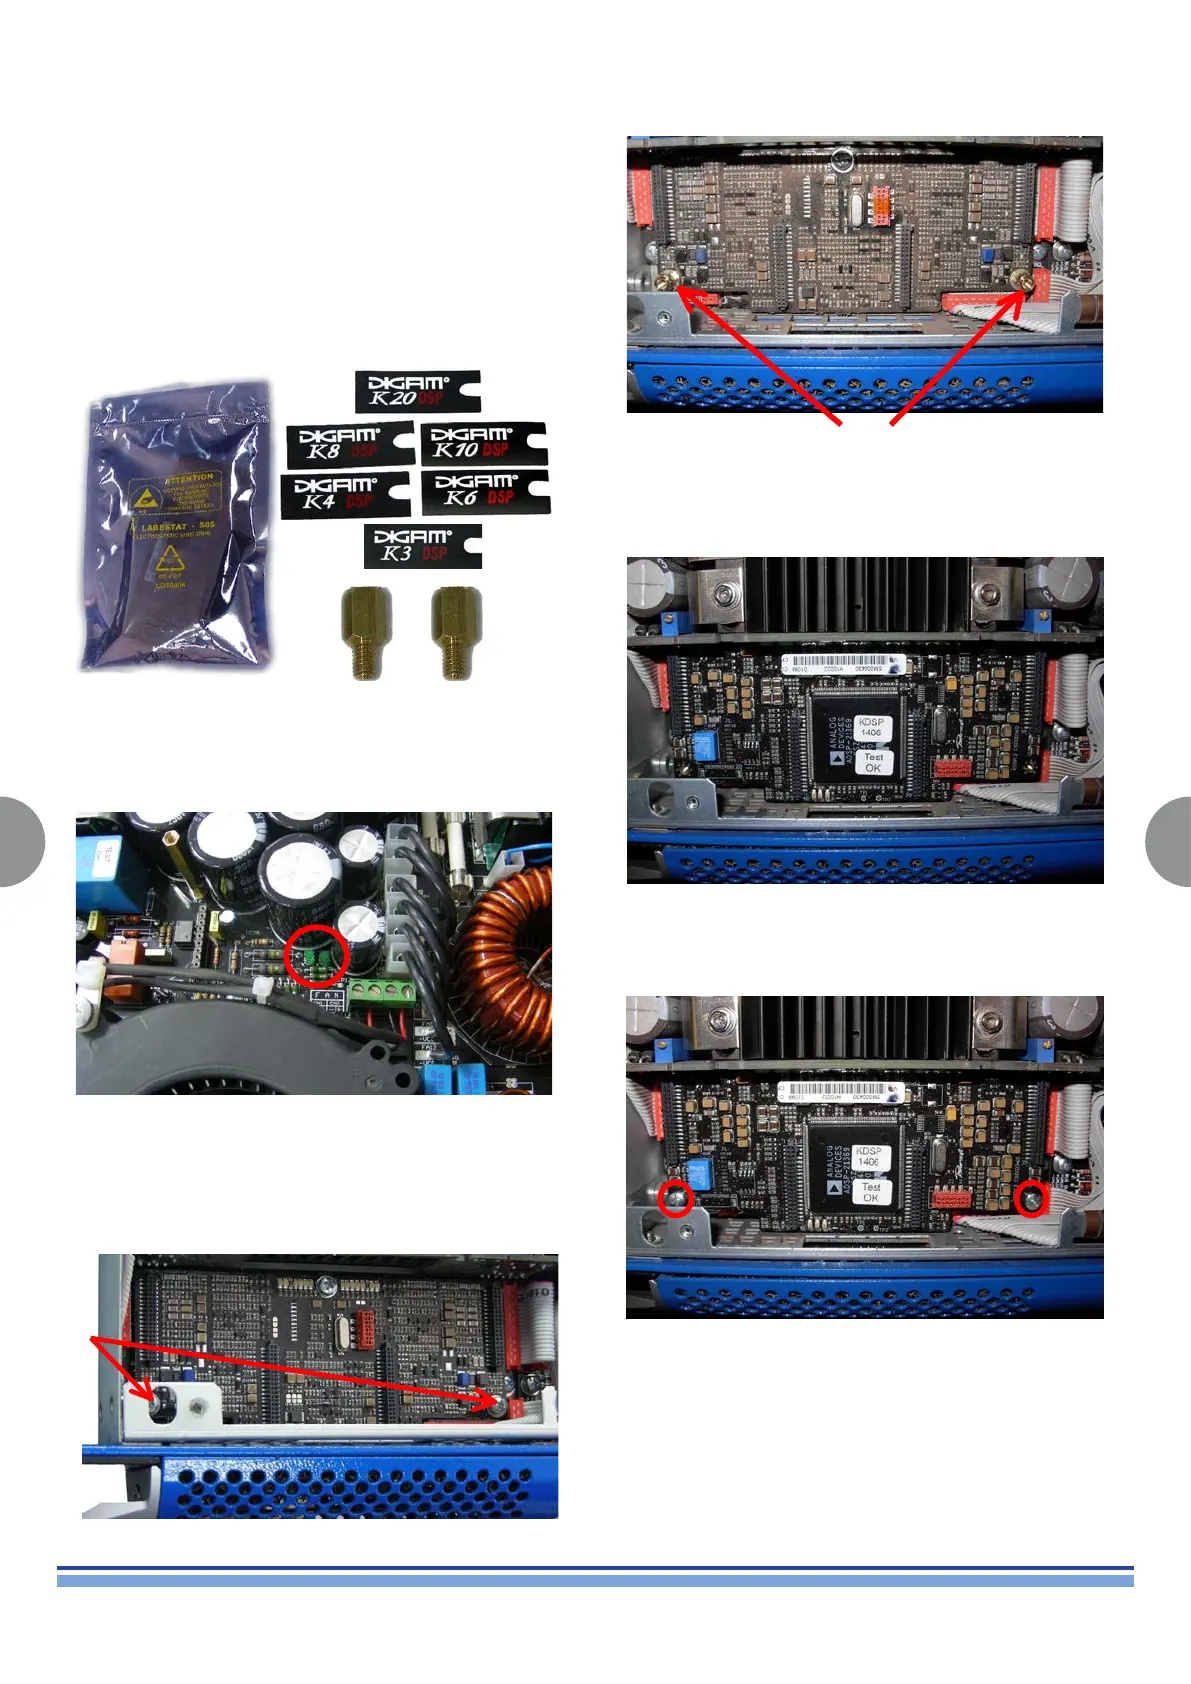
Powersoft DSP upgrade Kit comes as a DSP board protected in
an electrostatic shielding envelope, two brass spacers and a kit
of labels.
Powersoft KDSP upgrade kit
Prior to installing of the K-DSP board check if the rails are
completely discharged: leds in (Fig. 77) should be off, this should
happen 15 minutes after that the amplier has been switched off
and disconnected from the mains.
7railledsshouldbeofforit
isneededtodischarge
capacitorsbank
Locate the control board, positioned in the front left corner of
the amplier, as in (Fig. 78) and remove the screws of the control
board with a Phillips PH0 screwdriver.
Screw on the same holes the brass spacers support standoff as
on (Fig. 79).
Carefully position the DSP board on top of the control board, pay
particular attention to the four connectors of both boards, they
should align perfectly. (Fig. 80)
Screw the DSP Board in place, being careful not to over tighten
the screws in order to avoid any unwanted damage. (Fig. 81)
Reassemble the amplier’s cover.
Once the DSP Board has been successfully installed, replace the
front sticker choosing the appropriate one from the provided kit.
Lastly, perform a Firmware update as described in the previous
section.
(Fig. 77)
(Fig. 79)
(Fig. 80)
(Fig. 81)
(Fig. 78)