COMMERCIAL
PRO
D U C T S
DIVISION
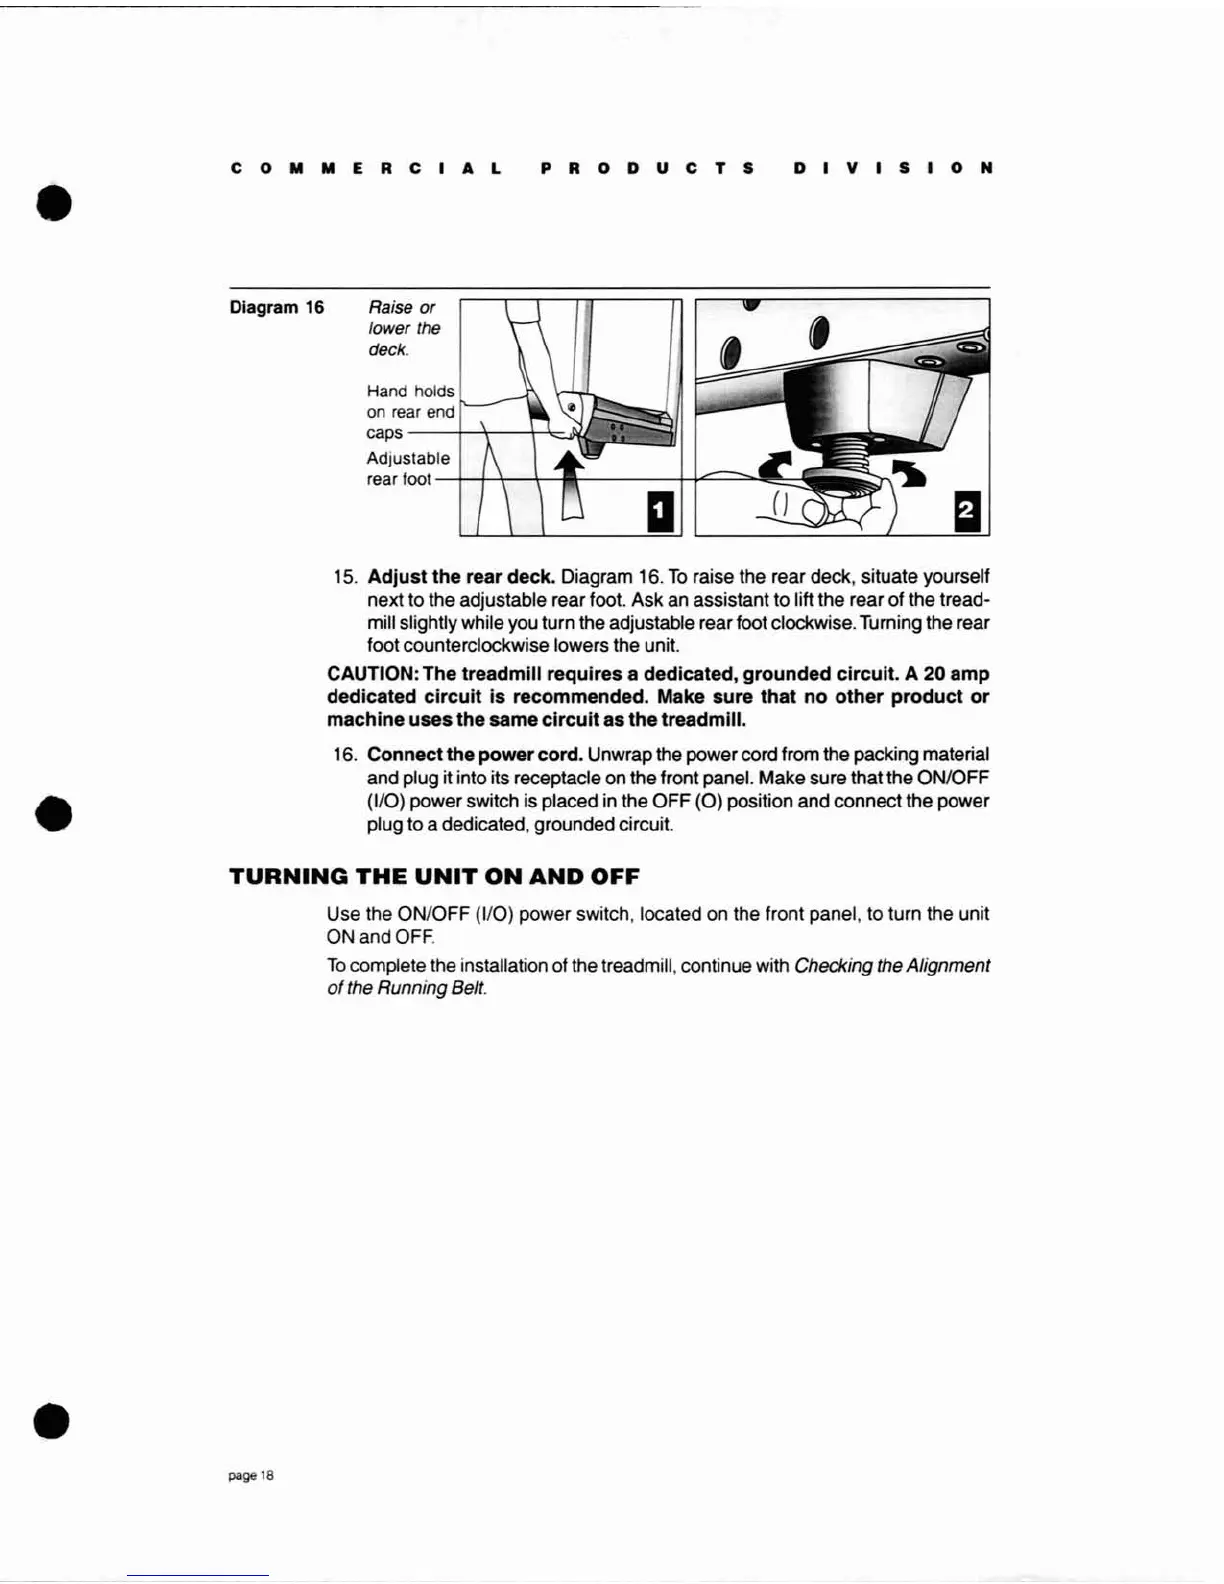
Diagram 16 Raise
or
lower the
deck.
Hand holds
on rear end
caps
Adjustable
rear foot
-t-f--T--\-
__
----+-+.e:::..--==-1I
~~~!I~
II
15.
Adjust the rear deck. Diagram 16.
To
raise the rear deck, situate yourself
next to the adjustable rear foot. Ask an assistant to lift the rear of the tread-
mill slightly while you turn the adjustable rear foot clockwise. Turning the rear
foot counterclockwise lowers the unit.
CAUTION: The treadmill requires a dedicated, grounded circuit. A 20 amp
dedicated circuit is recommended. Make sure that no other product or
machine uses the same circuit as the treadmill.
16. Connect the power cord. Unwrap the power cord from the packing material
and plug it into its receptacle on the front panel. Make sure that the ONIOFF
(1/0) power switch is placed in the
OFF
(0)
position and connect the power
plug to a dedicated, grounded circuit.
TURNING
THE UNIT
ON
AND
OFF
Use the ONIOFF (1/0) power switch, located on the front panel, to turn the unit
ON and
OFF.
To
complete the installation of the treadmill, continue with Checking the Alignment
of
the Running Belt.
page 18