17
Working with the Software
I
n this chapter, you’ll learn how to
create a new SureThing label design, as
well as the basics of editing, saving and
printing labels. The information is often
presented in a step-by-step format in-
tended to give you a good overview of
SureThing’s features and capabilities. To
learn more about a specific command or
feature, please refer to the Online Help.
Topic Page
Starting SureThing 17
Creating a New Label 17
SmartDesign Basics 19
Working with Text 20
Editing Text Frames 20
Adding a New Text Frame 22
Changing the Size and Position of a Text Frame 22
Inserting Merge Fields in Text Frames 23
Formatting Text in a Text Frame 24
Editing Text Effects 24
Selecting different types of Text Effects 25
Adding a New Text Effect 26
Working with Logos and Clipart 27
Editing a Logo 27
Adding Clipart to Your Label 28
Working with Backgrounds 29
Using Your Own Backgrounds 30
Using a Background Color 30
Acquiring Images 31
Changing the Label Stock 31
Duplicating a Design 31
Saving Your Label 33
Calibrating Your Printer 34
Printing 34
Working with Label Templates 35
Playlists & The Playlist Manager 39
Starting SureThing
Double-click the SureThing icon on the
desktop, or launch it from the Start menu
(look under Programs > SureThing >
SureThing CD Labeler).
If this is the first time you’ve started
SureThing, the “SureThing First Time
Wizard” appears. If this is not the first time
you’ve started SureThing, depending on
how you’ve configured your startup
options (choose the Program Options
command under the Tools menu), you
may or may not see this wizard. If it
doesn’t appear automatically, choose the
New command from the File menu.
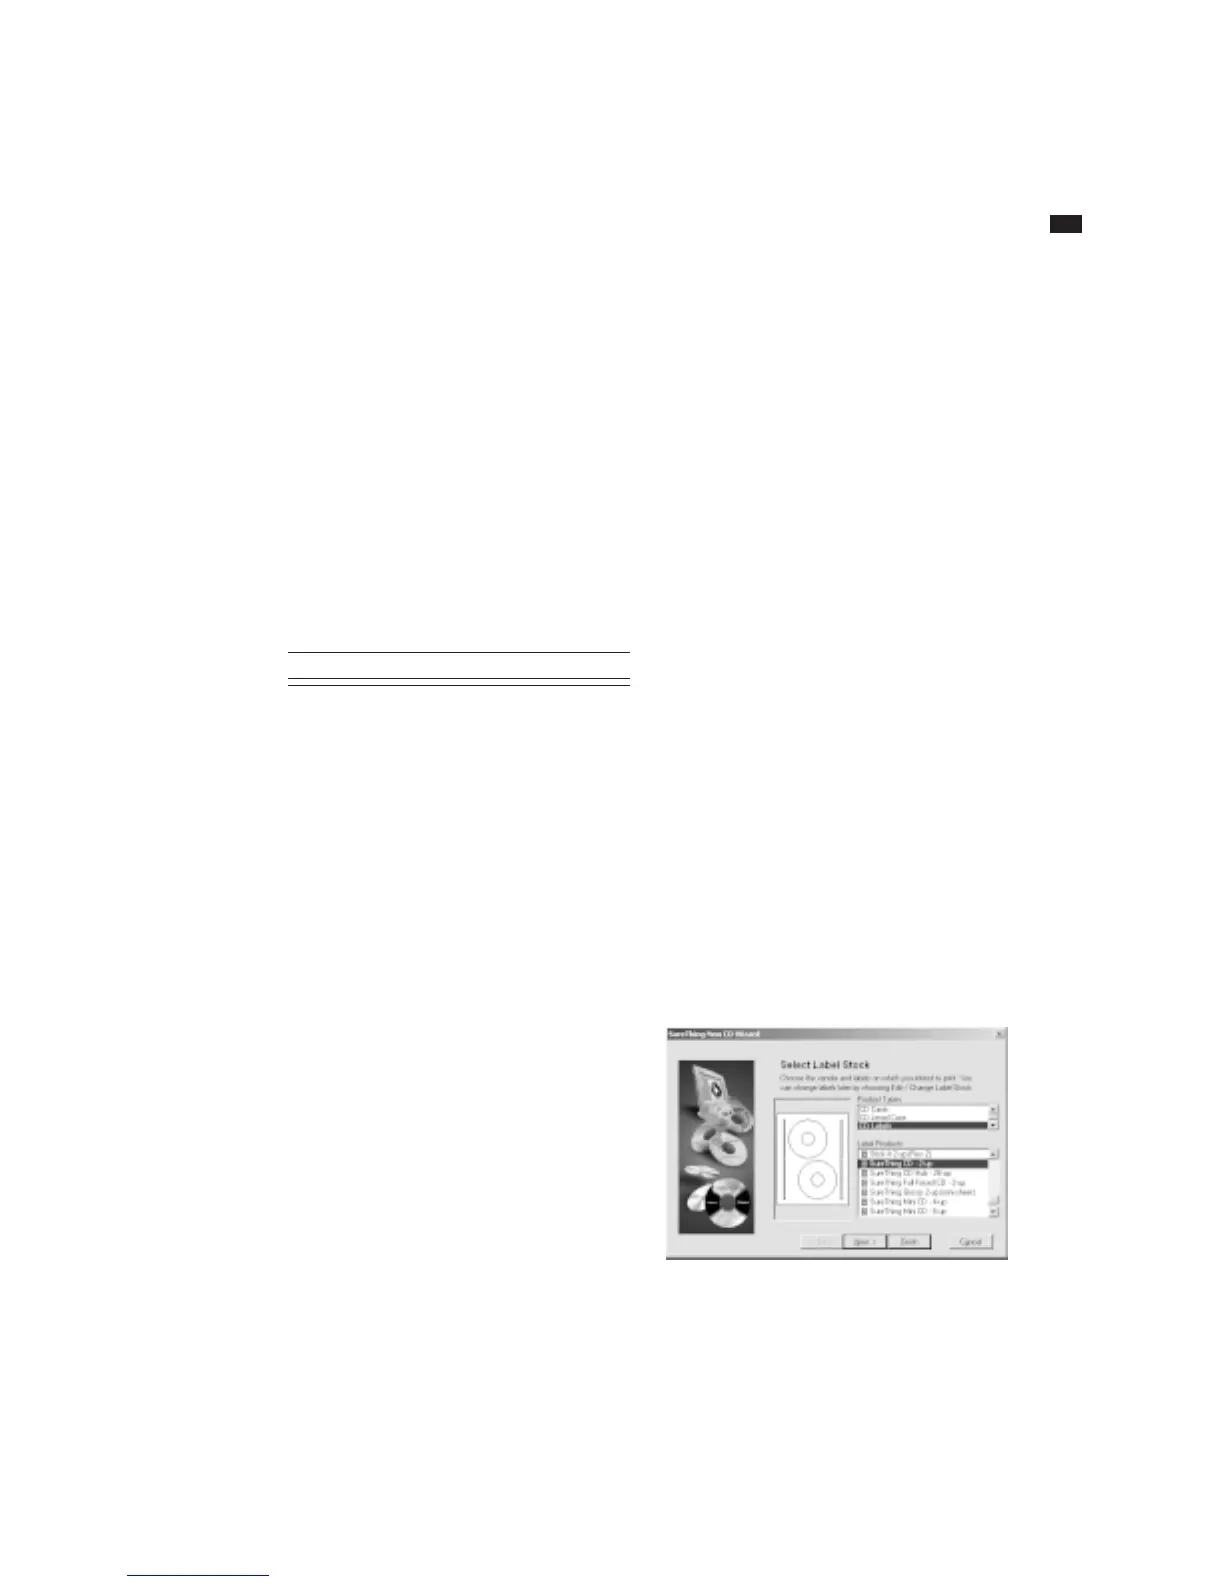
Creating a New Label
The New Label wizard steps you through
the process of selecting a label stock and
specifying design characteristics such as a
background image.
Select a label stock