PATHWAY
®
MR-20 OPERATOR’S GUIDE
24
External Pelvic Floor Placement of Easytrode
™
Pregelled Electrodes
(Part #6801)
CHAPTER 1: PHYSICAL/MECHANICAL OVERVIEW
take the 24” Electrode Lead Wire Set plug end (male six-pin mini din connector), with
at side up, then take the Pathway
®
Adapter (Part #3660), noting the notched top of the
connector input, (also at side up), push 24” Electrode Lead Wire Set plug end straight
into the Pathway
®
Adapter connector input to make the male/female connection. Push
rmly and do not twist.
Skin Preparation: Gently wipe down the area around the perineum using a moist,
disposable, towelette and allow area to dry completely.
Connecting the 24” Electrode Lead Wire Set to Easytrode
™
Pregelled
Electrodes: Take the 24” Electrode Lead Wire Set (Part #5328), and snap the two
red (active) lead wires and one green (ground) lead wire to the Easytrode
™
Pregelled
Electrodes (Part #6801).
Easytrode
™
Pregelled Electrode Preparation: With the 24” Electrode Lead Wire
Set (Part #5328) attached to the Pathway
®
Adapter (Part #3660), gently peel off the
Easytrode™ Pregelled Electrodes (Part #6801) to carefully remove the mylar backing,
being cautious to keep the hydrogel adhesive intact on the surface of the electrodes.
Remove the Easytrode™ Pregelled Electrodes (Part #6801) individually.
Surface Electrodes (External Pelvic Floor) Placement
NOTE: For complete information regarding the 24” Electrode Lead Wire Set
(Part #5328), refer to the product packaging label which includes:
• Cautions
• Cleaning
• Directions for Use
Additional cleaning instructions can also be found on page 51 at the back of
this Operator’s Guide.
24” Electrode Lead Wire Set Used
with Easytrode
™
Pregelled
Electrodes (Part #6801)
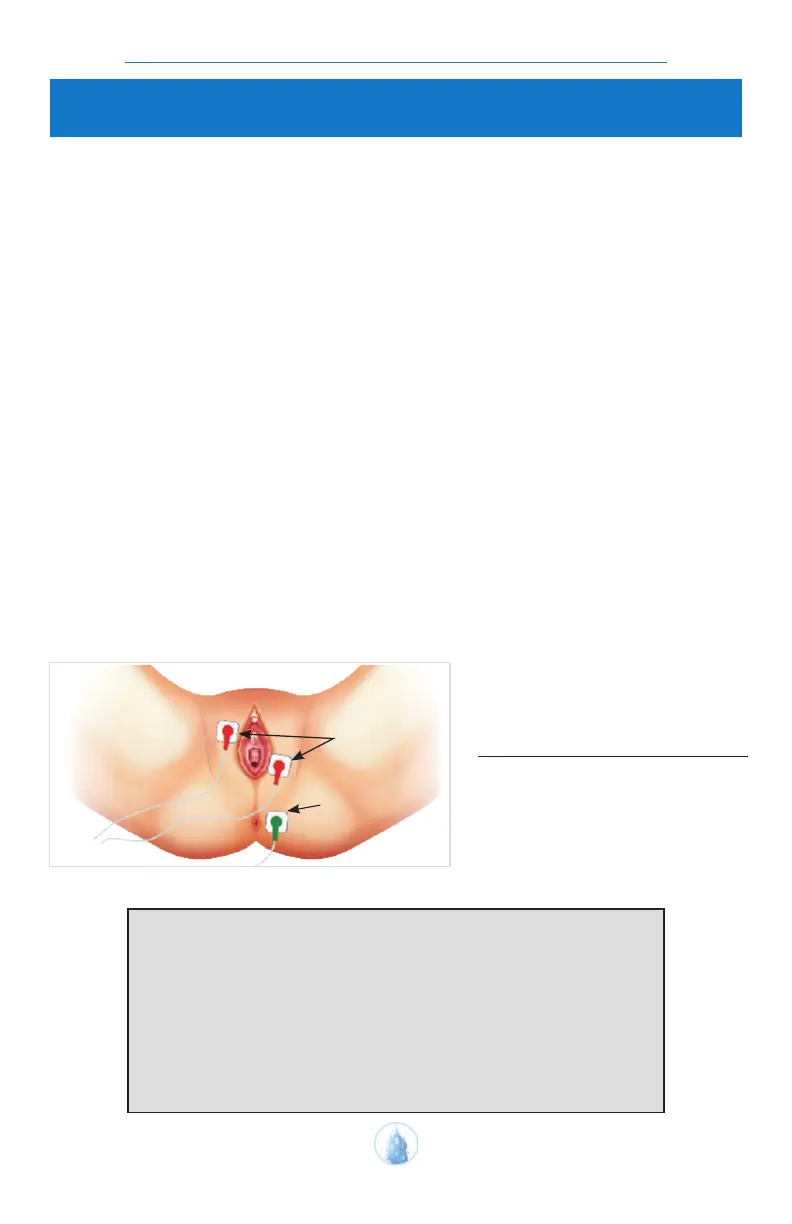
The two active (ACT) surface electrodes are
placed at 10 and 4 o’clock.
The single ground (GND) surface electrode
is placed on the gluteal muscles.
Figure 8.
(Ground)
Electrode
(Active)
Electrodes