Personnel:
n
Technical personnel
Materials:
n
Screwdriver 8 x 1.5 (mm)
n
Torx wrench
n
Philips head screwdriver
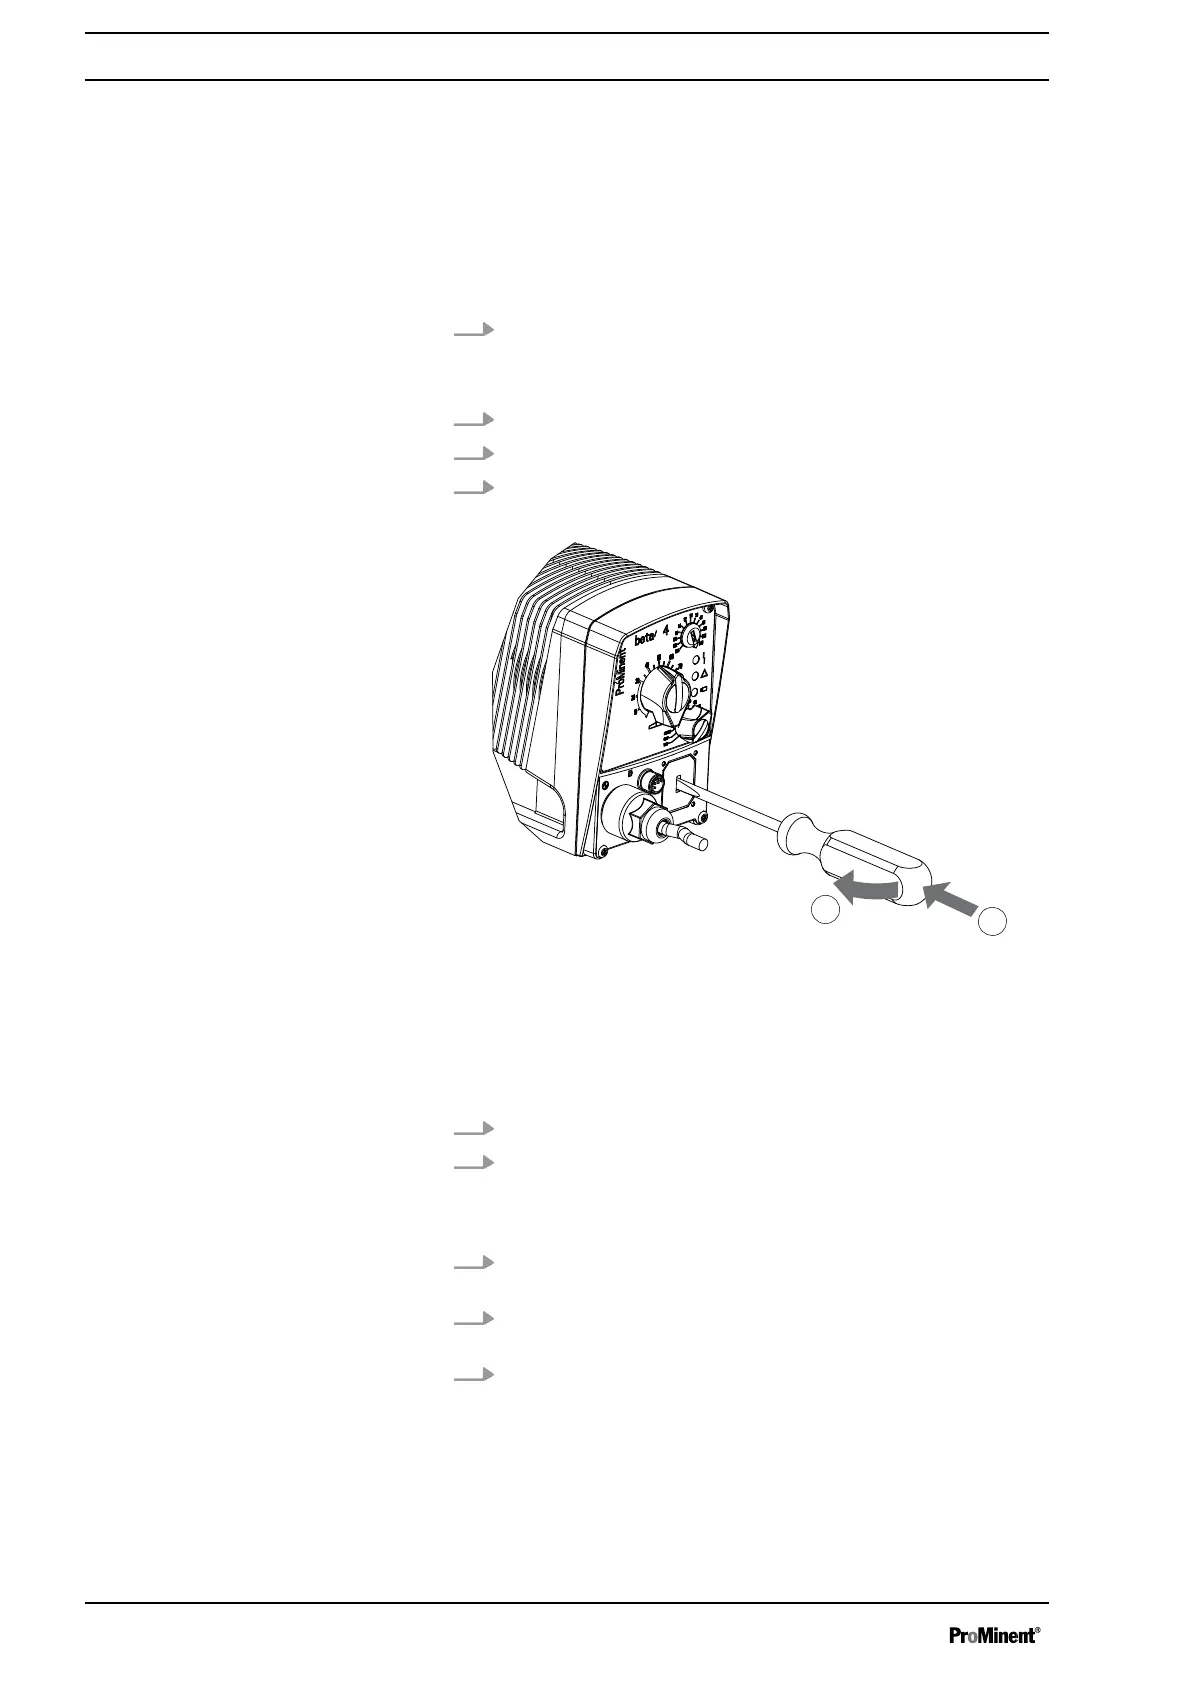
The pump is hydraulically and electrically clamped.
It is fixed well.
1. Push the screwdriver into the slot opening
.
ð
The screwdriver must be placed almost at the base of the
slot opening and lie solidly against its sides.
2. Break open the cover with a movement to the side
Fig.
41.
3. Neaten the edge of the opening if necessary
.
4. Remove the knock-out from the pump.
Fig. 41: Breaking open knock-out opening
Personnel:
n
Electrician
1. Hold the relay board by the edge of the relay cover
Fig.
42.
2. Push the relay board into the knock
-out opening; at the same
time ensure that the 2x3 pins on the left-hand side of the relay
board are positioned correctly on the 2x3 contact in the
knock-out opening.
3. Push the relay board with gentle pressure into the knock
-out
opening.
4. Tighten the screws of the relay cover with the Torx wrench to
the housing.
5. Insert the seal of the relay cable plug into the relay cover
, fit
the relay cable plug and then tighten.
Fitting the relay board
Appendix
76