AGENT-2 S41D Line - User Manual AG2-S41D/MU-EE
Ed. Jun-2012 Proprietary information 31 of 89
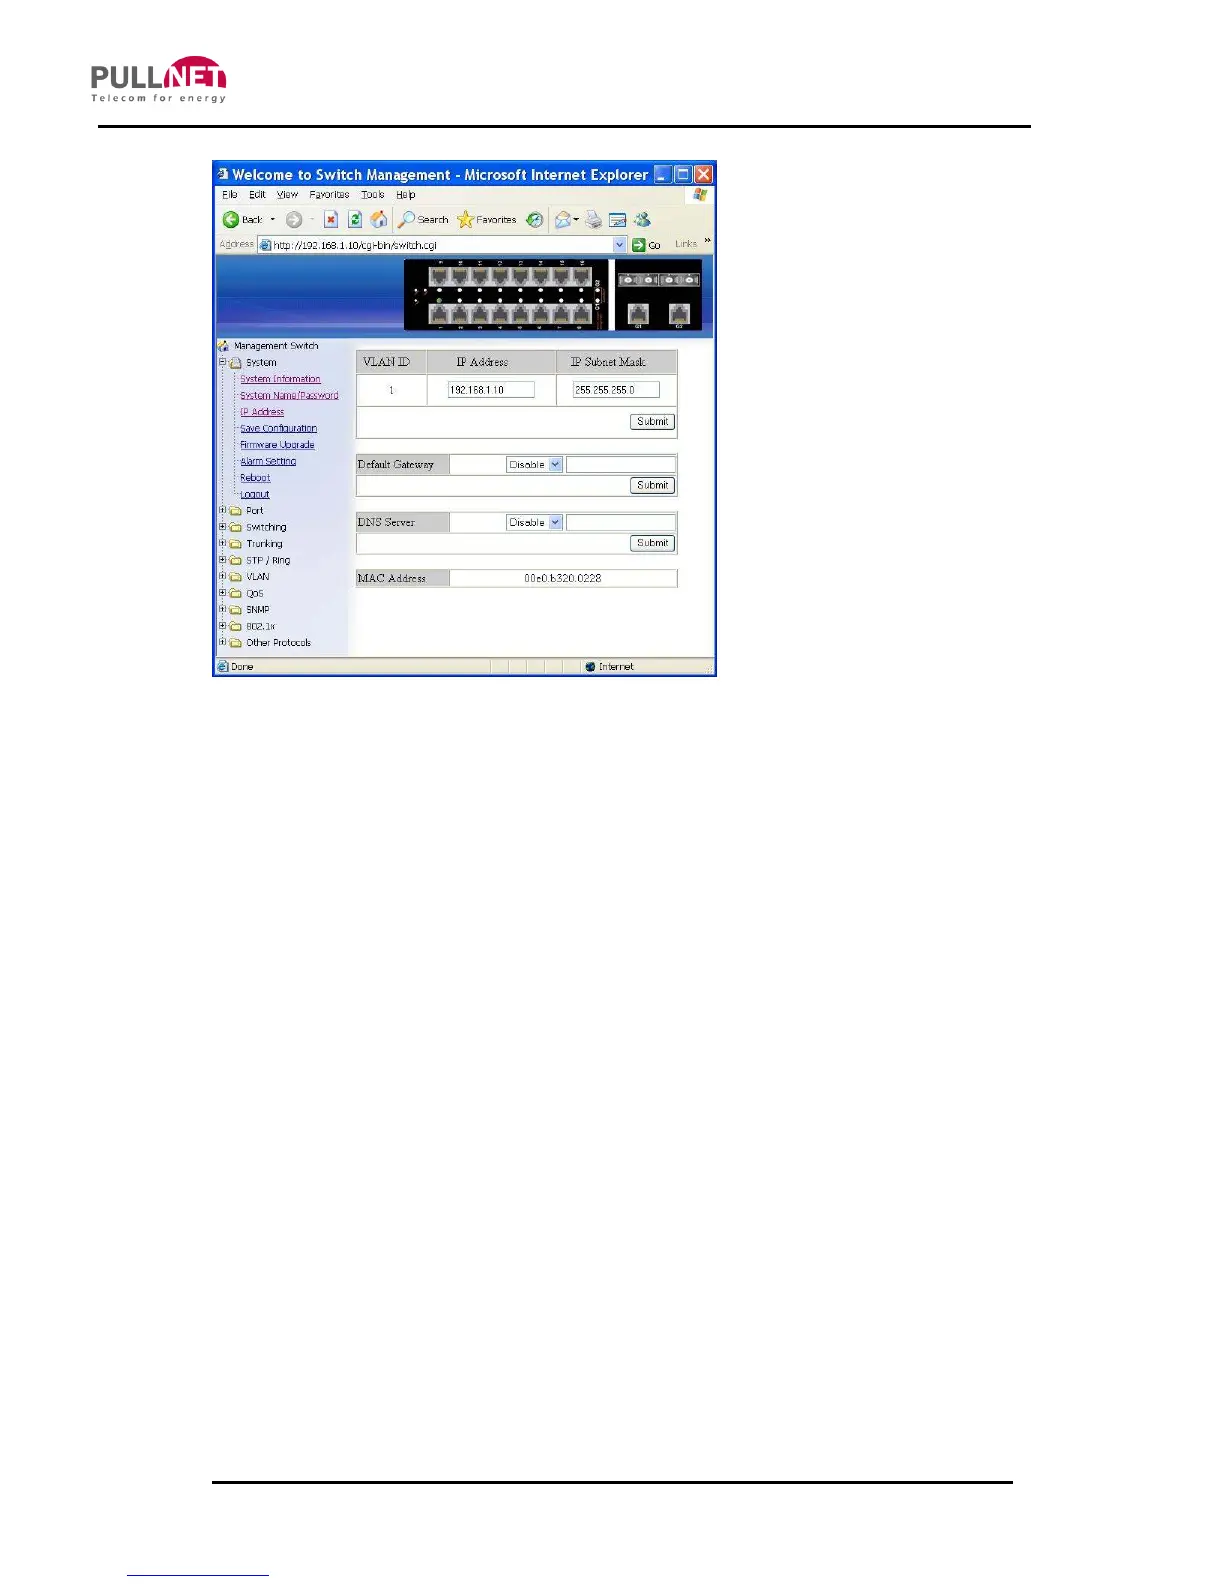
IP Address
1. IP Address: Click in “IP Address” text box and type a new address to change the IP
Address.
2. IP Subnet Mask: Click in “IP Subnet Mask” text box and type a new address to
change the IP Subnet Mask.
3. Submit: Click “Submit” button when you finished these selections.
4. You need to enter the new IP address on the browser and reconnect to the switch
after IP or subnet mask are changed.
5. Default Gateway: Click “Default Gateway” drop-down menu to choose “Disable” or
“Enable” from the “Default Gateway” drop-down list to disable or enable Default
Gateway Setting for the switch.
Click the text box and type a new address to change the Default Gateway. (Need to
choose “Enable” from the “Default Gateway” drop-down menu.)
6. Submit: Click “Submit” button when you finished Default Gateway.
7. DNS Server: Click “DNS Server” drop-down menu to choose “Disable” or “Enable”
from the “DNS Server” drop-down list to disable or enable DNS Server Setting for
the switch.
Click the text box and type a new address to change the DNS Server. (Need to
choose “Enable” from the “DNS Server” drop-down menu.)
8. Submit: Click “Submit” button when you finished DNS Server.