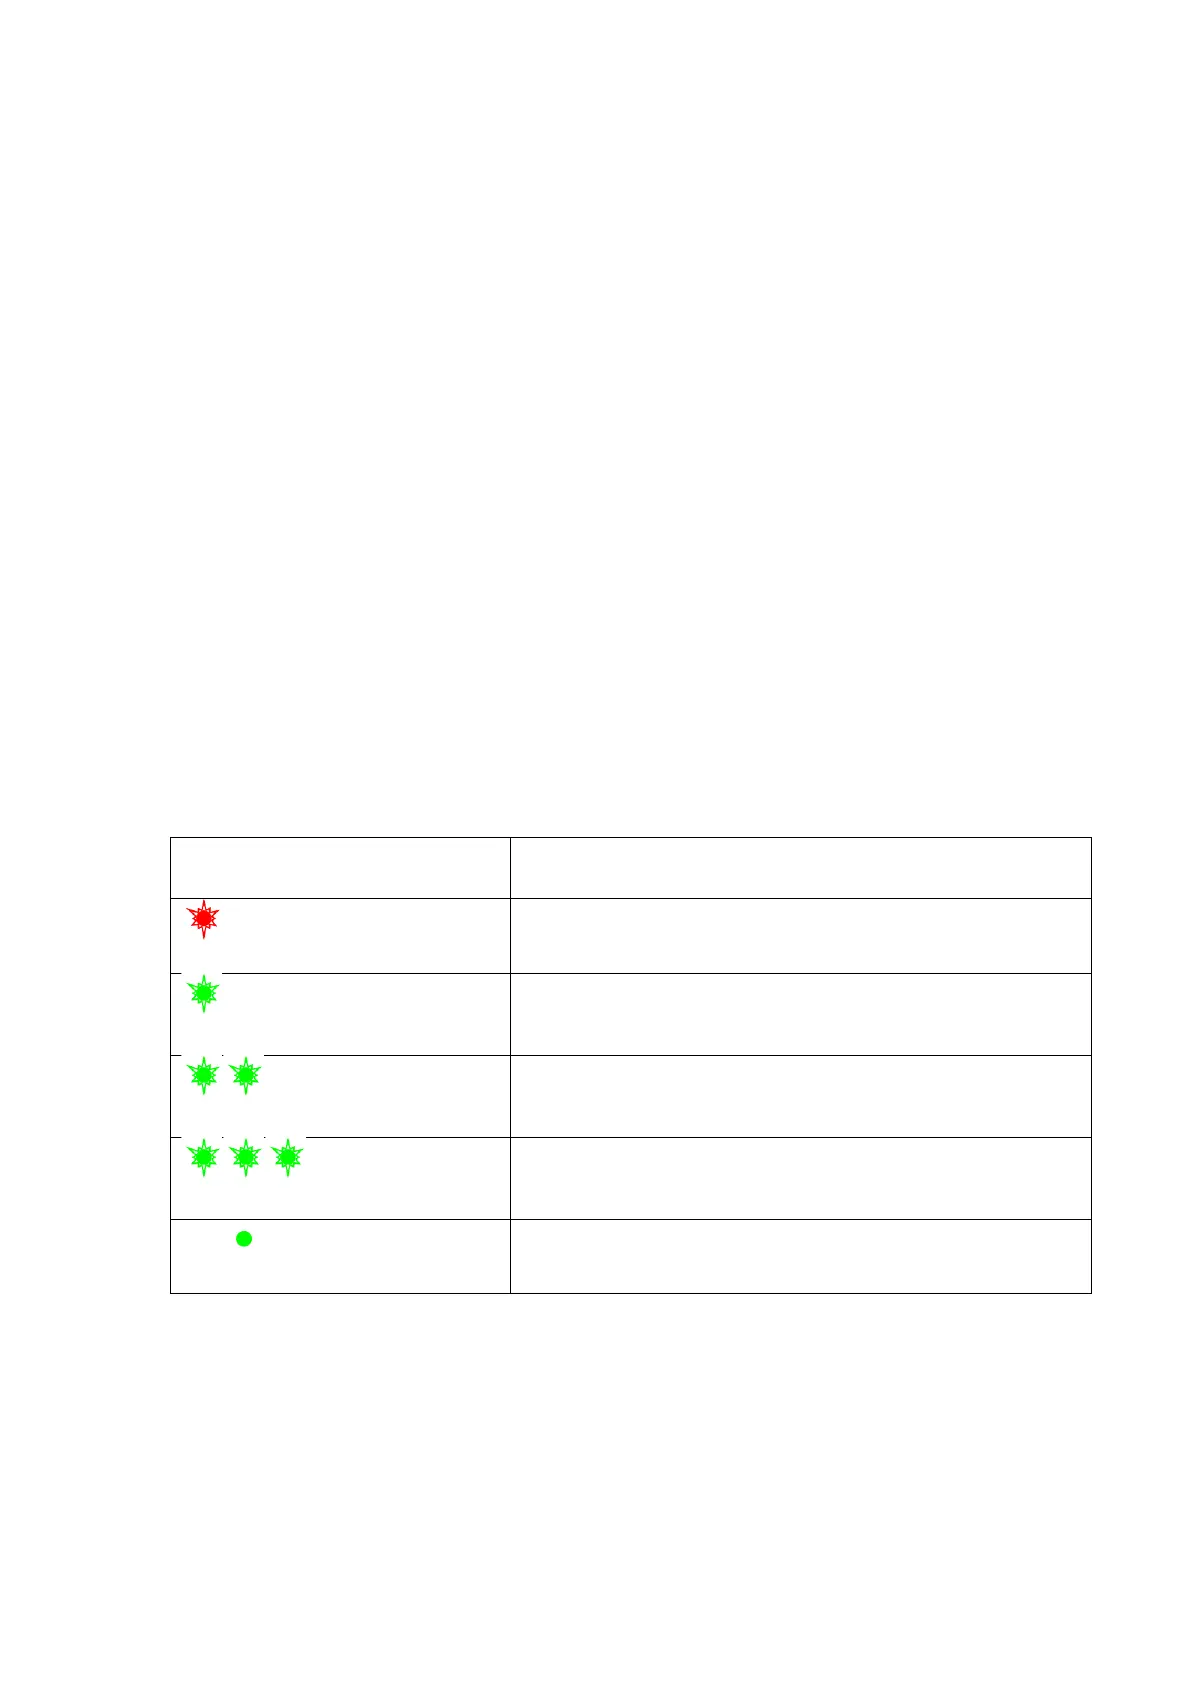
• Upon installation, a green LED indicator on the charger will start to glow and
begin flashing:
- once if the battery charge ranges from 0% to 50%.
- twice if the battery charge ranges from 51% to 75%.
- three times if the battery charge ranges from 76% to 99%.
• When the indicator is continuously green, the battery is fully charged.
Disconnect the charger from the mains and disconnect the battery from the
charger.
• If the battery charger indicator is constantly red when the battery is inserted,
the charge level is probably below the permissible level (the battery has been
in a discharged state for a long period of time). Leave the battery in the
charger for a long period of time (up to several hours), then remove and
reinsert.
• If the indicator begins to flash green, the battery is good.
• If it continues to show red, the battery is defective. Do not use this battery!
The LED indicator will display the battery charge status:
Step 3. Сonnect the charger to the mains supply
1. Connect the plug of the USB Type-C cable (20) with the attached MicroUSB
adapter (22) to the USB socket (19) of the charger.
2. Connect the other end of the USB cable (20) to the power adapter (21).
3. Plug the power adapter (21) into a 100-240V socket.
 Loading...


