Page 21 of 48
Set Time and Date
The Time option allows for two different time formats to suit specific country requirements.
The User can change the displayed time format to 12h or 24h format.
In the field, select either 12h or 24h. Use the on-screen keypad to enter the correct time.
When the 12h format is selected, also select AM or PM. When the 24h format is selected,
the AM/PM buttons are non-functional. If an invalid time is added, the field will highlight in
red and the will not be available.
The Date option allows for two different date formats to suit specific country requirements.
In the field, the User can select the date format as either mm/dd/yy or dd/mm/yy
format. Use the on-screen keypad to enter the correct date. If an invalid date is added, the
field will highlight in red and the will not be available.
Press to confirm when changes are complete to return to the Run Test screen.
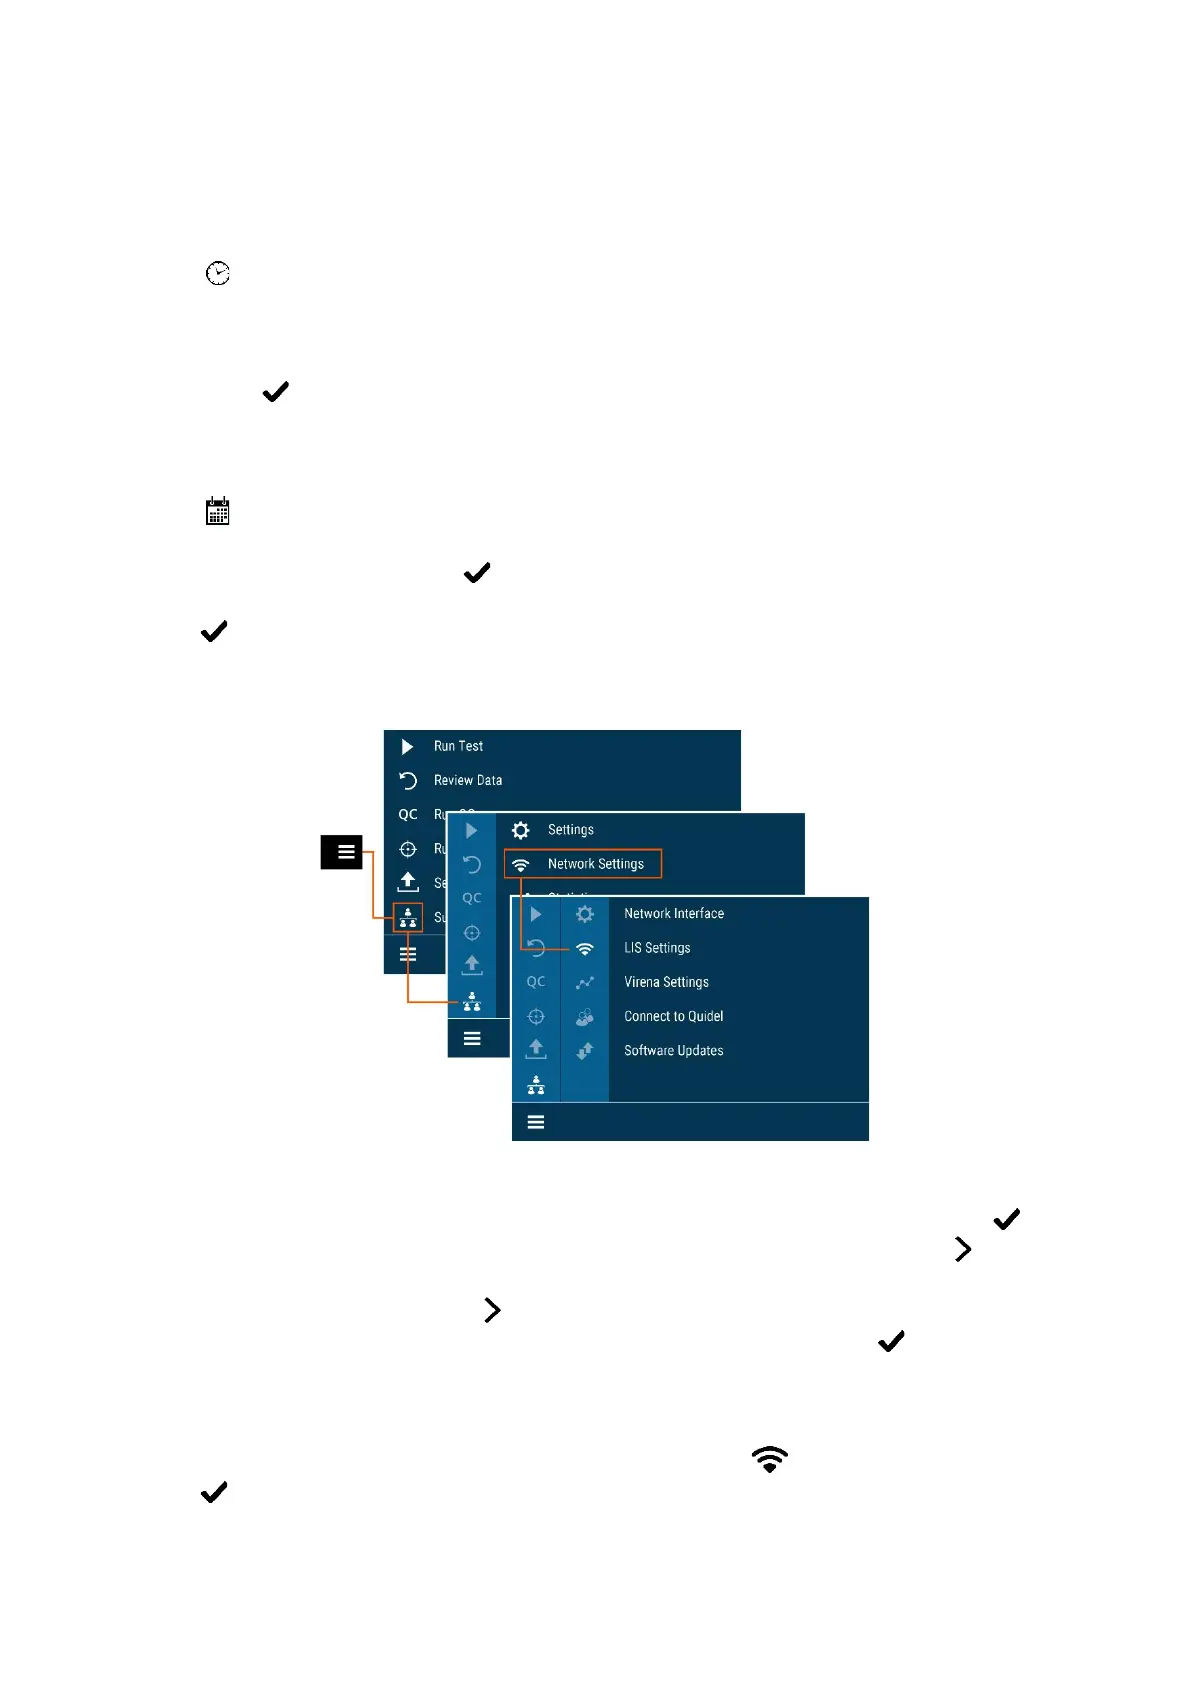
Network Settings
Network Interface
Wired Ethernet: For Set IP Address, select Manual or DHCP. If DHCP is selected, select to
test the connection and return to the Run Test screen. If Manual is selected, press to
continue to the next screen. Using the on-screen keypad, enter information for IP Address,
Subnet Mask, and Gateway. Press to continue to the next screen. Using the on-screen
keypad, enter the information for Primary DNS and Secondary DNS. Select to test the
connection and return to the Run Test screen.
Wi-Fi: Select your Wi-Fi network from the list of available options while considering each
network’s signal strength. Enter the Wi-Fi Password and press to test the connection.
Press to save the configuration and return to the Run Test screen.