© 2020 Radiodetection Ltd 23
which is available as a free download from
www.radiodetection.com
To select a frequency on the locator:
1 Press the key to cycle through available
frequencies
2 Alternatively, hold down the key and press the
or keys to cycle up or down the range of
frequencies
If locating using an active frequency you must also set
your transmitter to output the matching frequency.
You can change your transmitter’s output frequency
manually using your transmitter’s keypad or
automatically using iLOC (Bluetooth transmitters only).
To manually select a transmitter output
frequency:
1 Press the key to cycle through available
frequencies
To change frequencies using iLOC, refer to Section 13.
NOTE: Some frequencies require that you connect an
accessory, for example an A-Frame, before the
frequency is available.
NOTE: Some RD8100PTL model frequencies are only
available in the Tx-10B transmitter model.
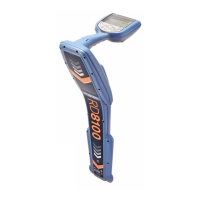
5.3 Antenna modes
The RD8100 system supports five antenna modes,
exclusively dedicated to locating cable and pipes, and to
suit your particular application or the local environment.
These are:
Peak mode
Peak+ mode
Guidance mode
Broad Peak mode
Null mode
Peak mode
Peak mode provides the most sensitive and accurate
mode for location and depth measurement. It provides a
sharp Peak response with a corresponding small
decrease in sensitivity. Peak mode cannot be disabled
using the menu.
In Peak mode the following indicators are displayed by
the LCD:
Depth
Current
Signal strength
Compass
To select Peak mode:
1 Press the key until the Peak mode icon is
displayed on the LCD
NOTE: The depth and current values will display
automatically, although these values should not be
considered accurate until the locator is directly over the
target line.
Peak+™ mode
Peak+™ mode combines the accuracy of the Peak
bargraph with a choice of Guidance or Null directional
arrows.
Guidance arrows provide visual indication of the
direction to the target utility, and are designed to get you
close to the Peak position faster, before using the Peak
bargraph to pinpoint the target utility,
Using Null arrows allow you to check for distortion before
marking a point, and should be used when accurate
locate measurements are required.
Switching between arrow types:
When in Peak+ mode, press and hold the key to
toggle between Guidance and Null arrow types.
You can also select the default arrow type in the locator
menu:
1 Press the key to enter the menu
2 Scroll to the ARROW menu using the or keys
3 Press the key to enter the ARROW menu
4 Select NULL or GUIDE using the or keys
5 Press the key twice to return to the main locate
menu.
When using Guidance arrows:
Use the proportional arrows to guide the locator along
the path of the target cable or pipe. To accurately locate
the center point of the target utility, for example to mark
a point or take a survey measurement, use the Peak
bargraph to pinpoint the Peak position.
When using Null arrows:
Use the arrow heads to place the locator above the
NULL point. If the Peak response is not at a maximum
then this is evidence of a distorted field. If the Peak
response is at its maximum level where the Null point is
located then there is no or very limited distortion present.