ESP-ME3 Controller
6
EN
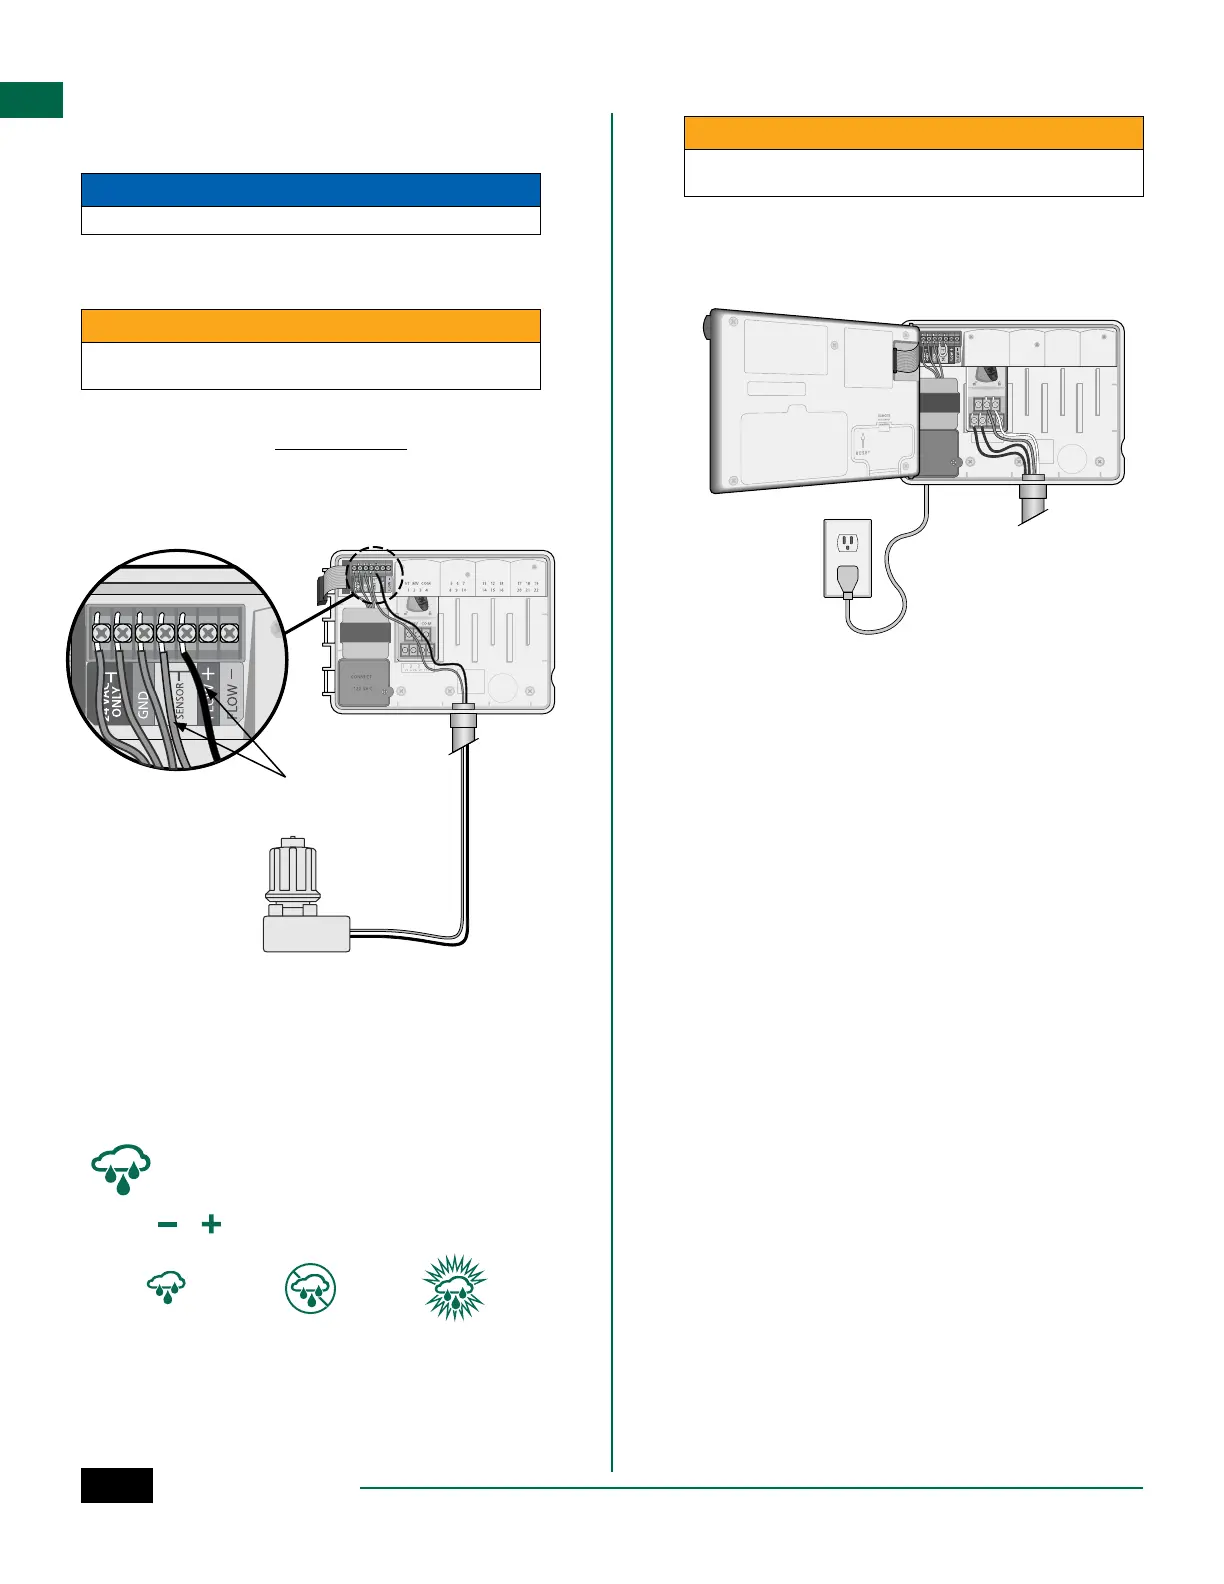
Connect Weather Sensor (optional)
A
Remove the yellow jumper wire from the SENSOR
terminals on the controller.
NOTICE
Do not remove the yellow jumper wire unless connecting a rain sensor.
B
Connect both rain sensor wires to the SENSOR
terminals as shown.
WARNING
Do not route the rain sensor wires through the same opening as the
power wiring
NOTE: Rain Bird ESP-ME3 controllers are only
compatible with normally closed rain sensors.
NOTE: For wireless rain/freeze sensors, refer to
the sensor installation instructions.
B
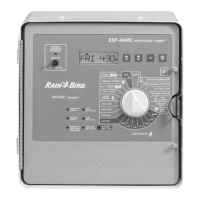
Connect Power
WARNING
DO NOT plug in the transformer or connect external power until you
have completed and checked all wiring connections.
Installation with Pre-attached Cord
• Plug the attached power cord into a nearby 120VAC
electrical outlet.
1234
VT VALV ETEST=
VT MV COM
VT MV COM567 11 12 13 17 18 19
1234 8910 14 15 16 20 21 22
CONNECT
120 VAC
Weather Sensor Settings
Set the controller to obey or ignore a weather sensor.
When set to Sensor ON, automatic irrigation will be
suspended if rainfall is detected. When set to Sensor
OFF all stations will ignore the rain sensor.
Turn the dial to Weather Sensors.
• Press
or to select SENS ON (sensor on) or SENS
OFF (sensor off).
Sensor ON Sensor OFF Rain detected
(flashing)