ESP-ME3 Controller
7
EN
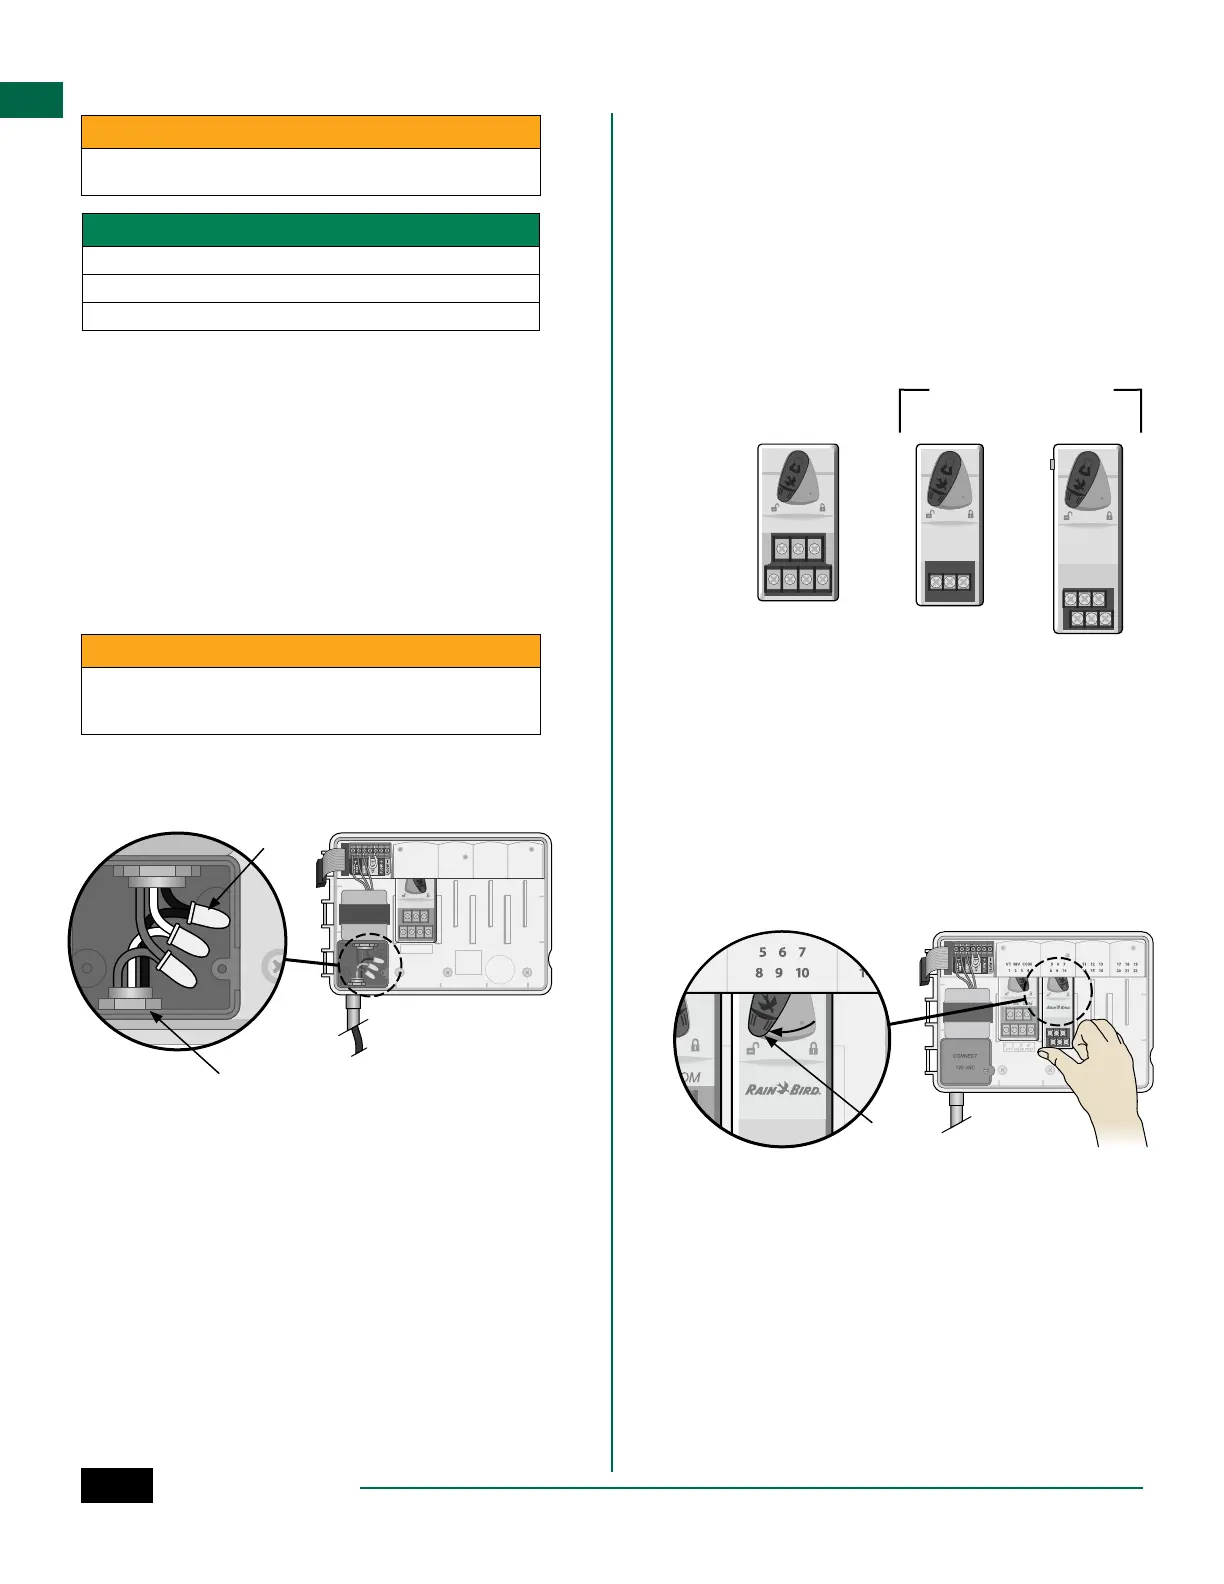
Outdoor Installation with Direct Wiring
WARNING
Electric shock can cause severe injury or death. Make sure power supply
is turned OFF before connecting power wires.
POWER WIRING CONNECTIONS
Black supply wire (hot) to the black transformer wire
White supply wire (neutral) to the white transformer wire
Green supply wire (ground) to the green transformer wire
A
Locate the transformer wiring compartment in
the lower left corner of the controller unit. Use a
screwdriver to remove the cover and expose the
transformer connection wires.
B
Route the three external power source wires
through the conduit opening at the bottom of
the unit and into the wiring compartment.
C
Using the provided wire nuts, connect the
external power source wires (two power and one
ground) to the transformer connection wires
inside the wiring compartment.
WARNING
Ground wire must be connected to provide electrical surge protection.
Permanently mounted conduit shall be used for connecting main
voltage to the controller
D
Verify that all wiring connections are secure,
then replace the wiring compartment cover and
secure it with the screw.
1234
VT VALV E TEST=
VT MV COM
VT MV COM567 11 12 13 17 18 19
1234 8910 14 15 16 20 21 22
A
C
B
Station Expansion Modules
Optional Station Modules can be installed in the empty
slots to the right of the Base Module to increase the
station capacity up to 22 stations.
NOTE: 6-Station Modules are compatible with
ESP-ME3 and ESP-Me. They are not backwards
compatible with the ESP-M vintage controller.
NOTE: For ideal station sequencing, insert 3-Sta-
tion module after inserting all 6-station modules.
For more details see the Station Numbering sec-
tion.
VT MV COM
3-STATION
(ESPSM3)
6-STATION
(ESPSM6)
Expansion Modules
(sold separately)
Base Module
(included)
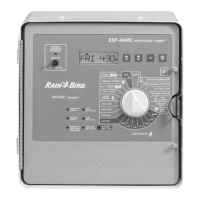
Install Modules
A
Verify the securing lever on the module is in the
unlocked position (slide to the left).
B
Place the module under the desired slot between
the plastic rails.
C
Push the module up into the slot until secure.
D
Slide the securing lever to the locked position
(slide to the right).
B C
D
A
REPEAT for additional modules.
NOTE: Modules can be installed or removed with
OR without AC power connected. They are con-
sidered “hot-swappable”.
NOTE: It take about 30 seconds for stations to
become available for configuration after install-
ing a new module.