Raise3D Pro3 HS Series Printer User Manual Hardware Installation
16
D. Hardware Installation
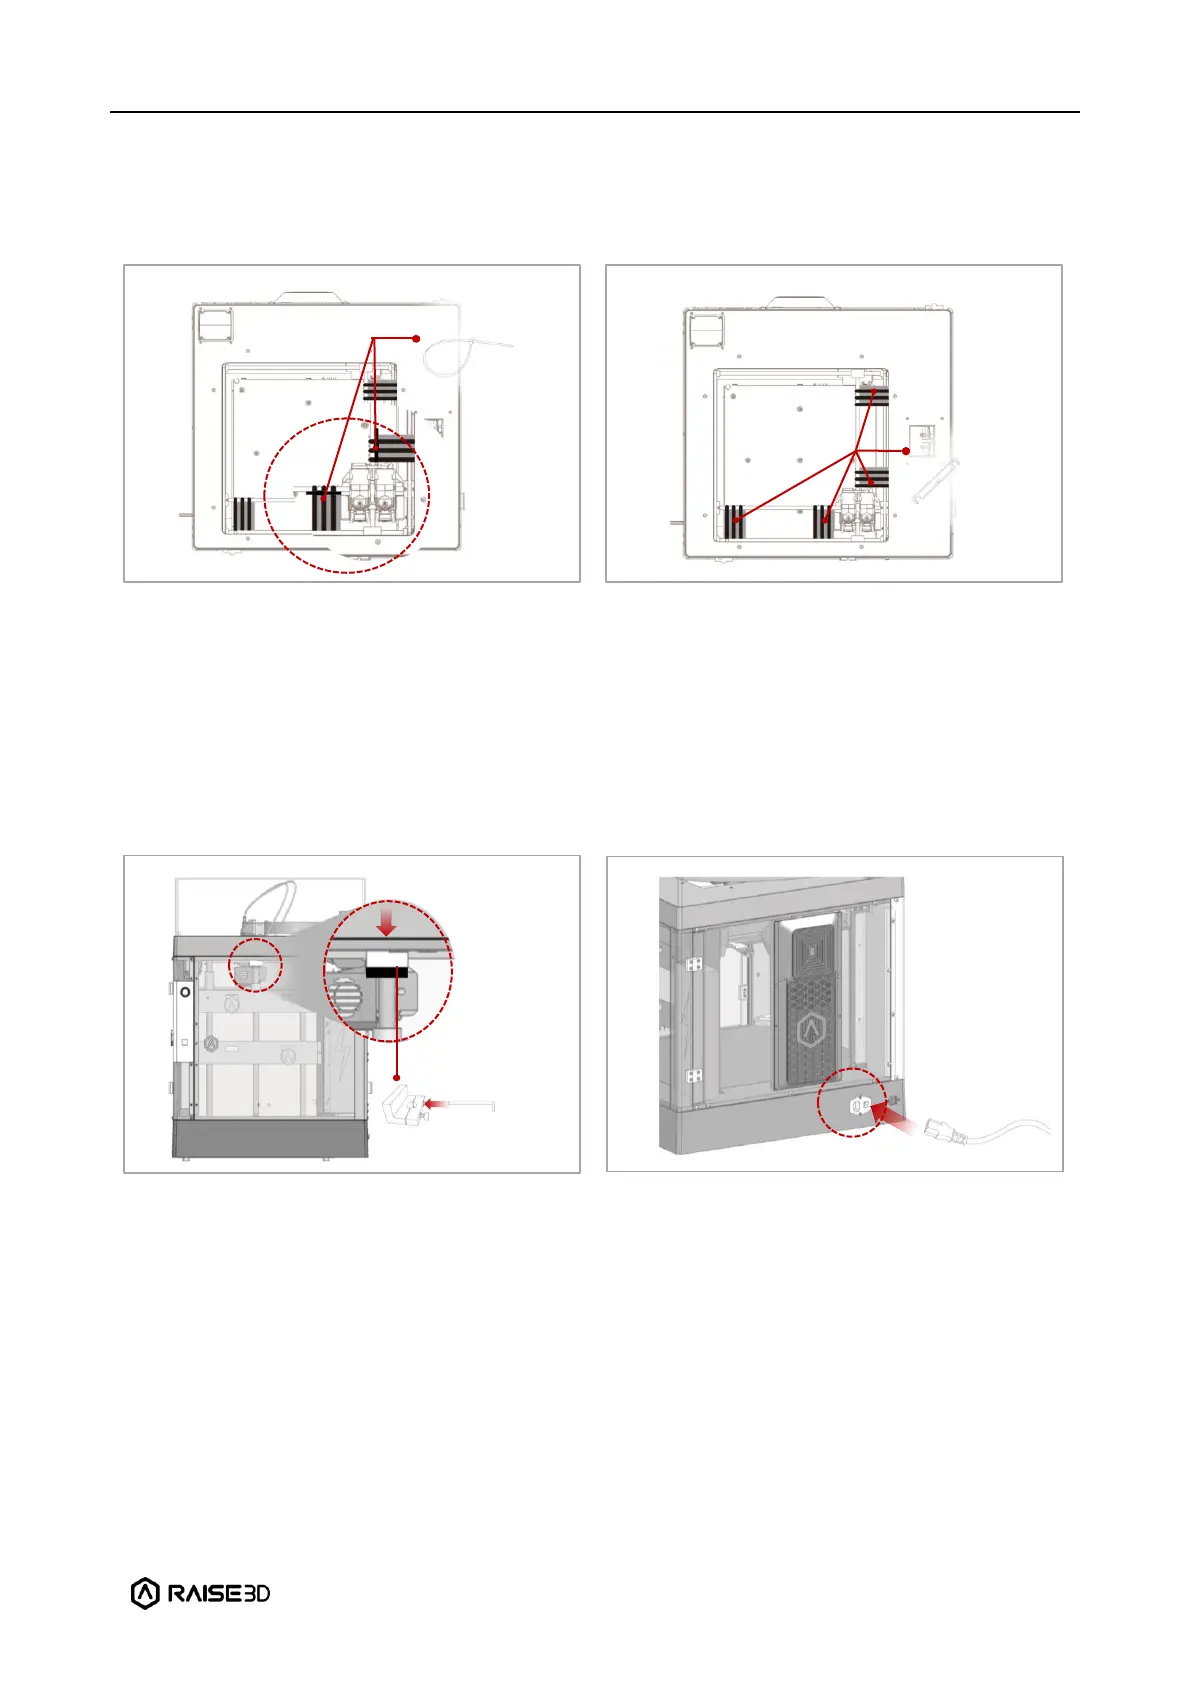
Remove, but do not cut, the four shipping
zip ties for fixing the Z axes. Keep the
shipping zip ties safe for further installation
and subsequent transportation.
Before powering on the printer, make sure
to peel off all the yellow stickers and remove
the 24 security spacers. If the spacers are
not removed, the spacers will damage the
printer once the printer begins operating.
Keep the security spacers carefully for
further installation and subsequent
transportation.
Remove the 4 screws on the screw clamps.
The clamps are located on the top of the
screw rods on the left and right sides of the
printer. Keep the screw clamps and screws
safe for further installation and subsequent
transportation.
The printer contains 1 power cord that
conforms to your current country (region)
and connect it to the power outlet. Turn on
the switch of the printer.
 Loading...