GETTING TO KNOW YOUR VEHICLE 49
3. Continue to press and hold the HomeLink®
button, while you press and release (cycle)
your hand-held transmitter every two seconds
until HomeLink® has successfully accepted
the frequency signal. The indicator light will
flash slowly and then rapidly when fully
trained.
4. Watch for the HomeLink® indicator to change
fla
sh rates. When it changes, it is
programmed. It may take up to 30 seconds or
longer in rare cases. The garage door may
open and close while you are programming.
5. Press and hold the programmed HomeLink®
but
ton and observe the indicator light.
NOTE:
If the indicator light stays on constantly,
programming is complete and the garage
door/device should activate when the
HomeLink® button is pressed.
To program the two remaining HomeLink®
buttons, repeat each step for each
remaining button. DO NOT erase the chan
-
nels.
If you unplugged the garage door opener/device
f
or p
rogramming, plug it back in at this time.
Reprogramming A Single HomeLink® Button
(Can
adian/Gate Operator)
To reprogram a channel that has been previously
trai
ned, follow these steps:
1. Place the ignition in the ON/RUN position.
2. P
r
ess and hold the desired HomeLink® button
u
n
t
il the indicator light begins to flash after
20 seconds. Do not release the button.
3. W
ithout releasing the button, proceed with
“Ca
nadian/Gate Operator Programming” step
2 and follow all remaining steps.
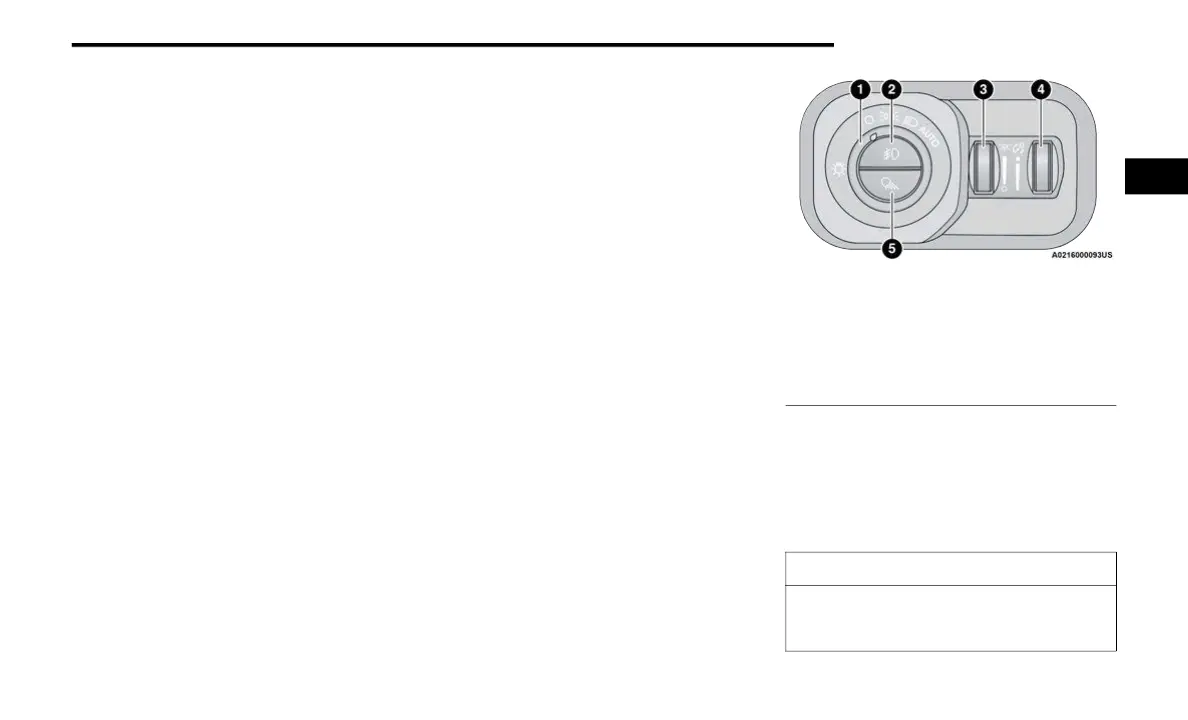
EXTERIOR LIGHTS
HEADLIGHT SWITCH
The headlight switch is located on the left side of
the instrument panel. This switch controls the
operation of the headlights, parking lights,
automatic headlights (if equipped), instrument
panel light dimming, cargo light/trailer spotter
lights (if equipped), and fog lights (if equipped).
Headlight Switch
To turn on the headlights, rotate the headlight
swit
ch clockwise. When the headlight switch is on,
the parking lights, taillights, license plate light and
instrument panel lights are also turned on. To turn
off the headlights, rotate the headlight switch back
to the O (off) position.
1 — Rotate Headlight Control
2 — Push Fog Light Switch
3 — Ambient Light Dimmer Control (If Equipped)
4 — Instrument Panel Dimmer Control
5 — Push Cargo Light Switch
CAUTION!
Do not use abrasive cleaning components,
solvents, steel wool or other abrasive materials
to clean the lenses.
2