61
WATER CHANGES: at the start of each daily activity
and anyway always after machine stop periods
longer than 8 hours, it is necessary to change
100% of the water contained in the circuits via the
points appropriately provided on the machine for the
purpose.
USING THE STEAM WAND: Before using the steam
wand, it is always necessary to ush out all the resi-
dual steam condensate for at least 2 minutes.
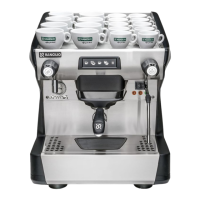
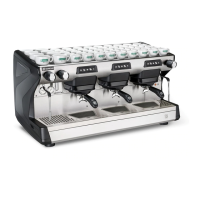
The machine has a top shelf on which the cups are
kept and heated, ready for use.
This is very important to obtain good coffee as the
pre-warmed cup stops the coffee from growing cold
too quickly.
● Remove the lter-holder from the group head and
knock out any grounds into a knock box. Be careful
not to damage the rim of the lter.
● Use the lter for 1 or 2 coffees, according to your
need.
● Fill the lter with the measure of coffee, level it off
and press it down gently with the tamper.
● Remove any ground coffee that has stuck to the
rim of the lter during tamping.
If ground coffee is left on the rim of the lter, the
lter-holder will not seal properly in the group
head, and during coffee production, water or
coffee grounds may leak into the cup.
(Fig.8)
● Turn on the water supply tap 2 (Fig.5).
● Turn on the gas tap 3 (Fig.5).
●Turn the main switch 1; the pump is activated,
lling the boiler.
● When the correct level is reached, the pump stops.
Turn on Switch 2 in order to activate the heating
element in the boiler.
● Turn the gas tap 8 to the vertical open position
and hold down the corresponding button, at the
same time repeatedly press hard on the piezoe-
lectric button 9 until the spark lights the gas ame
(carry out this operation looking through window
12). Hold the tap button 8 down for approx. 30
seconds to allow the safety system to keep the
ame lighted.If the ame goes out, repeat the
operation.
Should the ame not light quickly within a few
seconds, please close the gas tap by turning
it 90° in a clockwise direction.
● Wait until the machine reaches its working pres-
sure and until the correct thermal balance is
achieved.
● Turn on the water supply tap 2 Fig.5.
● Turn the main switch 1; the pump to ll the boiler
will activate.
● When the water reaches the correct level, the
pump stops.
Turn the main switch 2 to begin heating the water
in the boilerthen turn on each group head until
water begins to ow from them.
●
Wait for the machine to reach its working pressure
and to reach the correct thermal balance.
● For lever models without pump, machine starting
is identical, the heater will be lled by the water
supply pressure.
directly from the boiler for the set time or until the
button is pressed again.
If you press the button for 2 seconds, dispensing
is continuous and only stops when the button is
pressed again.
Dispensing is discontinued automatically after 30
and 60 seconds, respectively.
(mod.L)
Tap: turn in a anticlockwise direction to open and
a clockwise direction to close
Dispensing cannot be carried out if the machine
has not reached the operating pressure or tempe-
rature at least once, and each time that the boiler
pressure drops too much.
Tap: turn in an anticlockwise direction to open and
a clockwise direction to close.
-
Press down to ll the boiler.
(models with gas hea-
ting).
Open: vertical position;
Closed: turn 90° in clockwise direction.
(models with gas hea-
ting).
Ignition button: press down rmly to give off the
spark to light the gas for the burner.
(Fig.8)
with mobile needle on a xed dial with a
double scale.
Visual control of the pump (lower manometer ) and
of the boiler pressure (upper manometer) (mod.
E-S).
Minimum and maximum water level indicator .
Visual control of water level in boiler.
(models with gas heating).
Visual control of lighting and functioning of the
ame of the gas burner.
 Loading...
