5.
1Pre-installationtest
Testingthetransducer
Transduceroperationshouldbecheckedbeforeinstallation.Forthe
purposesofthistestyoudonotneedtoassemblytheconnectorlocking
collar.
FordetailedinformationonusingtheFishfinder/Sonarapppleasereferto
theoperationinstructionsforyourMFD.
1.ConnectthetransducertotherelevantconnectoronyourMFDorsonar
modulethatisconnectedtoyourMFD.
2.Fullysubmergethetransducerinwater.
3.PowerupyourMFDand/orSonarmodule.
4.OpenaFishfinder/SonarapponyourMFD.
5.Ifrequired,selecttherelevanttransducerfromtheTransducersettings
tab([Menu>Transducer>Transducer]).
6.Ifrequired,selecttherelevantchannelfromtheChannelselectionoptions
([Menu>Allchannels]).
7.Checkthataccuratedepthandwhereapplicabletemperaturereadings
aredisplayed.
8.IfyouexperiencedifficultiesobtainingreadingsthencontactRaymarine®
TechnicalSupport.
Warning:Transduceroperation
Onlytestandoperatethetransducerinthewater.DoNOT
operateoutofwaterasoverheatingmayoccur.
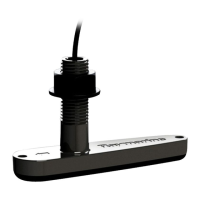
5.2Mountingthetransommountbrack et
Thetransducermustbemountedonthetransomusingthemountingbracket
provided.Thestepsbelowdescribetheinitialmountingstepsrequiredin
ordertotestyourtransducer’sperformance.
Important:
•Initiallyonlythe2holesfortheheightadjustmentscrewsarerequired
tosecurethemountingbrack
ettothetransom.Thethirdscrewisused
tofinalizetheinstallationoncethetransducerhasbeentestedand
adjustedtoobtainoptimumperformance.
•Tohelppreventchippingoffiberglasshulls,usepainter’stapetomask
thedrillholeareas,behindthemountingtemplate.
1.Fixthesuppliedtransducermountingtemplatetotheselectedlocation,
usingmaskingorself-adhesivetape
.
2.Ensurethetemplateisparalleltothewaterline.
3.Drill2xholesfortheadjustmentslotscrewsasindicatedonthetemplate.
4.Usingapozi-drivescrewdriverandthescrewsprovided,securethe
transommountbracketusingthe2adjustmentslots.
Note:
Thethirdscrewisnotuseduntilthetransducerhasbeensuccessfully
tested.
22

 Loading...