2828
ITALIANOENGLISH
17) Built-in battery charger (for battery-operated machines)
Used to recharge batteries.
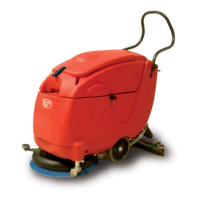
18) Recovery tank water fi lter
Holds back suctioned impurities from the squeegee, see ”WASHER-DRIER CLEANING – recovery tank cleaning (dirty water) and fi lter”
19) Cap for solution tank emptying
Open the cap to empty the solution tank
20) Recovery tank
Contains liquid (dirty water) suctioned up by the squeegee.
21) Solution tank
Contains cleaning solution (clean water) to be distributed to the brush.
22) Brush and traction inclination regulation bolt
see “WASHER-DRIER START-UP AND USE – start-up and traction”
23) Brush and traction inclination regulation nut
see “WASHER-DRIER START-UP AND USE – start-up and traction”
24) Machine lifting wheel
Used to facilitate machine movement or brush substitution when it is not in function.
Unlock locking pin 24b (Fig.1/C) to release the wheel, lift the front part of the machine and re-lock the pin.
25) Solution tank fi lter
Holds back and hinders impurities contained in the cleaning solution from ending up on the fl oor.
26) Suction motor protection
Hinders the entrance of water and protects the suction motor from short-circuits. DO NOT REMOVE THIS PROTECTION
27) Electrical system (for 230V.AC cable-operated machines)
see “wiring diagram (FIG.7)”
28) Electrical system (for battery-operated machines)
see “wiring diagram (FIG.6)”
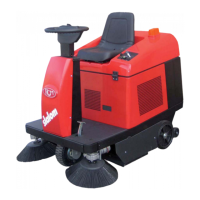
29) Panel with multifunction control card (for battery-operated machines)
The multifunction card controls operation of the brush and suction motor and controls battery charging status.
30) Electrovalve water release on brush control
The electrovalve distributes the cleaning solution regulated via the opening and regulation valve 15.
31) Start-up key setup (for battery-operated machines)
The start-up key located on the control panel (in equipped versions) sends voltage to the electrical system.
Select Pos.0= to remove voltage from the system; Pos.1= to send voltage to the system.
ATTENTION!
AFTER INSERTING THE START-UP KEY, OPERATE DIP SWITCH 2 (FIG.3) LOCATED BELOW THE ELECTRONIC CONTROL. SEE “FIG.3 POS.”B”.”B”