3232
ITALIANOENGLISH
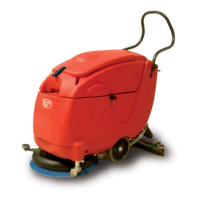
WASHER-DRIER CLEANING
The washer-drier must be cleaned as soon as work is completed.
DANGER!
V
ERIFY THAT THE WASHER-DRIER IS SWITCHED OFF BEFORE STARTING WASHER-DRIER CLEANING.
- Stop brush rotation and suction by pressing the relative symbols located on the start-up panel.
THE ELECTRICAL SYSTEM FOR BATTERY-OPERATED MACHINES MUST NOT BE POWERED. PROCEED AS FOLLOWS:
- for battery-operated versions with “auto-stop systems” do not utilise the washer-drier for a few seconds.
- for battery-operated versions with “start-up keys”, turn the key to the “0” position and then remove it.
- for “230V.AC cable-operated” machines, disconnect the cable from the power outlet.
Brush cleaning
For maximised brush cleaning, check for brush wear and tear, check if the brush is in good condition, remove it and clean it with a jet of
water. See “brush removal”; if the brush is worn and must be replaced, see “brush replacement.”
Squeegee cleaning
The squeegee must be clean for best drying. Proceed as follows:
Lift the squeegee by pulling up the lever 6 (Fig.1/A)
- remove the squeegee by following the instructions inversely as described in chapter “Machine preparation – squeegee assembly”.
- carefully clean the inside of the squeegee with a jet of water.
- turn the squeegee wheels to check that they are not worn. Replace them if they are still not in good condition after being cleaned with
a jet of water.
- reassemble the squeegee.
Recovery tank (dirty water) and fi lter cleaning
Completely empty the recovery tank 20 (Fig.1/C) as described in the “End work” paragraph.
Lift the recovery tank cover and dismantle the underlying fi lter 18 (Fig.1/B) and clean it with a jet of water.
Clean the inside of the tank with a jet of water.
Reassemble.
ATTENTION!
RECOVERY TANK AND FILTER CLEANING SHALL BE PERFORMED WHEN THE TANK IS FULL, AT THE END OF WORK AND IF THE MACHINE
IS NOT USED FREQUENTLY.
Solution tank (clean water) and fi lter cleaning
ATTENTION!
SOLUTION TANK (CLEAN WATER) 21 (FIG.1/C) CLEANING SHALL BE PERFORMED WHEN THE MACHINE IS NOT USED FREQUENTLY.
REMOVE THE CAP 19 (FIG.1/C) FOR EMPTYING, CLEAN THE TANK VIA THE MOUTH 9 (FIG.1/A) WITH A JET OF WATER.
Unscrew the cap 25a (Fig.1/B), remove the fi lter 25 (Fig.1/B) and clean it.