Reach Robotics Confidential Proprietary Information not to be reproduced or made available to third parties without prior consent from Reach Robotics and not
to be used in any unauthorised way. © Reach Robotics Pty Ltd 2022
19
5. Ensure sheath is slid over pushrod. Rotate
pushrod by hand if needed.
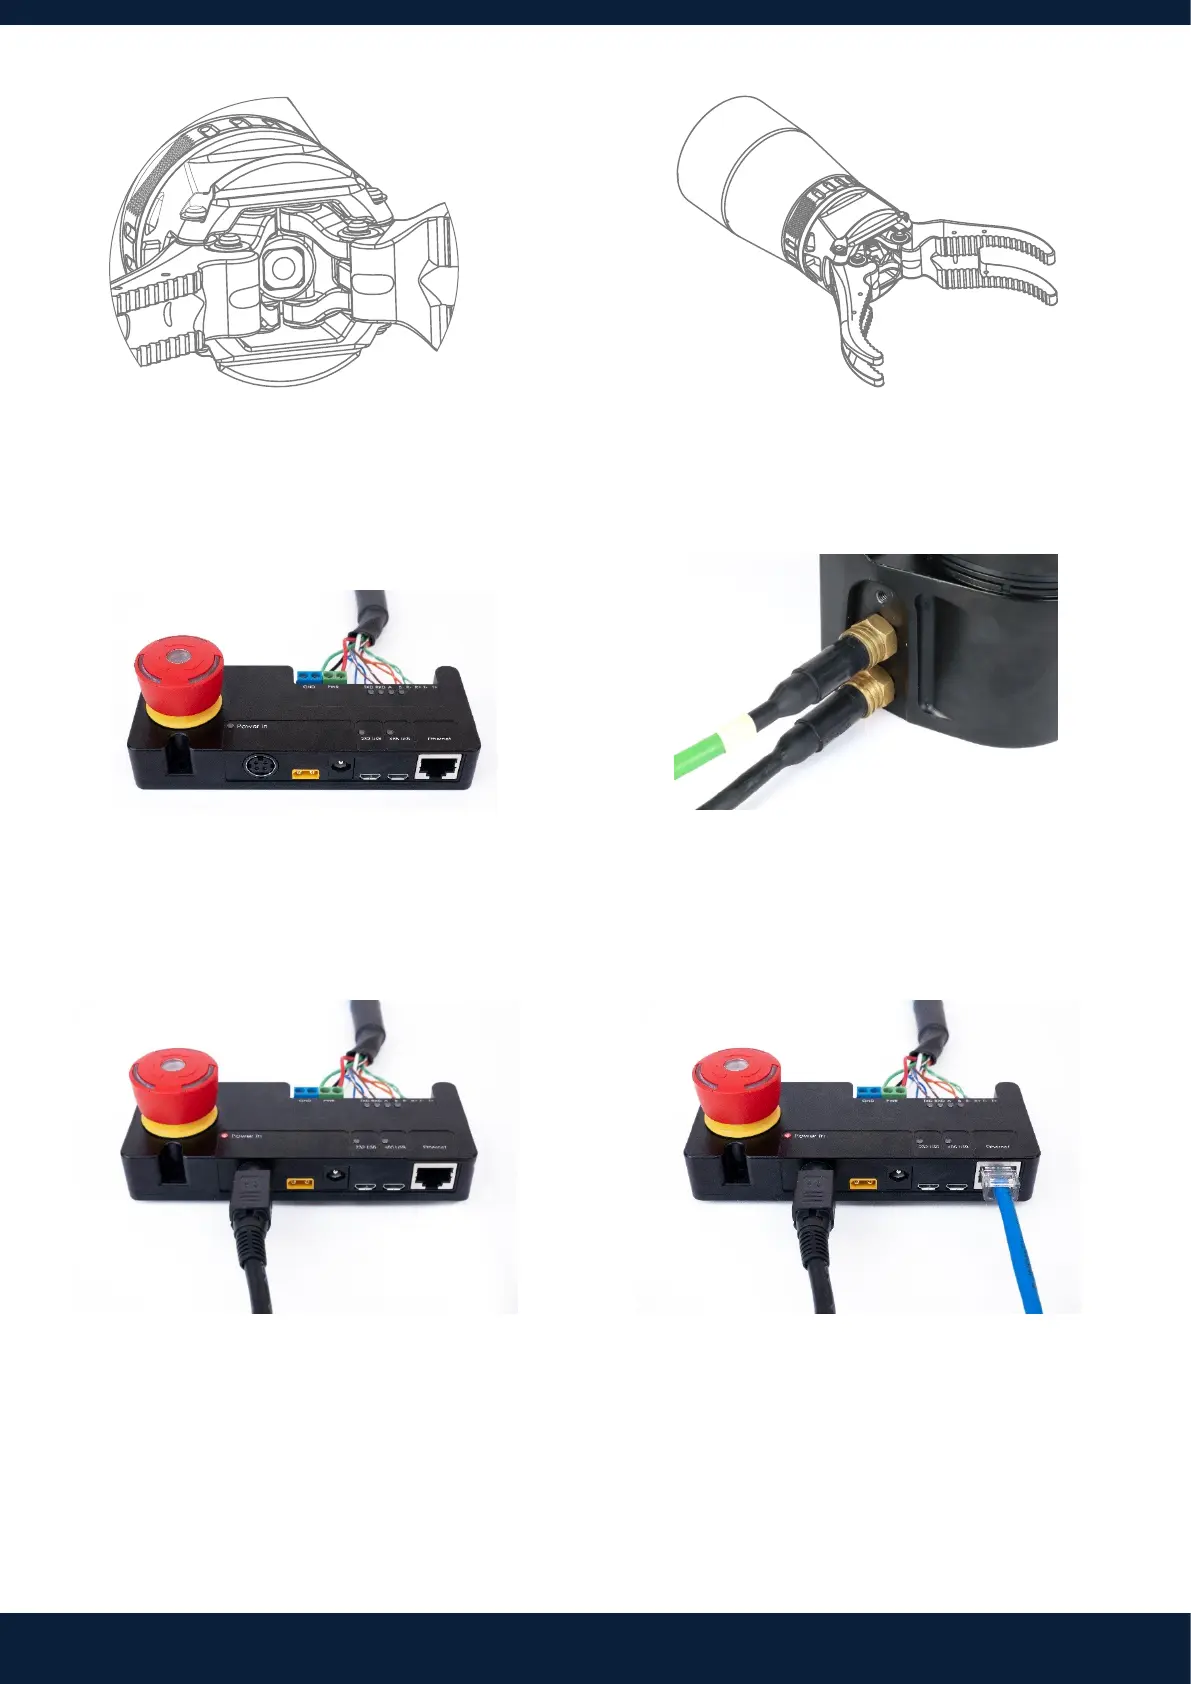
7. Ensure the included power and communications
cables are securely connected to the Breakout
Board (BoB).
9. Connect the power supply to the BoB. Plug the
other end into a wall socket. Turn on.
6. Screw the collar to tighten. Fasten the screw with
the 5mm Allen key to secure.
8. Plug the power and communications cables into
the arm.
10. Use an Ethernet cable to connect the BoB to your
computer.
This completes the mechanical setup procedure. Please note, you also have the option of connecting the Reach Bravo via
Serial using the MicroUSB to USB cable.
 Loading...