reachrobotics.com
info@reachrobotics.com | +61 (2) 9519 7651
20
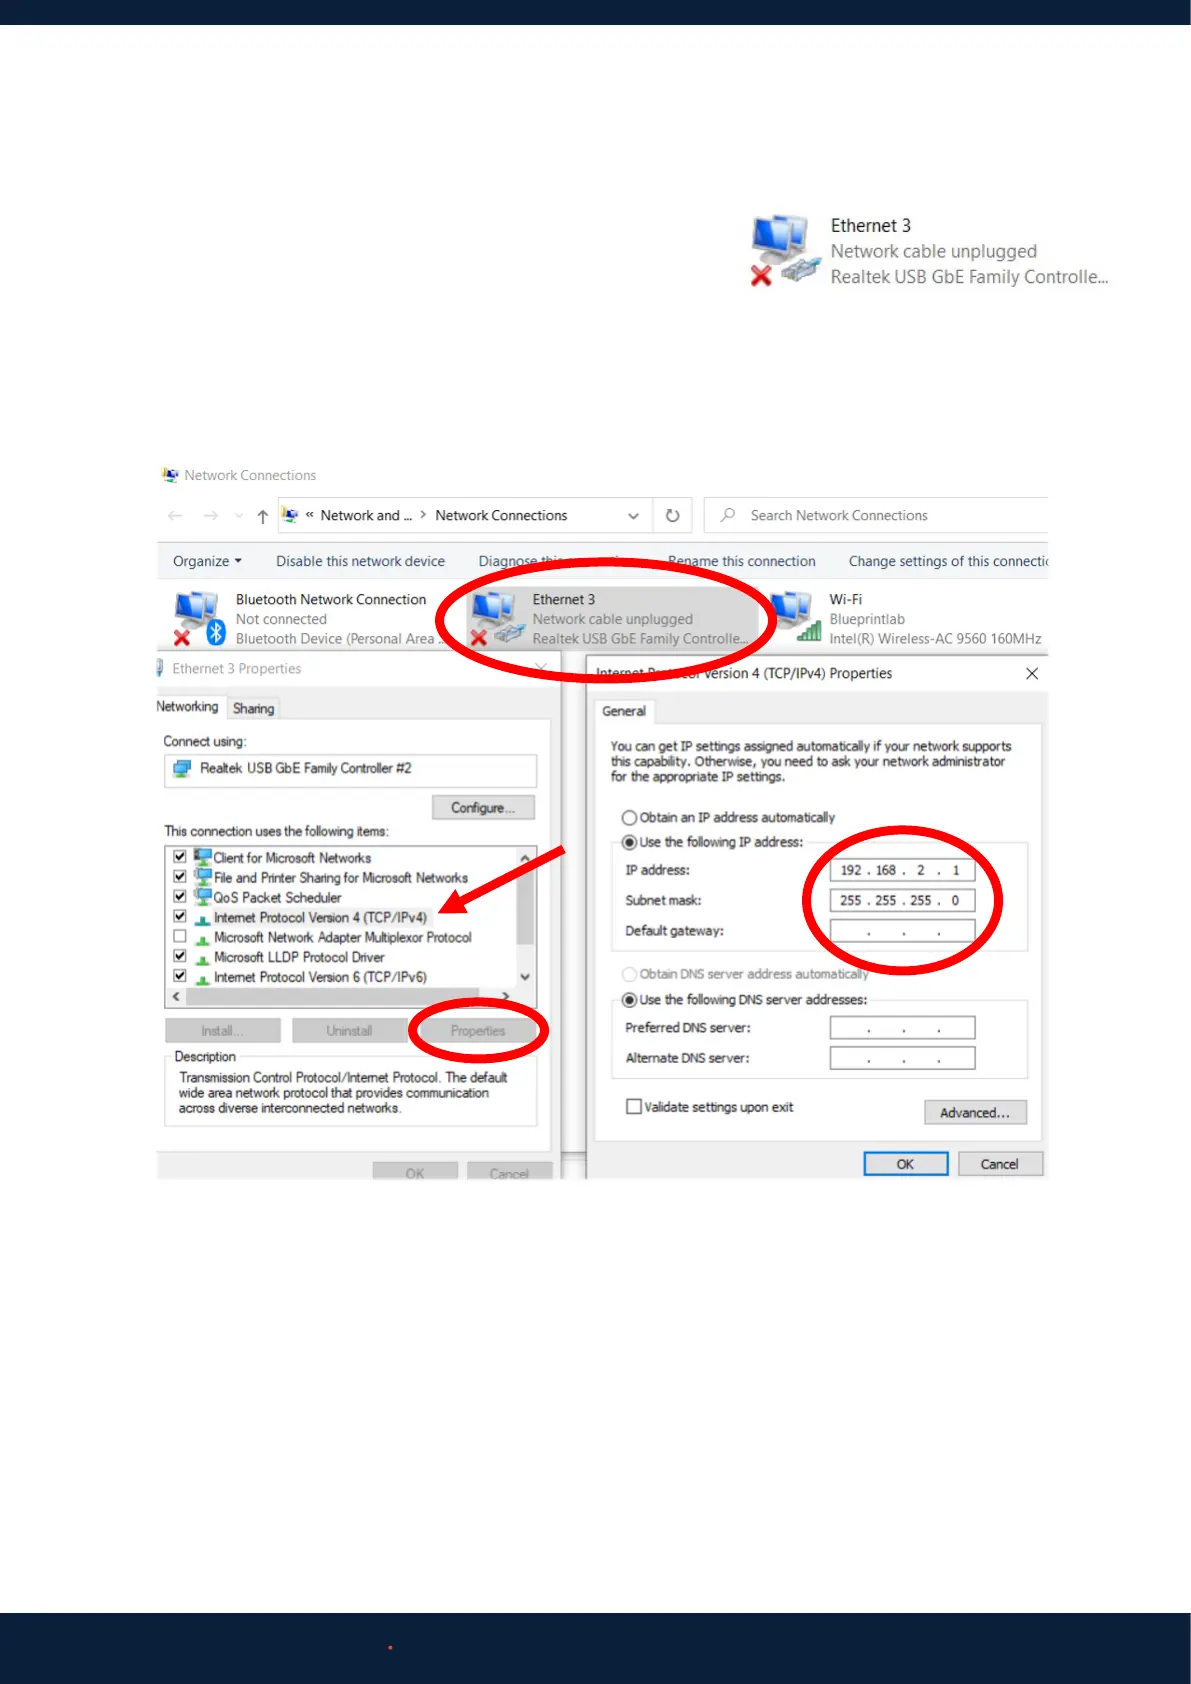
1. On your Windows computer, press START > type “Settings” > Network and Internet > Ethernet > Change Adaptor Options.
2. Double click the Ethernet connection to the Reach Bravo Arm. To
check if you have the correct Ethernet connection, unplug and re-plug
the cable. The correct connection should disappear and reappear.
3. Click ‘Properties’.
4. Highlight ‘Internet Protocol Version 4 (TCP/IPv4)’ > ‘Properties’. Set the IP Address to 192.168.2.1 and Subnet Mask to
255.255.255.0. Click OK and Close all windows.
6.1.2 Communication Setup
Reach Control will be provided to you digitally via email as well as on a USB within the Hard Carry Case.
6.1.3 Reach Control
1. Install Reach Control.
2. Open Reach Control > Settings (Cog Icon) > Ports > Add.
Click the new Port. Name your device. Select UDP as the communication method. Set the:
a. IP to 192.168.2.3
b. Port to 6789
c. Ensure Full-Duplex is selected
 Loading...