reachrobotics.com
info@reachrobotics.com | +61 (2) 9519 7651
18
6 BENCH SETUP AND ACCEPTANCE TEST
6.1 BENCH SETUP
This section outlines the basic setup and testing procedure users should complete to ensure their arm is fully operational. The
following example is demonstrated with a Bravo 7.
If you experience any issues in following these steps, please contact Reach Robotics for technical support via info@
reachrobotics.com.
YOU WILL NEED :
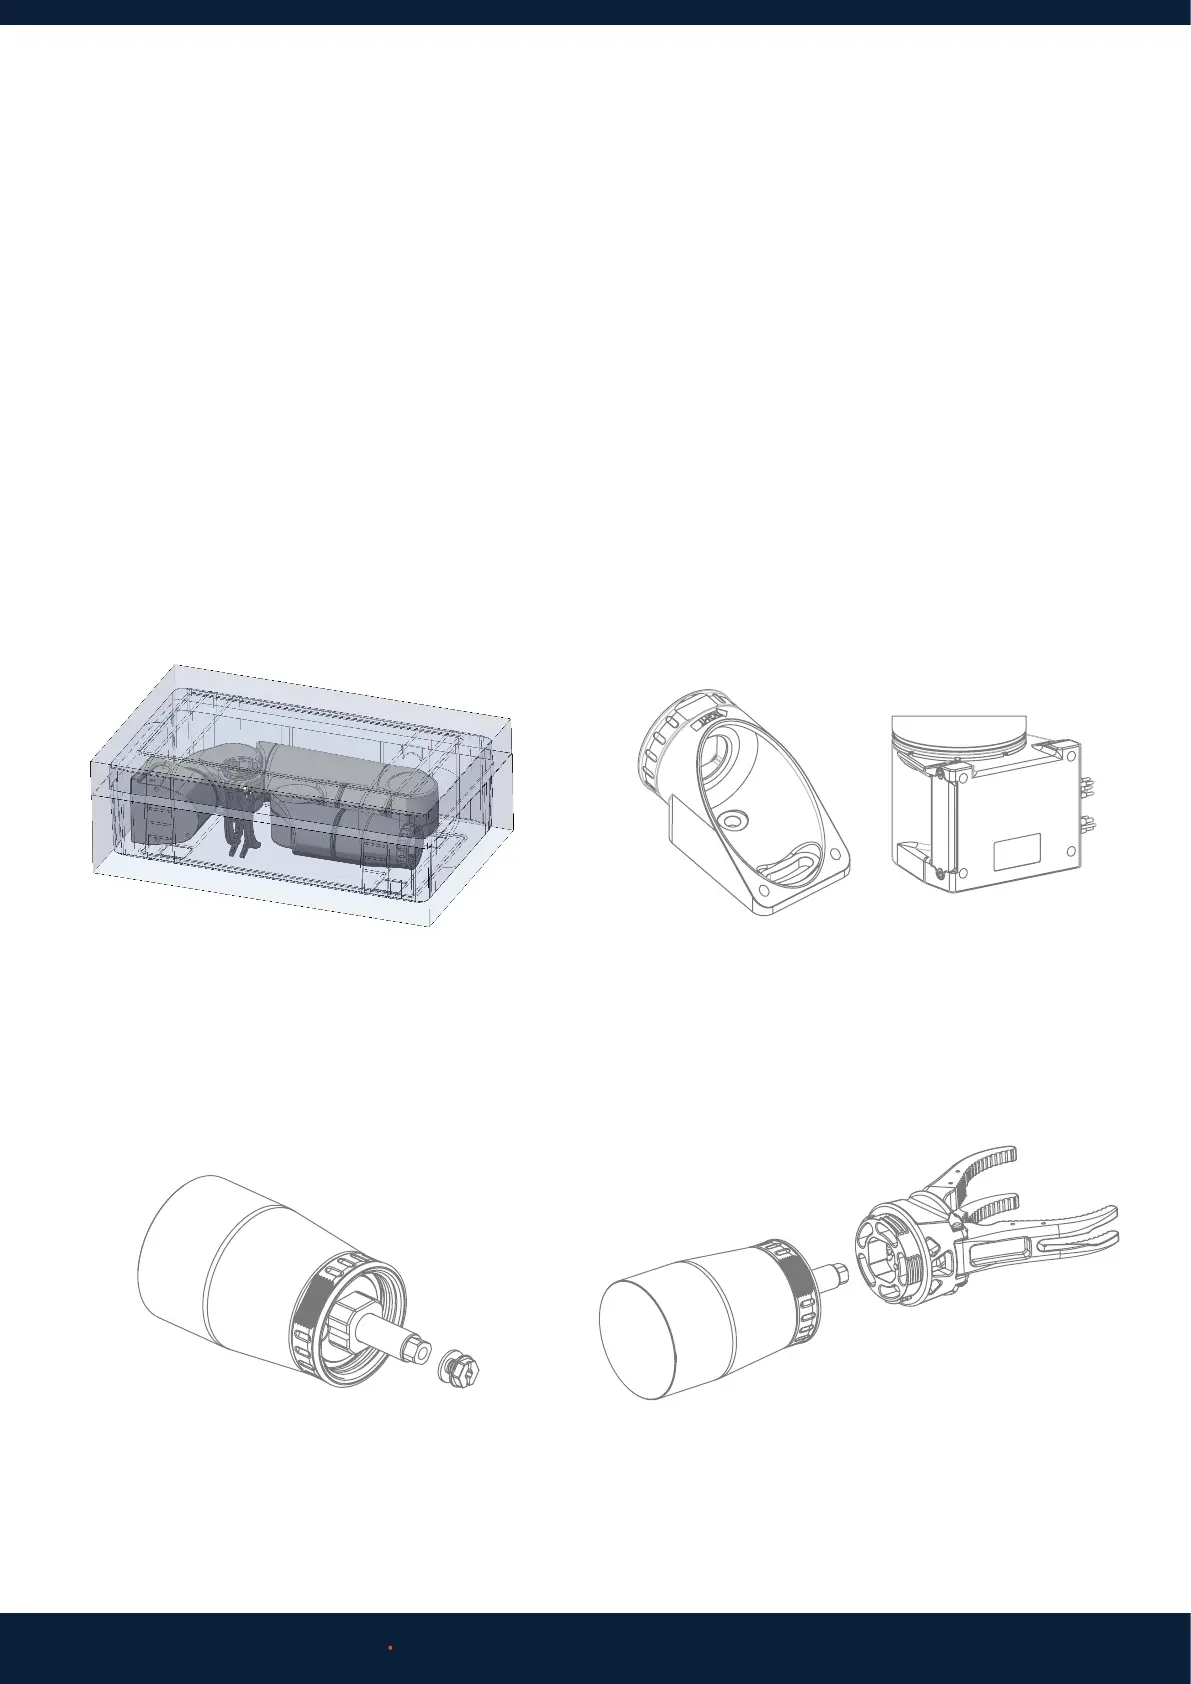
6.1.1 Physical Interfacing
1. Unpack all Bravo components from case
3. Using the 5mm Allen Key, remove the screw and
washer from the end eector pushrod.
2. Use the provided 4xM8 bolts to fix the Bravo base
in position onto your mounting surface. Section 4.1.1
provides the mounting interface dimensions.
4. Connect the end eector onto the arm. Ensure
dowel pin is correctly aligned. Apply marine grease
to the thread of the jaws.
• Bravo Product
• Reach Control
• Wall Power Outlet
• Computer or Laptop
 Loading...