4” Standard Pump Installation, Operation & Service Manual To Test Ta nk
31
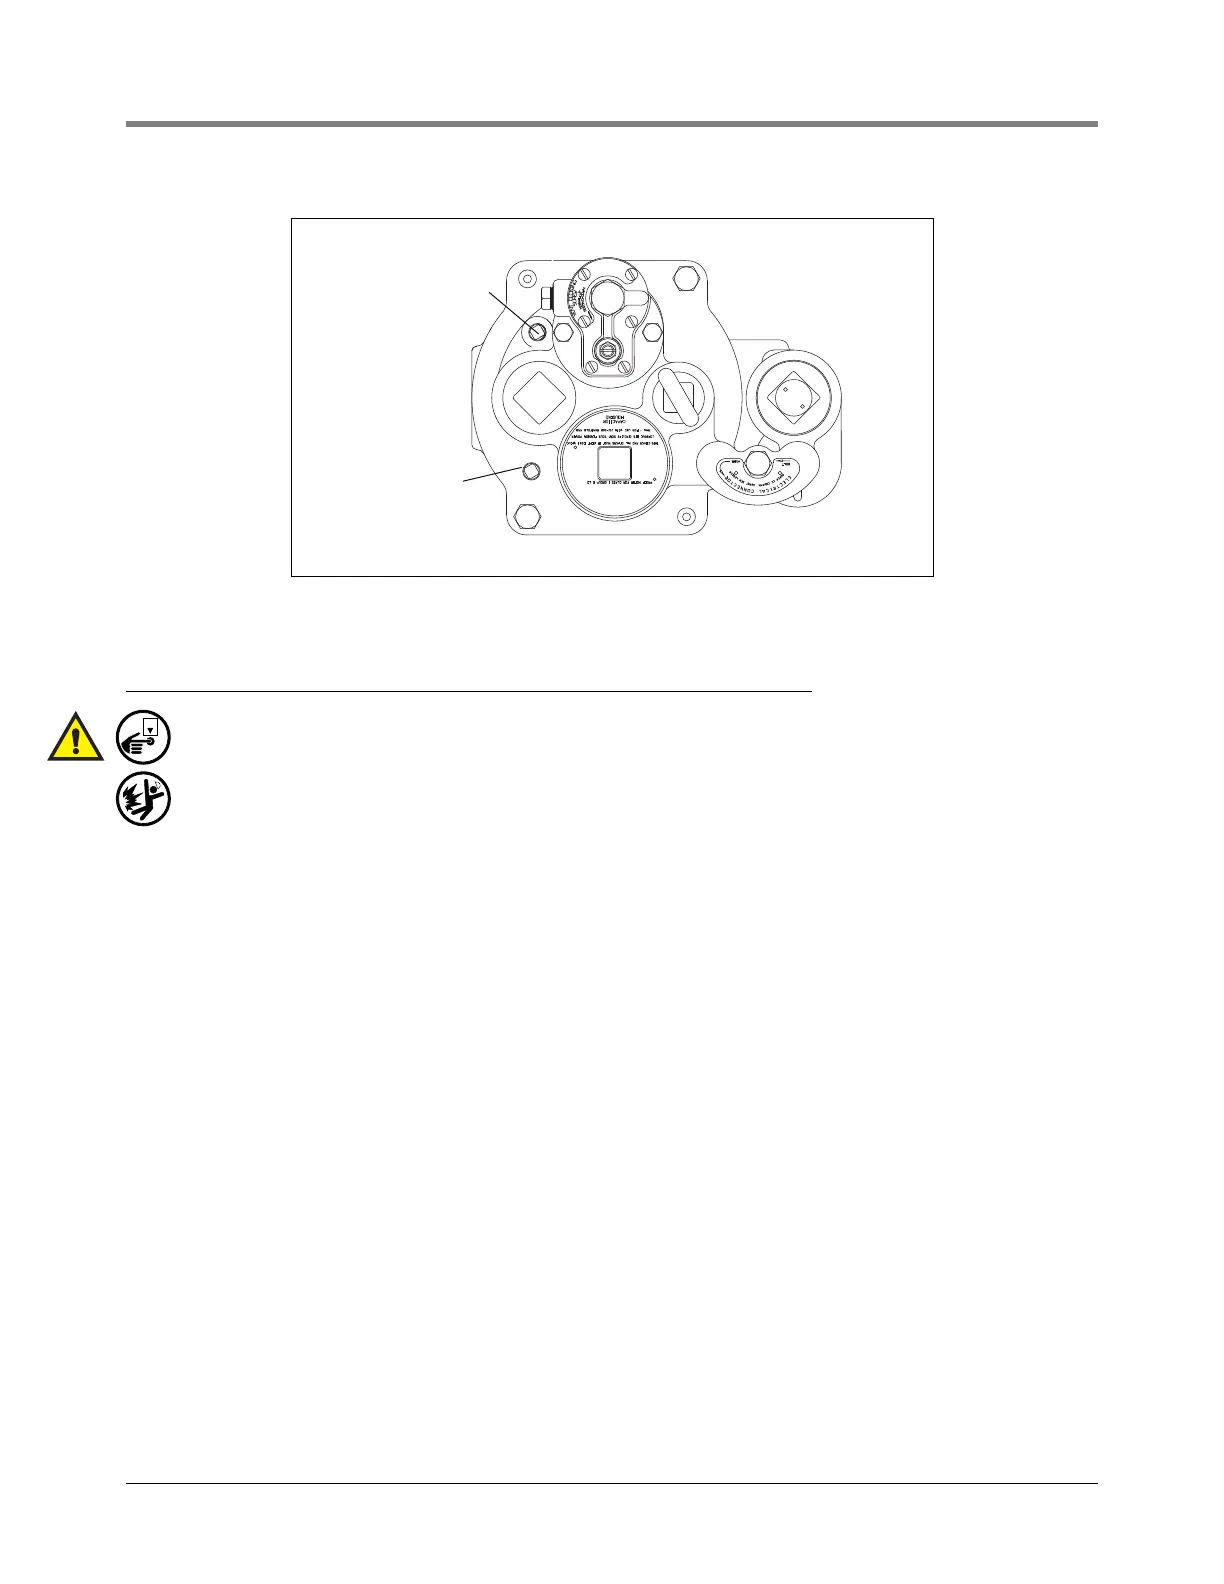
Figure 27. Line test port
To Te st Tank
DANGER! Always disconnect, lock out, and tag the power before starting to service the pump.
When servicing unit use non-sparking tools and use caution when removing or installing equipment to
avoid generating a spark.
1. Remove the protective plug and close pump check valve by turning the vent closing screw (see Figure 26) as
far down as possible. Remove the 1/4” NPT tank test port plug and attach tank testing equipment. Apply tank
test pressure at tank test port.
2. After completion of tank tests, depressurize tank and remove testing equipment. Apply an adequate amount of
fresh, UL classified for petroleum, non-setting thread sealant on the 1/4’’ NPT plug and replace it in the tank
test port. Torque the plug to 14 to 21 ft-lbs (19.4 to 29 N•m).
3. After the installation is completed and tests have been made, purge system of air by pumping at least 15
gallons (57 liters) through each dispenser. Begin with the dispenser furthest from the pump and work toward
the pump.
LINE TEST PORT
TANK TEST PORT
fig 22.eps