30
Testing The Installation
DANGER! Always disconnect, lock out, and tag the power before starting to service the pump.
When servicing unit use non-sparking tools and use caution when removing or installing equipment to
avoid generating a spark.
To Te st Pip ing
1. Block lines at each dispenser. (Trip dispenser shear valve.) Remove line test plug for this test.
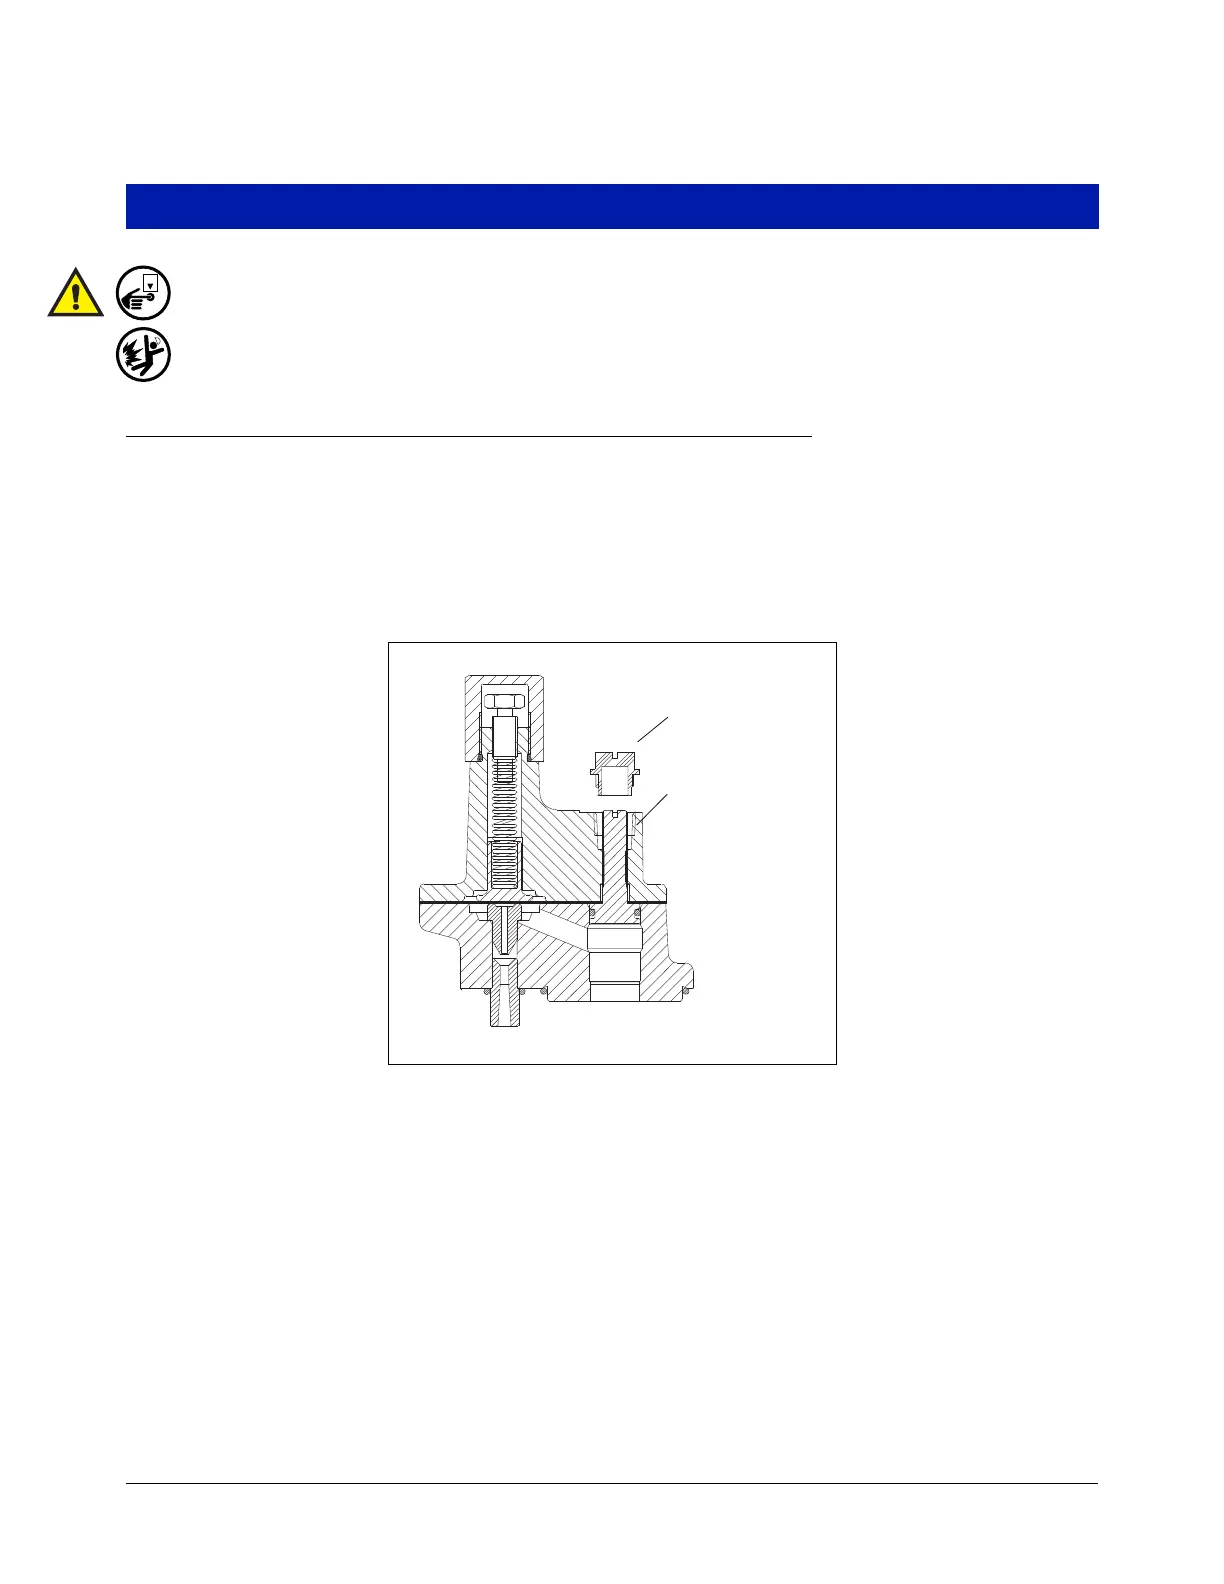
2. Remove protective plug and close pump check valve by turning the vent closing screw clockwise as far down
as possible (see Figure 26).
CAUTION: Excessive pressure (above normal test pressure of 50 - 55 psi [345 - 380 kPa]) may damage
check valve seat and other system components.
Figure 26. Closing the check valve
3. Remove line test port plug and apply line test pressure at line test port (50 psi [345 kPa] maximum) - see
Figure 27.
4. Depressurize the line by reversing Step 2. Replace the protective plug over the vent closing screw.
5. Apply adequate amount of fresh, UL classified for petroleum, non-setting thread sealant on the 1/4” NPT line
test port plug and replace it. Torque the plug to 14 - 24 ft-lbs (19.4 - 29 N•m)
REMOVE THREADED
PLUG
VENT CLOSING
SCREW
fig21.eps