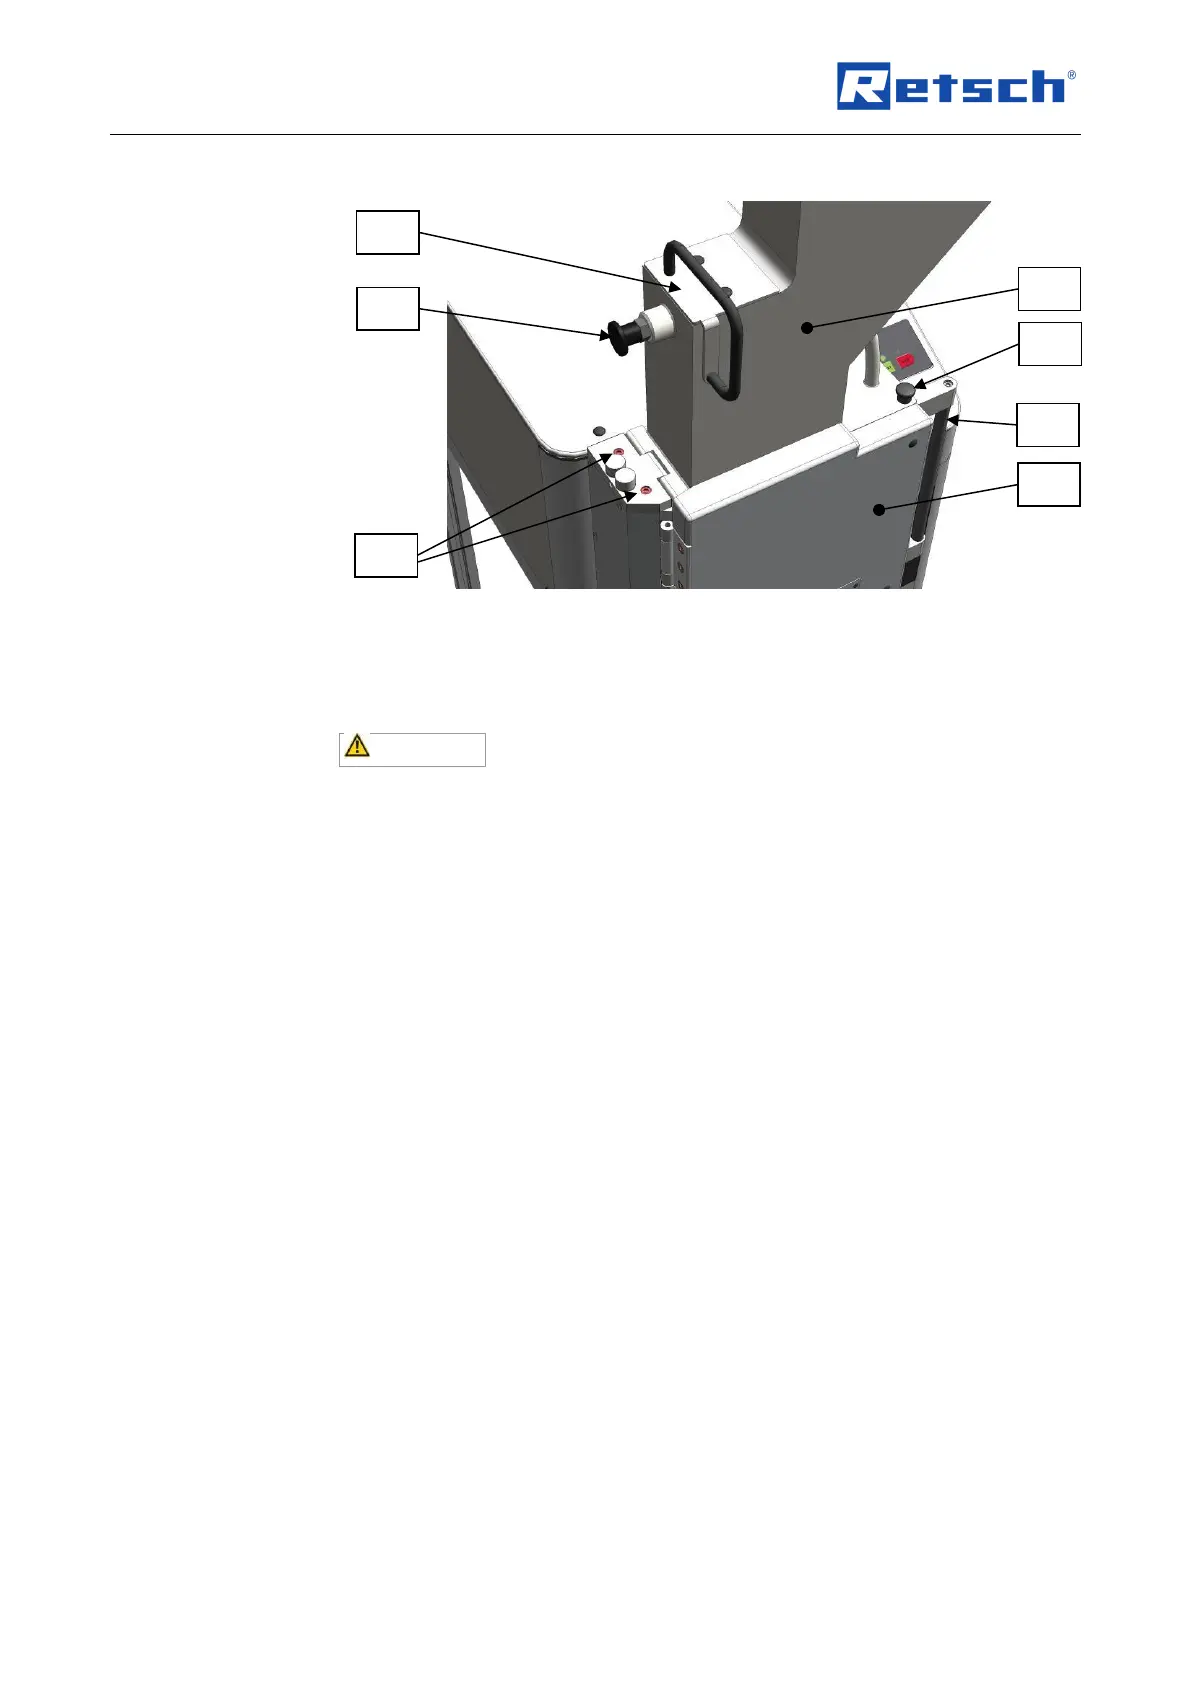
Fig. 4: Mounting the feed hopper
• Push the handle of the door latch (F) backwards.
• Open the grinding chamber door (T).
• Pull the plunger (B) into the upper latching position.
• Place the feed hopper (R) on the device. (see diagram)
Until the feed hopper (R) is secured by two socket-head screws, there is a risk of it falling out of
the device.
• Release the detent pin bolt (D) on the plunger (B).
• Push the plunger downwards.
• Screw the two provided socket-head screws (S) through the hinge on the
feed hopper into the enclosure.
• At first, tighten the screws only slightly.
• Close the grinding chamber door.
• Pull the handle on the door latch (F) forwards until the mini detent pin (E)
engages.
• Adjust the feed hopper until the plunger can be moved upwards and
downwards easily without jamming.
• Tighten the two socket-head screws securely. (10 Nm)
• Check again if the plunger moves upwards and downwards easily without
jamming.
• Put the two protective caps (SK) onto the screws (S).