2.Replacement and Adjustment
25
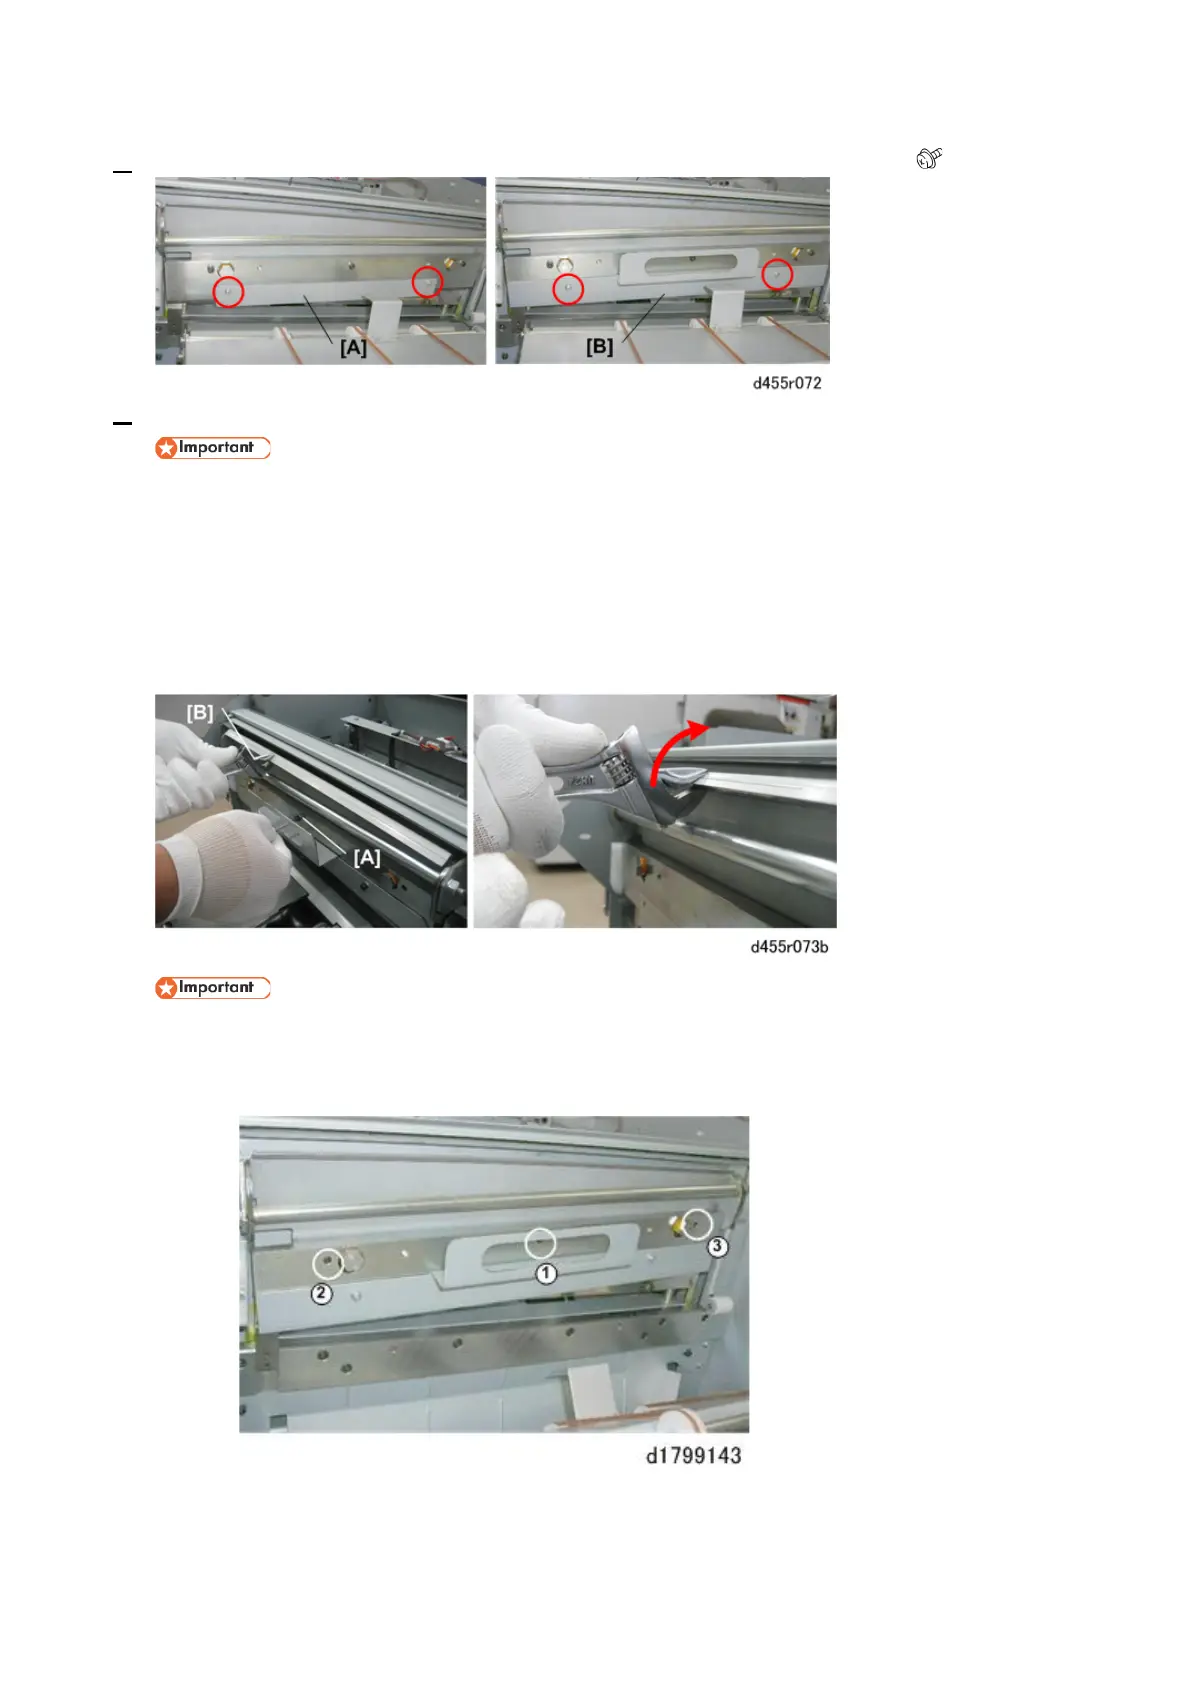
8. Use the guard plate screws to attach the handle [B] to the side of the guard plate ( x2).
9. Use the Allen key (provided with the new blade) to remove the blade hex screws.
• The blade is held down by these screws and three very strong springs.
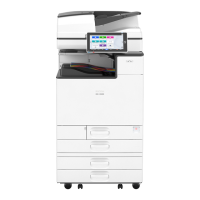
1. Insert the Allen key into the first hex screw [A].
2. Attach an adjustable wrench [B] as shown.
3. Raise the wrench to relieve the tension on the springs.
4. Loosen each screw a full turn each to gradually relieve the tension on each screw.
5. Continue to loosen each screw in turns to remove them.
• The screws should be removed gradually. To avoid stripping the threads of the other holes
or screws, never completely remove any screw before the others.
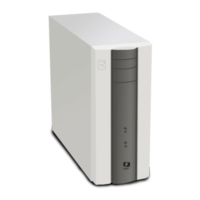
• Loosen and remove the screws in the order from (1) to (3).