11
Clockandtimesettings
The following instructions assume that you have just plugged in and you have
just specied the language option for the menus (see page 10).
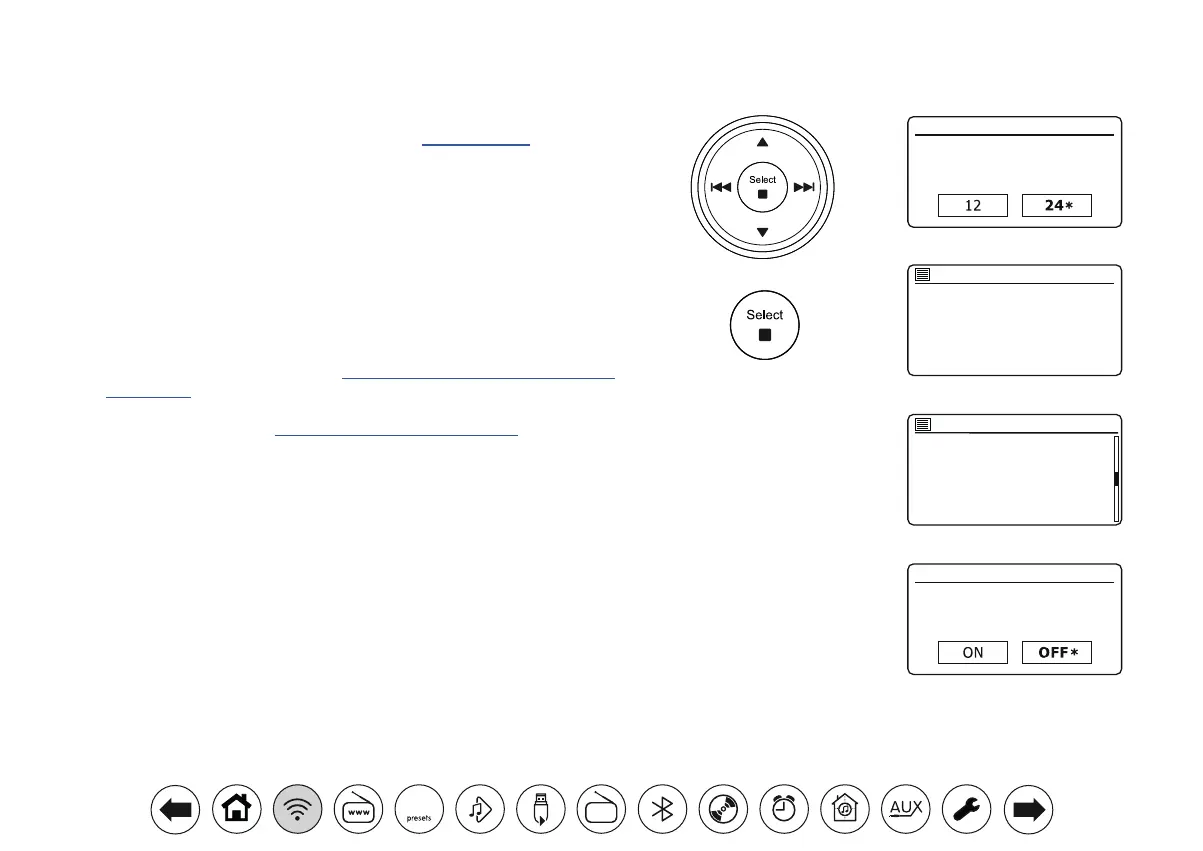
1. Press Menu Left or Right to highlight the desired clock format (either 12
or 24 hour) then press Select to enter your selection.
2. Next, the way in which the audio system updates its clock is set. A menu
allowing you to specify the auto-update option for the clock will be shown.
The 'Update from Network' option will be best for most users.
3. Press Menu Up or Down to choose an auto-update option for the clock.
This can be updated from DAB or FM radio, from the Network, or not
updated automatically. The default is to auto-update from the network. If
you choose another option go to 'Connecting to your computer network'
on page 12. Otherwise you will rst need to select the correct time zone
and daylight savings setting, see the next steps. If you choose 'No update'
you will need to set the clock manually later, see page 60. Press Select
to conrm your choice.
4. Press Menu Up or Down to highlight the time zone for your current location.
Press Select to enter the setting.
5. You will then need to set the Daylight Savings option according to your
location (Daylight Savings is also known as Summer/Winter time or BST/
GMT adjustment).
Press Menu Left or Right to highlight 'ON' or 'OFF' as required. The
asterisk shows the current setting. Press Select to enter the setting.
In the UK, 'ON' is equivalent to British Summer Time and 'OFF' is equivalent
to Greenwich Mean Time.
6. Continue setting up your audio system on the next page.
Date/Time
12/24 hour format
Auto update
Update from DAB
Update from FM
Update from Network
No update
*
UTC + 00:00: Dublin, Lond
UTC + 00:30:
UTC + 01:00: Madrid, Am
UTC + 01:30:
UTC + 02:00: Athens, Cair
UTC + 02:30:
Set timezone
*
Daylight savings
Daylight savings
DAB
30