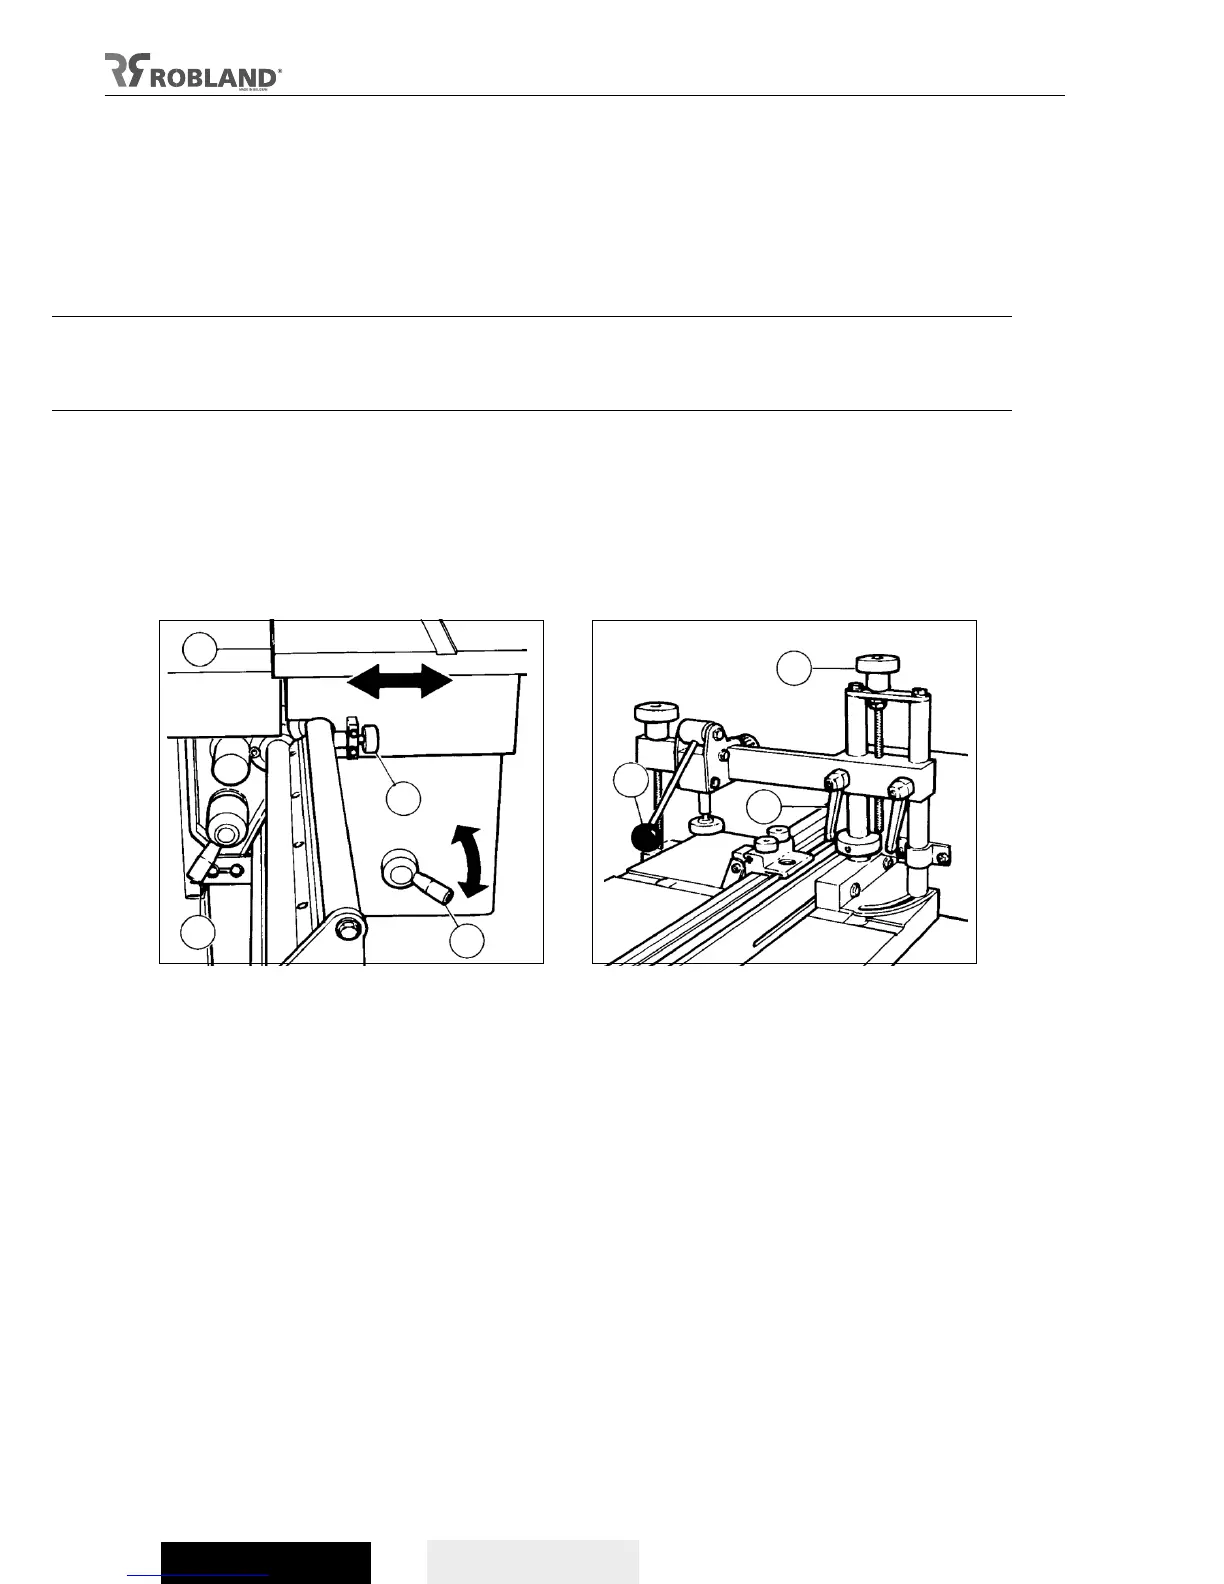
(fig 13.3). The whole system can be locked by means of the knob (fig 13.2).
The support legs of the sliding table carriage can be adjusted in height after setting the course of the
sliding table.
Unlock the bolt which holds the adjustment pad and put it on the floor and lock the bolt.
By means of both handles (fig 13.12), the first at the front of the sliding table, the second at the back,
the sliding table bars can be moved to the front and back to alter the course of the sliding table. These
handles have to be loosened 1/2 turn to allow the sliding table to position the sliding carriage in
function of the piece of wood to be machined.
Clamping system
Loosen the clamping handles (fig 14.1) in order to free the horizontal bridge to adjust in height of the
wood-pusher by turning the knob (fig 14.2).
After adjusting the height the clamping handles must be well tightened. The wood, or the piece to be
machined, is pushed downward with the eccentric pusher. To do this, press down the handle (fig
14.3).
To use the table extension when working with the spindle fence, the elbow protection has to be tilted
away. Lift the protection to loosen it from the lock, then pivot it 90 degrees and put it back on the bolt
with the opening in the protection. Now the elbow-protection will not hinder when tenoning.
Fig.13 Fig.14