34
ButterCup Installation - Air Spring Shaft
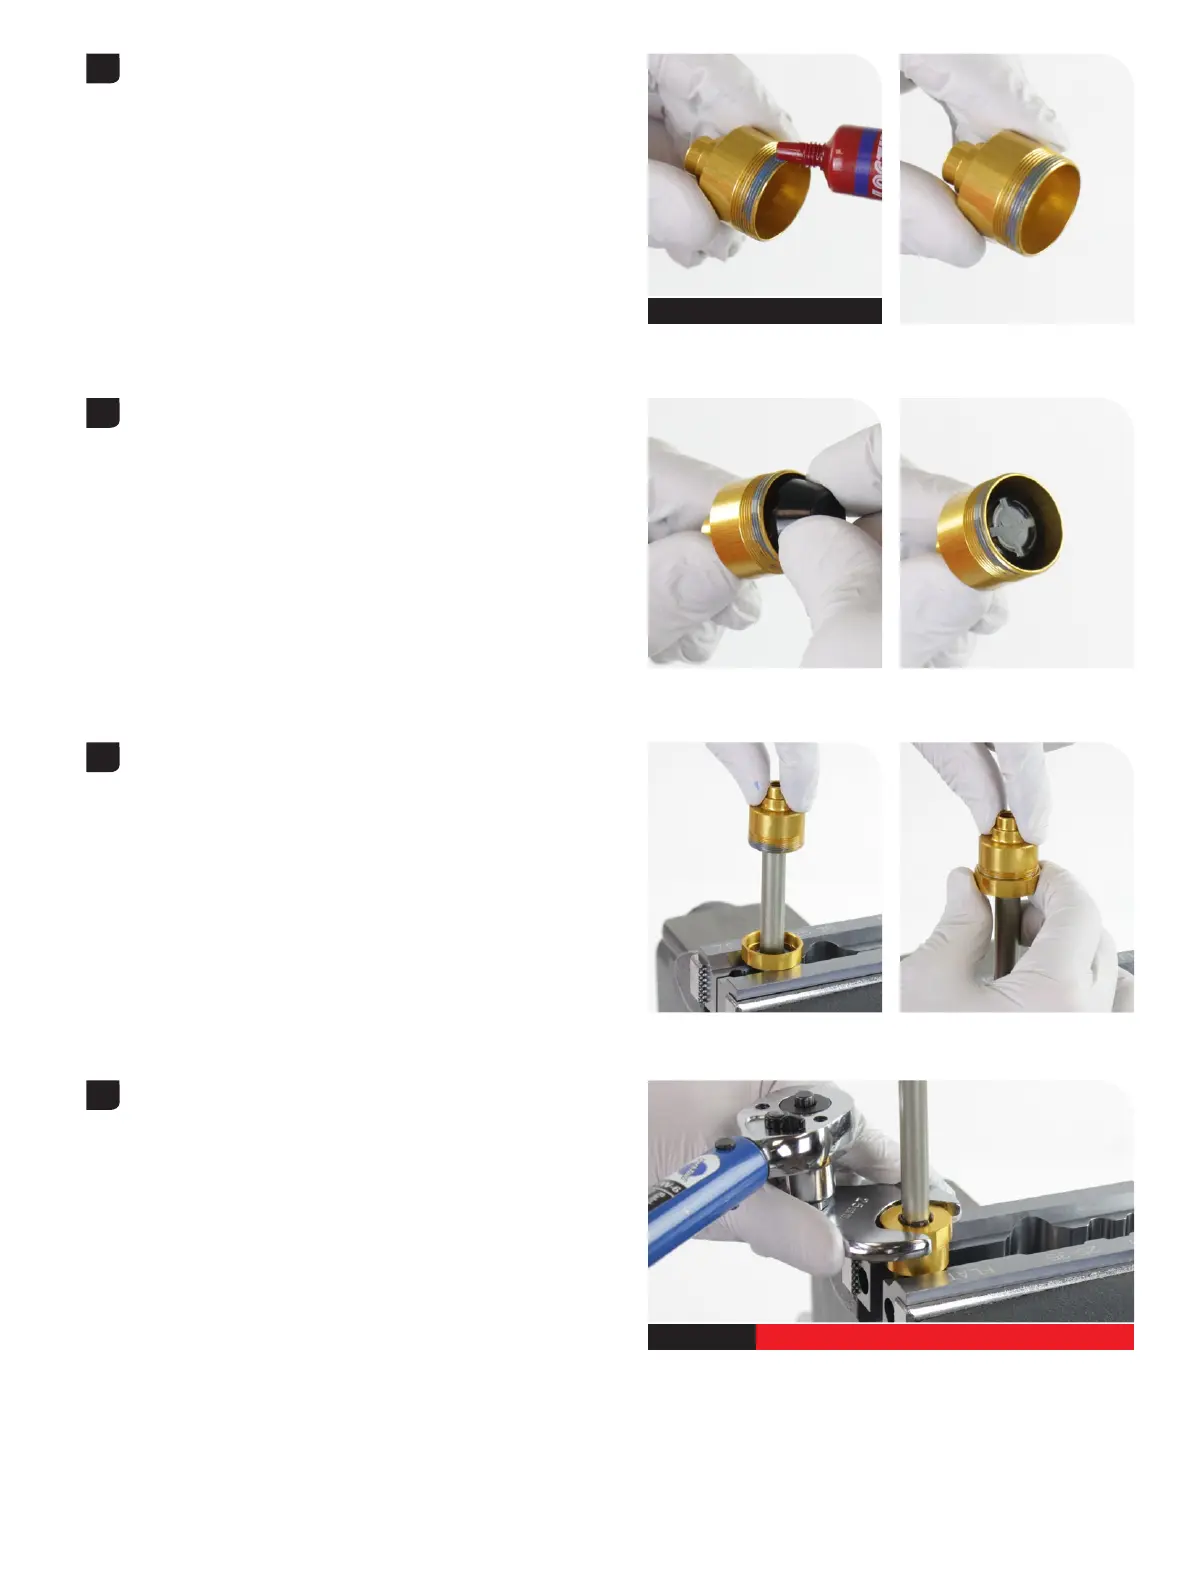
Apply Loctite Threadlocker Blue 242, or equivalent, to three full outer Apply Loctite Threadlocker Blue 242, or equivalent, to three full outer
threads on the lower ButterCup housing. threads on the lower ButterCup housing.
Install a new ButterCup bumper into the lower ButterCup housing, wide Install a new ButterCup bumper into the lower ButterCup housing, wide
end first.end first.
Position the lower ButterCup housing and bumper onto the ButterCup Position the lower ButterCup housing and bumper onto the ButterCup
end plate. end plate.
Slide the upper ButterCup housing and bushing assembly up and Slide the upper ButterCup housing and bushing assembly up and
thread it onto the lower ButterCup housing finger tight.thread it onto the lower ButterCup housing finger tight.
Remove the air shaft from the vise and vise blocks. Remove the air shaft from the vise and vise blocks.
Clamp the lower ButterCup housing into a vise with RockShox Vise Clamp the lower ButterCup housing into a vise with RockShox Vise
Blocks on the wrench flats, air spring piston oriented upward.Blocks on the wrench flats, air spring piston oriented upward.
Tighten the upper ButterCup housing onto the lower housing.Tighten the upper ButterCup housing onto the lower housing.
5
Theadlocker Loctite 242 - Blue
6
7
8
25 mm 8.5 Nm (75 in-lb)