- 18 -
DISPOSAL
When properly used and disposed of, there are no known environmental hazards associated with the components of the product in this manual.
Dispose of the product and/or components in accordance with the applicable regulations in your jurisdiction. DO NOT INCINERATE.
Check AGILITY screws, clamps, and brackets for wear, breakage, and tightness daily. Retighten loose screws following instructions throughout
this manual.
WARNING: DO NOT continue to use an AGILITY if any part cannot be tightened or is broken. ROHO, Inc. recommends that an AGILITY be
thoroughly inspected periodically by a qualified technician.
Problem installing or adjusting AGILITY, check the following:
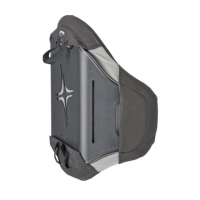
BACK CANE HARDWARE INSTALLATION:
1. Make sure that both the left (
L
) and right (
R
) back cane brackets are in line with the frame of wheelchair and are not twisted.
2. Make sure that the heights of both the left (
L
) and right (
R
) back cane brackets are equal. Use a tape measure or ruler, if necessary.
3. The normal installation location of the back cane brackets is on the back side of the back canes. If a rigidizer bar interferes with the back
cane brackets installed in the normal location, the back cane brackets may be installed on the front side of the back canes. In either
orientation, the left ( ) and right ( ) directional markers on the back cane brackets should be correctly located from the
viewpoint of the installer.
AGILITY INSTALLATION:
1. Make sure that both the left (
L
) and right (
R
) back cane brackets are in line with the frame of wheelchair and are not twisted.
2. Make sure that the width is set appropriately for the chair. Back cane widths may vary. Back shell hardware is factory installed to
accommodate most wheelchairs. If back shell hardware will not hook to the upper and lower pins of the back cane brackets, or if latches
will not close, a width adjustment may be needed. Adjust the width as described in WIDTH AND HEIGHT ADJUSTMENT. It may take a few
attempts to find the ideal width position for your chair.
3. If latches will not close, check to see if safety locks are in the LOCKED ( ) position. Safety locks should be in the UNLOCKED ( )
position to install AGILITY, and then LOCKED ( ) prior to the individual being seated in the chair.
WIDTH AND HEIGHT ADJUSTMENT:
1. Make sure the left (L) and right (R) back shell hardware are on the correct side.
2. Make sure the width and height adjustment bolts are positioned the same within the horizontal slots in the triangle brackets. Use the
reference grooves above and below the horizontal slots on the triangle brackets as guides.
3. Make sure the left (L) and right (R) back shell hardware are positioned the same in the vertical slots on the back shell. Count the number of
square slots in the sliding height adjustment bar that are visible through the vertical slots in the back shell.
DEPTH AND ANGLE ADJUSTMENT:
1. If a triangle bracket will not slide, make sure the slider nut is not in position to interfere.
Adjust slider nut position if necessary.
2. Make sure that the left (L) and right (R) depths are equal. Compare the markers on the top of the triangle brackets.
3. Make sure that the left (L) and right (R) double hooks are rotated to the same angle. Compare the markers on the front of both double hooks.
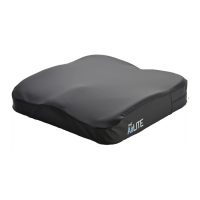
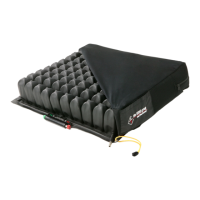
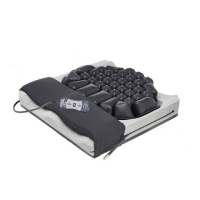
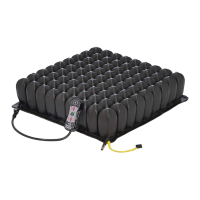
Problem with the air insert, check the following:
1. If the air insert is not holding air, make sure the valve is tightly closed by turning the valve clockwise. If still not holding air, visibly check for
holes. If no holes are visible, close the valve and immerse the air insert in a sink or tub of water and look for air bubbles. If ‘pin-hole,’ sized
holes are found, air dry the insert completely and then use the repair kit that came with the product and follow the repair kit
instructions. If large holes or other leaks are found, see LIMITED WARRANTY Section.
2. If the air insert is not comfortable, add or remove air to adjust to your comfort level. (see TO ADJUST THE AIR INSERT). Make sure air cells are
facing the front of the wheelchair and the cover is properly positioned (see TO INSTALL THE COVER and TO INSTALL THE FOAM PAD WITH AIR
INSERT).
3. If the air insert slides inside the cover, make sure it is properly positioned and the fabric back is secured to the fastener strip in the cutout
area of the foam pad (see TO INSTALL THE FOAM PAD WITH AIR INSERT). The perimeter of the air insert should be tucked in between the foam
layers around the edge of the cutout area.
TROUBLESHOOTING
MAINTENANCE
L R