39
7. Remove the two protective wooden slats [h] (see the
illustration above).
8. Set up the piano body in a vertical position and so that it
rests on the remaining styrofoam protectors [i].
1
2
3
[i]
A
A
A
Space: 3mm
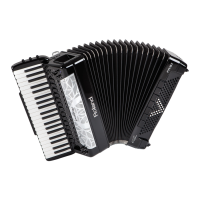
9. Install the rst side board ([2] or [3]) by carefully aligning it
with the piano body.
10. Secure the side board [2] or [3] to the body [1] using two
of the large screws [A] and a Philips appropriate size
screwdriver.
You may need to slightly lift the piano body to be able to align the
screw holes.
11. Tighten the large screws [A] up to a point where they still
protrude about 3mm (see the illustration above).
12. Repeat steps (9)~(11) for the other side board.
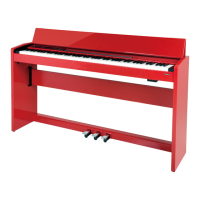
13. Set the piano upright, and hold it in such a way that the side
boards cannot slip and scratch the oor.
14. Remove the three styrofoam protectors [i] surrounding the
piano body [1] (see the illustration above).
15. Slide the rear board [4] from the back between the side
boards and tighten the upper large screws [A] on either side
using a Philips appropriate size screwdriver.
Do not tighten them too strongly at this time.
A
A
4
16. Attach the lower large screws [A] on either side without
tightening them too much.
17. Attach the stabilizers [F] to the side boards and tighten the
small screws [B]. Securely fasten the stabilizers to their nal
tightness at this time.
F
B
F
18. Insert the pedal board [5] from the rear between the side
boards, slide it over the metal hinges on the side boards
and secure it with the two large screws [A] (one on either
side, see the illustration below).
Tighten the screws securely.
A
5
19. Securely tighten the four screws of the side boards [2] & [3]
(2 left, 2 right).
20. Securely tighten the four screws of the rear board [4] (2
above, 2 below).
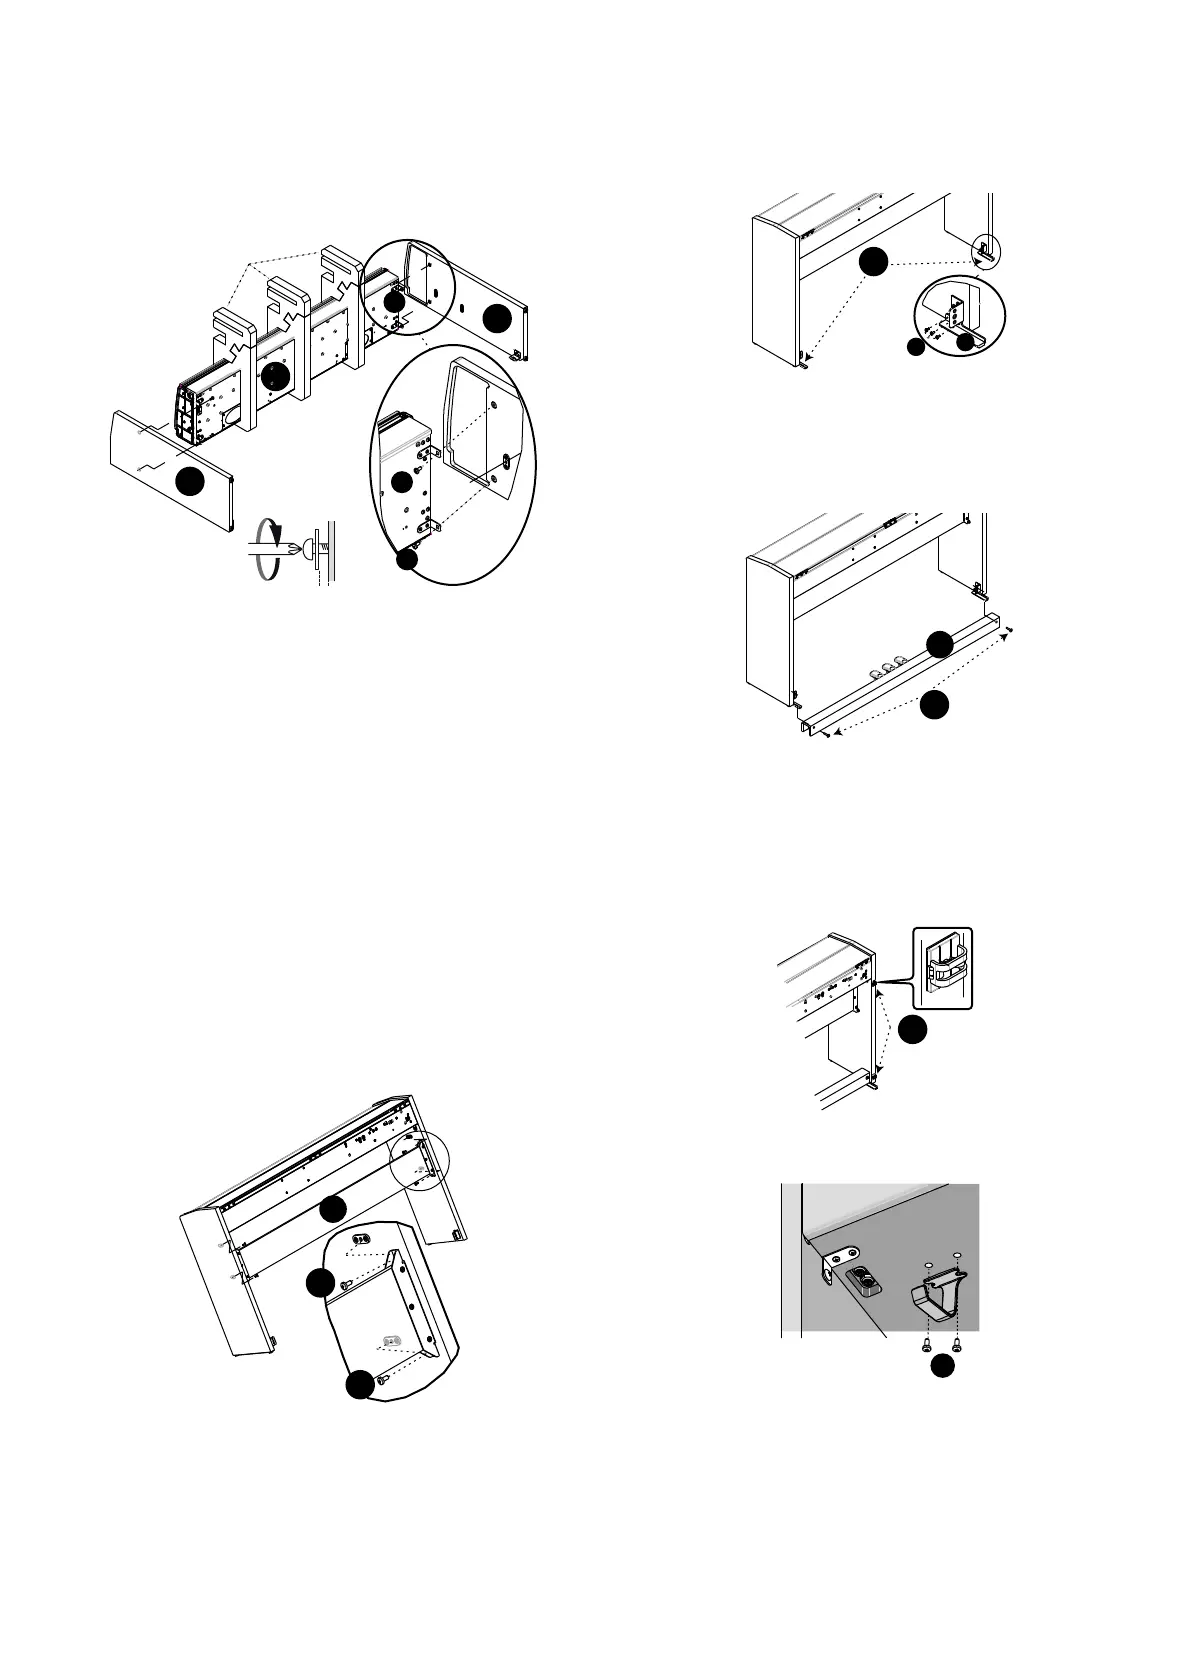
21. Install the adhesive cable clips [D] at the back of the left
side board [2] (right when viewed from the back).
D
22. Use the 2 screws (with washers) to fasten the headphone
hook.
C
 Loading...