3
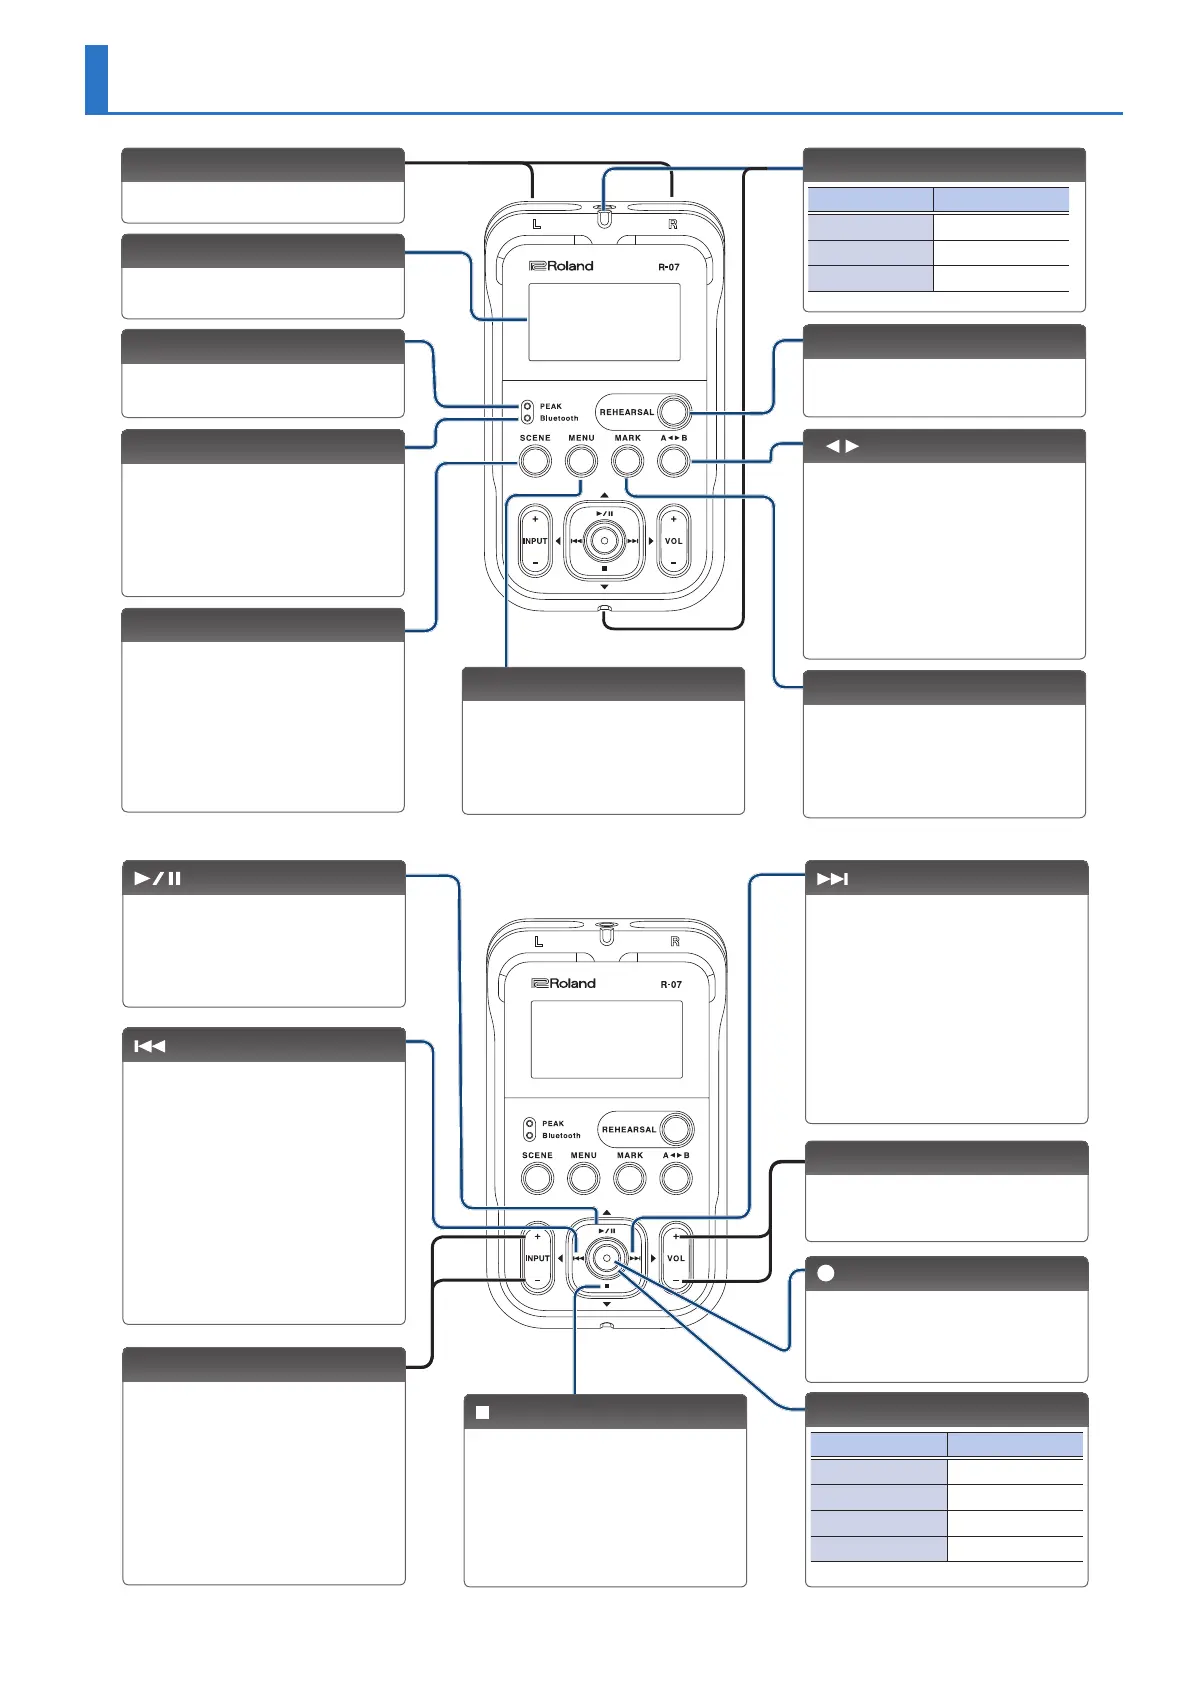
Panel Descriptions
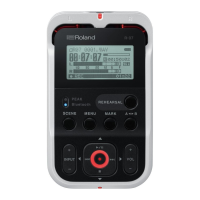
Display
This shows various types of
information for the R-07.
PEAK indicator
This will light when the input volume
is excessive.
Bluetooth indicator
This blinks when pairing with a
Bluetooth speaker or headphones
(p. 10). It is lit if the R-07 is
connected to a Bluetooth speaker
or headphones, or when the remote
control is on (p. 26).
Built-in mics
This is a stereo mic built into the unit.
[SCENE] button
This button lets you switch scenes
(p. 13) that recall settings suitable for a
specic recording situation.
Long-press this button to ip the
display vertically.
[MENU] button
This button lets you make various
settings for the R-07, such as
recording/playback settings and
specifying the date and time.
[REHEARSAL] button
This button automatically sets the
appropriate recording level (p. 18).
[MARK] button
For a WAV le, you can press this
button to add a mark at a desired
location (p. 23). If you press this
button at a marked location, the mark
is removed.
Remote indicator
Operation Status
Lit Recording
Blinking (slow) Record-standby
Blinking (fast) Input overload
[A B] button
This button lets you repeatedly play
between two points (the A–B region)
of a le (p. 23). When you assign an
“A” marker and “B” marker in the le,
playback will repeat between the “A”
and “B” markers. Pressing the button
the rst time assigns the “A” marker,
and pressing it a second time assigns
the “B” marker.
[ ] button
Press this button to select the next le.
For a WAV le that contains marks, this
button advances to the next mark. By
holding down this button, you can
fast-forward through the le.
You can do this during playback or
while stopped.
This button also moves the cursor to
the right in the screen, or changes the
value of the selected item.
[ ] button
Press this button to move to the
beginning of the le, or to select
the previous le. For a WAV le that
contains marks, this button returns to
the previous mark. By holding down
this button, you can rewind through
the le.
You can do this during playback or
while stopped.
This button also moves the cursor to
the left in the screen, or changes the
value of the selected item.
INPUT [+] [–] buttons
These buttons adjust the level of the
audio that’s being input via the built-
in mics or the MIC/AUX IN jack.
Pressing [+] will increase the input
level. Pressing [–] will decrease the
input level.
You can change the playback speed
by pressing these buttons during
playback (p. 24).
[ ] button
Press this button to start playback, or
to pause playback or recording.
This button also moves the cursor
upward in the screen, or changes the
value of the selected item.
[ ] button
This button stops playback or
recording.
This button also moves the cursor
downward in the screen, or changes
the value of the selected item.
VOL [+] [–] buttons
These buttons adjust the volume that
is output from the built-in speaker, the
PHONES jack or the Bluetooth device.
REC/PLAY indicator
Operation Status
Lit red Recording
Blinking red Record-standby
Lit green Playing
Blinking green Play-standby
[ ] button
Press this button to enter recording-
standby mode or to begin recording.
You’ll also use this button to conrm
a selection.
 Loading...