
R
Rachel RichardsonSep 23, 2025
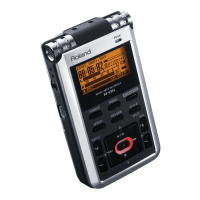
Why can’t I divide or combine projects on my Roland R-26?
- KKathy CarpenterSep 23, 2025
If you can’t divide or combine projects on your Roland Recording Equipment, the SD card must have twice as much free space as occupied by the corresponding project(s). Free up enough space on the SD card.