Playback
64
Assigning Markers in a
Project
You can assign markers to the desired
locations in a project, and then jump easily
to those locations.
* Markers cannot be assigned to an MP3
format project.
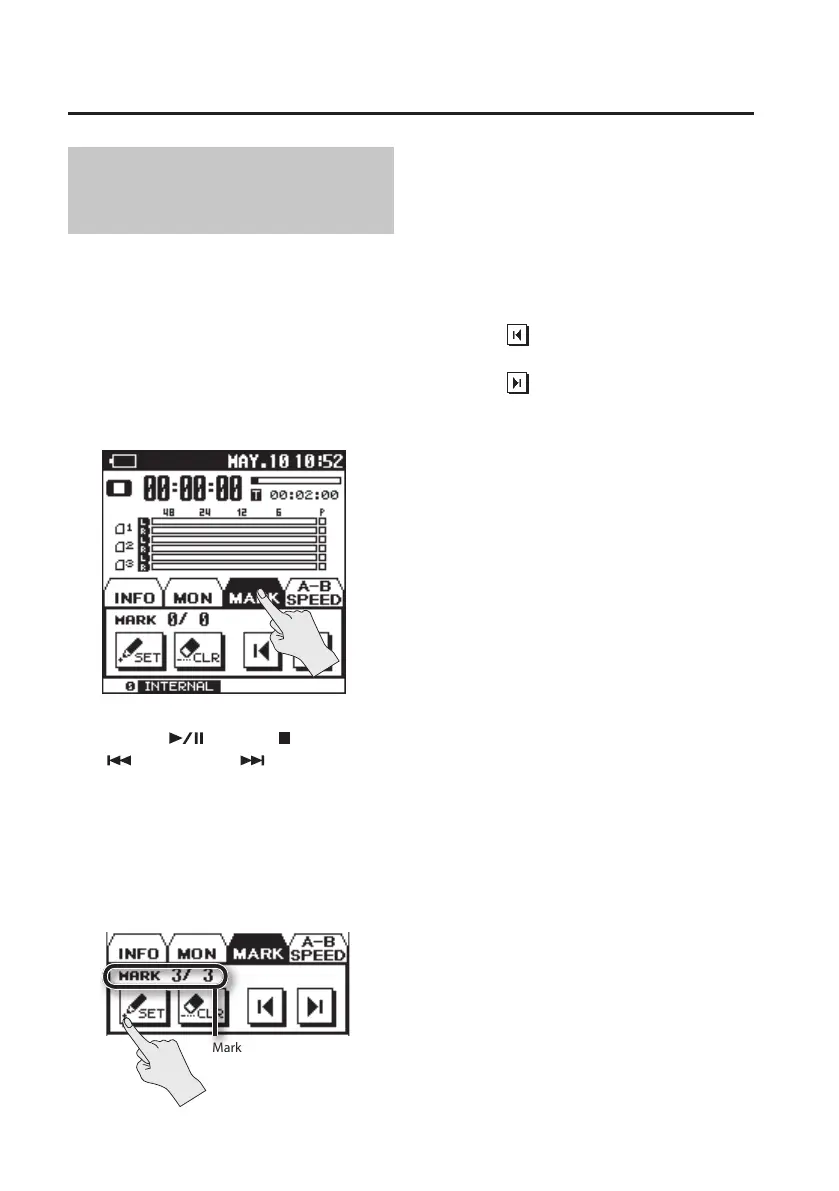
1. In the main screen, touch the MARK
tab.
2. Use the [ ] button, [ ] button,
[ ] button, and [ ] button to play,
fast-forward, or fast-reverse to nd
the location at which you want to
assign a marker.
3. When you’ve found the location at
which you want to assign a marker,
touch <SET>.
Marker indication
(number of markers
passed/number of
markers in the project)
The number of markers will be shown.
Markers are numbered sequentially starting
at the beginning of the project.
A maximum of 99 markers can be assigned.
Repeat steps 2 and 3 to assign markers at
the desired locations.
Moving to a marker
Touch to move to the marker that
precedes the current location.
Touch
to move to the marker that
follows the current location.
Deleting a marker
Touch the CLEAR icon to delete a marker
you’ve assigned. Markers will be deleted
starting with the marker that precedes the
current location.
 Loading...