OPERATIONAL MAINTENANCE
7‑2
OM1R-SM-GB01R
7 Operational maintenance
7.1 Fuses and relays
The electrical distribution cupboard containing the
fuses and relay is mounted at the left‑hand front of the
bodywork. It is pivoted at its bottom outer corner and
held in its stowed position by a gas strut at the bottom
and an anti‑loose clip at the top.
To access the fuses and relays:
1. Immobilise the vehicle ‑ (see ‘1.2 Immobilising
the vehicle prior to service procedures’ on page
1‑3).
2. Release the anti‑loose clip (see Fig. 7‑1 ,1).
3. Pull the electrical distribution cupboard outwards
(see Fig. 7‑1, 2).
4. Unlatch the cover and lower it (see Fig. 7‑1, 3).
5. Unscrew the bolts securing the access door and
open it (see Fig. 7‑1 ,4).
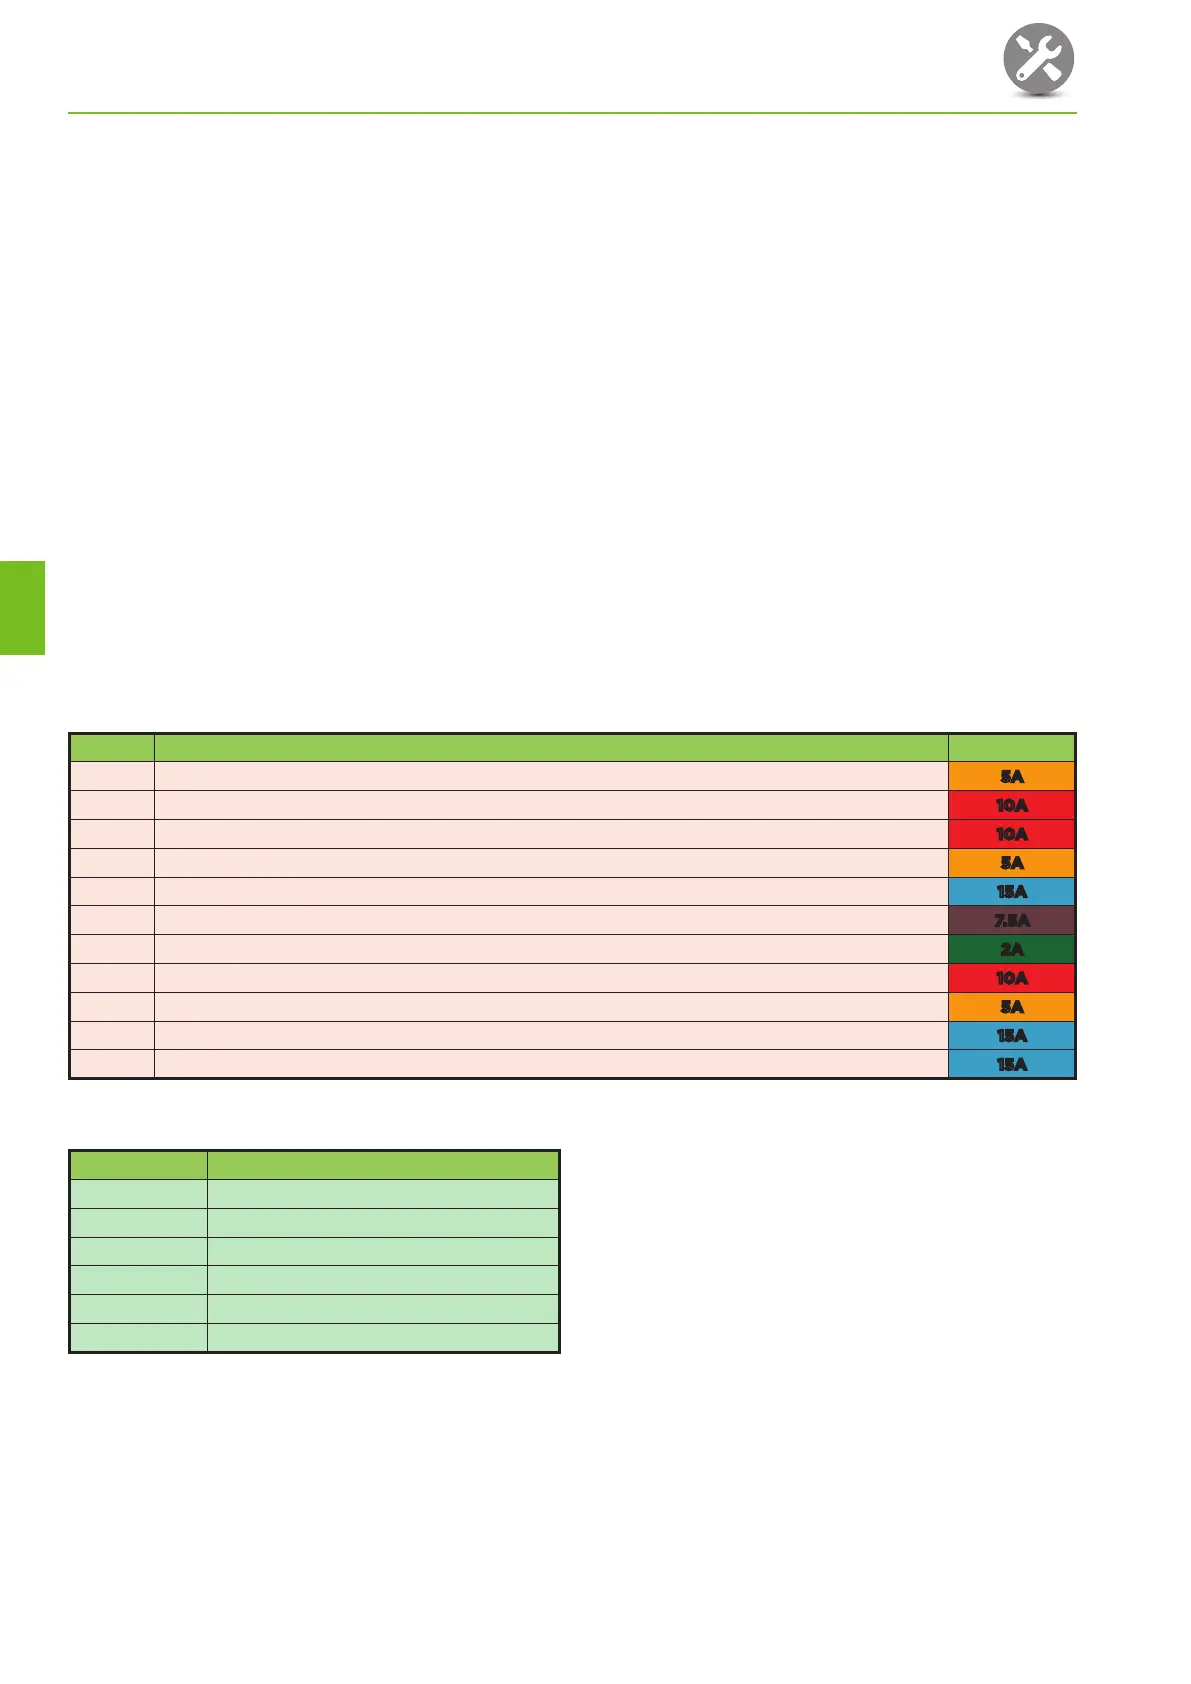
Fuses
Fuse Function Fuse rating
F11 Sensors and control push‑buttons.
5A
F10 Spare.
10A
F9 Spare.
10A
F8 Rear view camera.
5A
F7 Controller outputs.
15A
F6 Waste container lifting device.
7.5A
F5 Controller inputs.
2A
F4 Options.
10A
F3 Option work lamps.
5A
F2 Rear work lamps.
15A
F1 Warning beacons.
15A
Relays
Relay Function
SPR1 Spare relay.
SPR2 Spare relay.
CS Control panel selection relay.
BR Beacon relay.
RW Work lamp relay.
HL Hopper lamp relay.
7