Versionwith
overload clutch
Up to
eccenter collar for
fuel
pump,
there
is no
difference
to
version without overload
clutch.
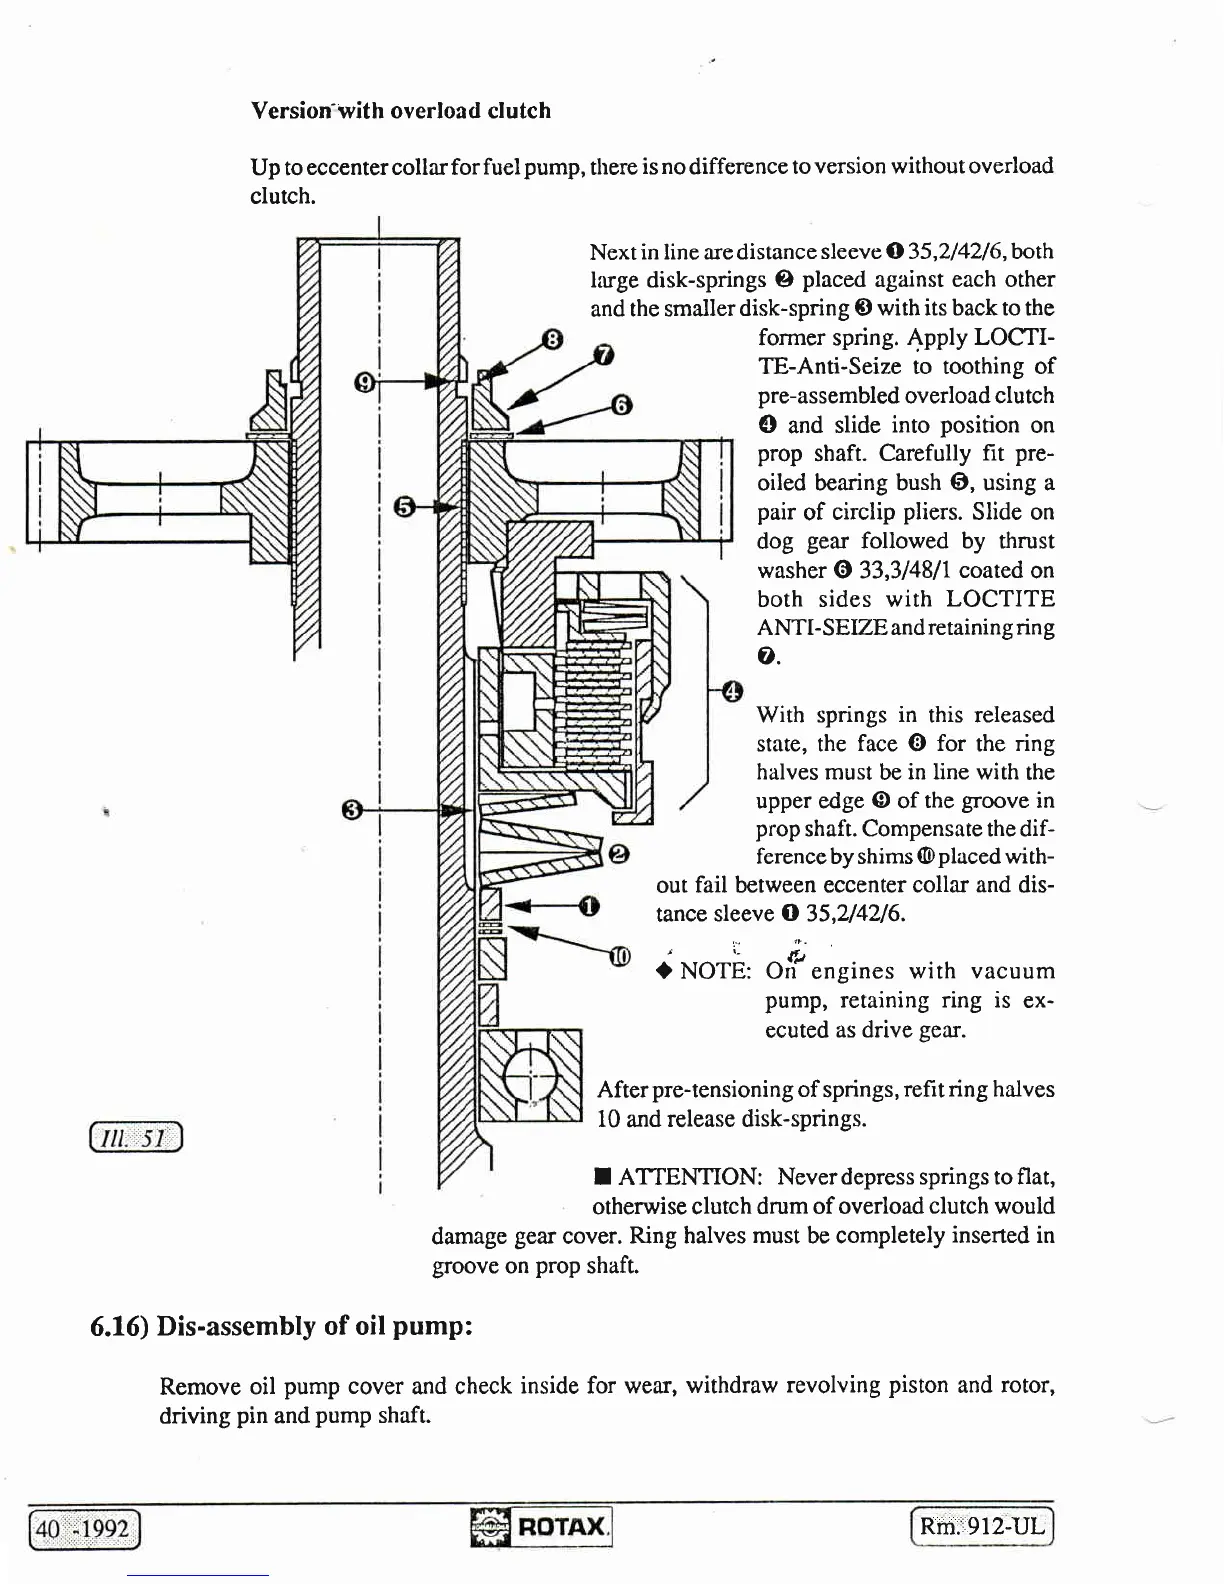
Next
in line are distance
sleeve O35,2/4216, both
liuge disk-springs I
placed
against each other
and
the smaller
disk-spring @
with its back to the
former spring.
4pply
LOCTI-
TE-Anti-Seize to toothing of
pre-assembled
overload clutch
O
and
slide
into
position
on
prop
shaft.
Carefully
fit
pre-
oiled bearing bush 6, using a
pair
of
circlip
pliers.
Slide on
dog
gear
followed by thrust
washer
@ 33,314811
coated
on
both sides with
LOCTITE
ANTI-SEZE and retaining rin
g
o.
With springs
in
this released
state, the
face
@
for
the
ring
halves must
be
in line with
the
upper edge
O
of
the
groove
in
prop
shaft. Compensate the dif-
ference by shims
(Dplaced
with-
out
fail between eccenter collar
and
dis-
tance
sleeve
O
35,2142/6.
|
'|-
J
r.
E,
t
NOTE:
Oil engines
with
vacuum
pump,
retaining ring is
ex-
ecuted
as drive
gear.
Afterpre-tensioning
of
springs,
refit ring halves
10
and
release disk-springs.
I ATTENTION:
Neverdepress springs toflat,
otherwise clutch
drum of overload
clutch would
damage
gear
cover.
Ring halves
must
be completely
inserted
in
groove
on
prop
shaft.
6.16)
Dis-assembly
of oil
pump:
Remove
oil
pump
cover
and check
inside for wear,
withdraw
revolving
piston
and
rotor,
driving
pin
and
pump
shaft.
Rm:'i912-UL

 Loading...


