22
FA ROTEX HPSU compact 4 - 06/2015
4 x Set-up and installation
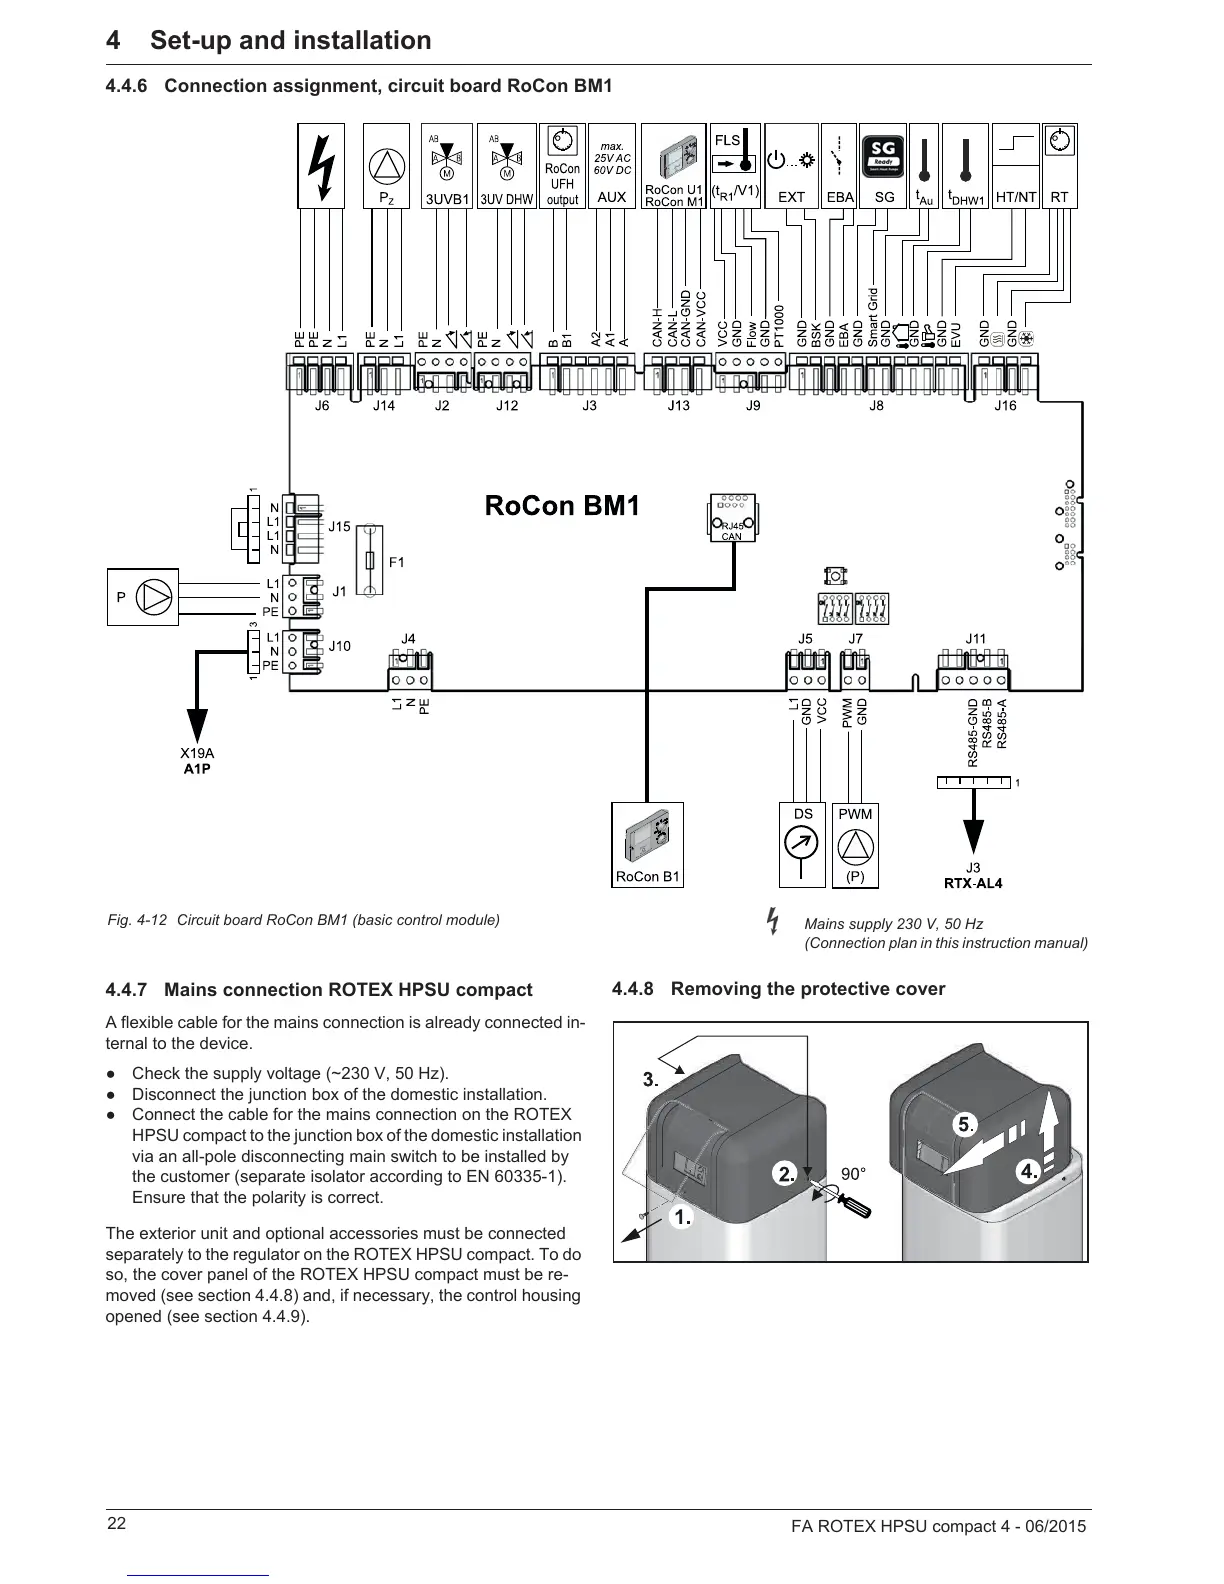
4.4.6 Connection assignment, circuit board RoCon BM1
4.4.7 Mains connection ROTEX HPSU compact
A flexible cable for the mains connection is already connected in-
ternal to the device.
Ɣ Check the supply voltage (~230 V, 50 Hz).
Ɣ Disconnect the junction box of the domestic installation.
Ɣ C
onnect the cable for the mains connection on the ROTEX
HPSU compact to the junction box of the domestic installation
via an all-pole disconnecting main switch to be installed by
the customer (separate isolator according to EN 60335-1).
En
sure that the polarity is correct.
The exterior unit and optional accessories must be connected
sep
arately to the regulator on the ROTEX HPSU compact. To do
so, the cover panel of the ROTEX HPSU compact must be re-
moved (see section 4.4.8) and, if necessary, the control housing
opened (see section 4.4.9).
4.4.8 Removing the protective cover
Fig. 4-12 Circuit board RoCon BM1 (basic control module)
Mains supply 230 V, 50 Hz
(Connection plan in this instruction manual)
Fig. 4-13 Unscrew/loosen screws, lift the cover at the back and remove
in a forwards direction.
 Loading...