7 x Service and maintenance
BA ROTEX HPSU compact 4 - 09/2013
41
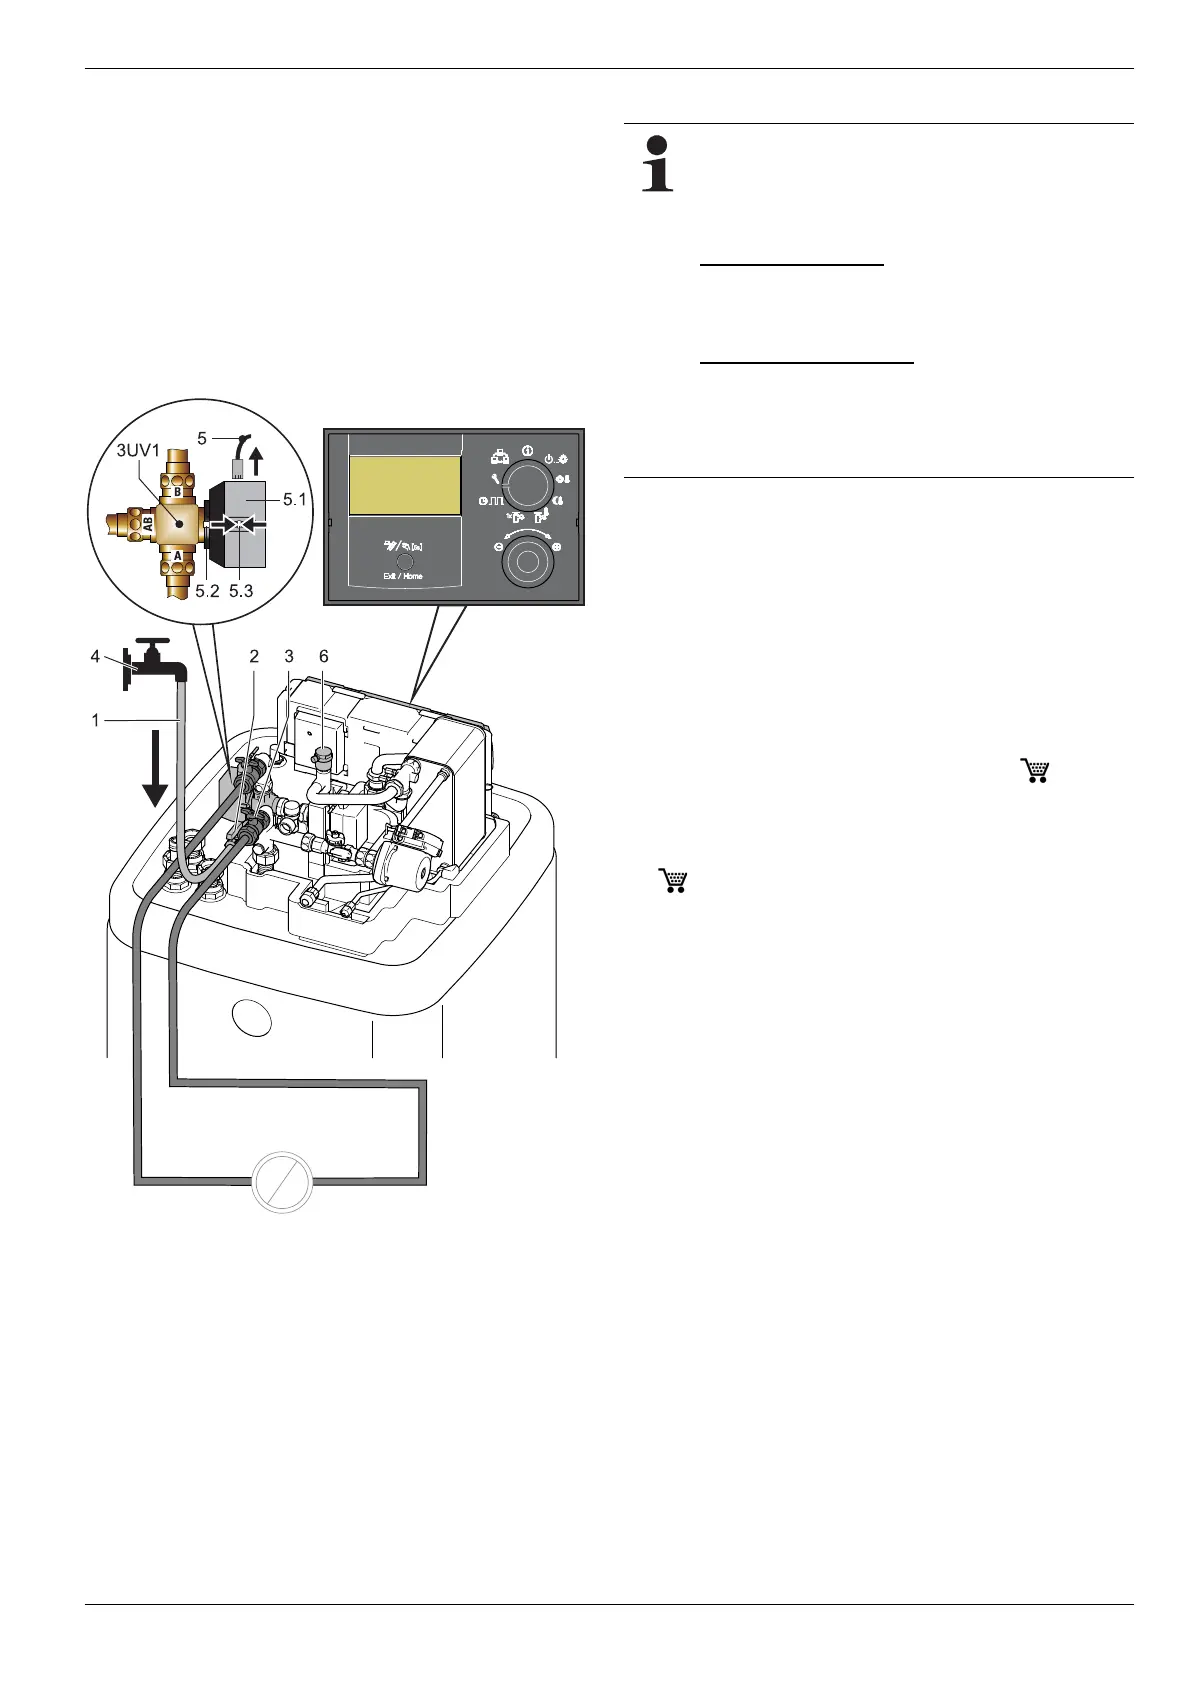
13. Bleed the entire heating network (open the regulation valve.
At the same time the underfloor heating system can be filled
and flushed with the underfloor heating distributor.).
14. In
spect the water pressure at the external pressure gauge
again. Where necessary, refill with water via the KFE cock
(fig. 7-3, pos. 2).
15. Close the water cock (fig. 7-3, pos. 4) in the supply line.
16. Disconnect the filler hose (fig. 7-3, pos. 1) with flow-back
preventer from the KFE cock (fig. 7-3, pos. 2).
17. After commissioning, re-connect the electrical plug connector
on the 3-way switching valve (3UV1) (fig. 7-3, pos. 5) on the
valve actuator (fig. 7-3, pos. 5.1).
1 Filler hose
2 KFE c
ock
3 Ball c
ock
4 Water
cock
5 Electrical plug connection
5.1 Valve drive
5.2 Unlocking button
of the drive
lock
5.3 Hand lever
6 Automatic bleeder
3UV1
3-way switch valve
Fig. 7-3 Filling the heating circuit
7.5 Filling and topping up the storage tank
The safety settings of the HPSU compact hinder the
operation of the heat pump if
– the outdoor temperature is < 12 °C and simultane-
ously
– the storage tank temperature is < 30 °C.
Without backup heater:
With an outdoor temperature < 12 °C, the storage tank
water needs to be heated up by an external heater to
> 30 °C.
With backup heater (BUH):
With an outdoor temperature < 12 °C and a storage tank
tempe
rature < 35 °C, the backup heater (BUH) is
switched on automatically on in order to heat up the
storage tank water to > 30 °C.
Without installed solar system
● Connect the filling hose with backflush prevention (1/2") to
the connection "DrainBack Solar - feed" (see fig. 7-4,
pos. 1).
● Fi
ll the storage tank on the HPSU compact until water
comes out of the connection (fig. 7-4, pos
. 23), that has
been connected as the safety overflow.
● Disconnect the filling hose with backflush prevention (1/2")
again.
With KFE filling connection or with installed solar
system
● Without solar system: KFE filling connection ( 16 52 15)
to the filling and drain connection of the HPSU compact
(fig. 2-2 to fig. 2-5, pos. 10)
or
With the solar system: Fit the KFE fil
ling connection
(
16 52 12) to the bracket of the Solaris regulating and
pump unit (RPS3).
● Connect the filling hose with backflush prevention (1/2") to
the previously installed KFE cock.
● Fi
ll the storage tank on the HPSU compact until water
comes out of the connection (fig. 7-4, pos
. 23), that has
been connected as the safety overflow.
● Disco
nnect the filling hose with backflush prevention (1/2")
again.