Maintenance
4-21
HP6A Manual
Float and Clamp:
Float
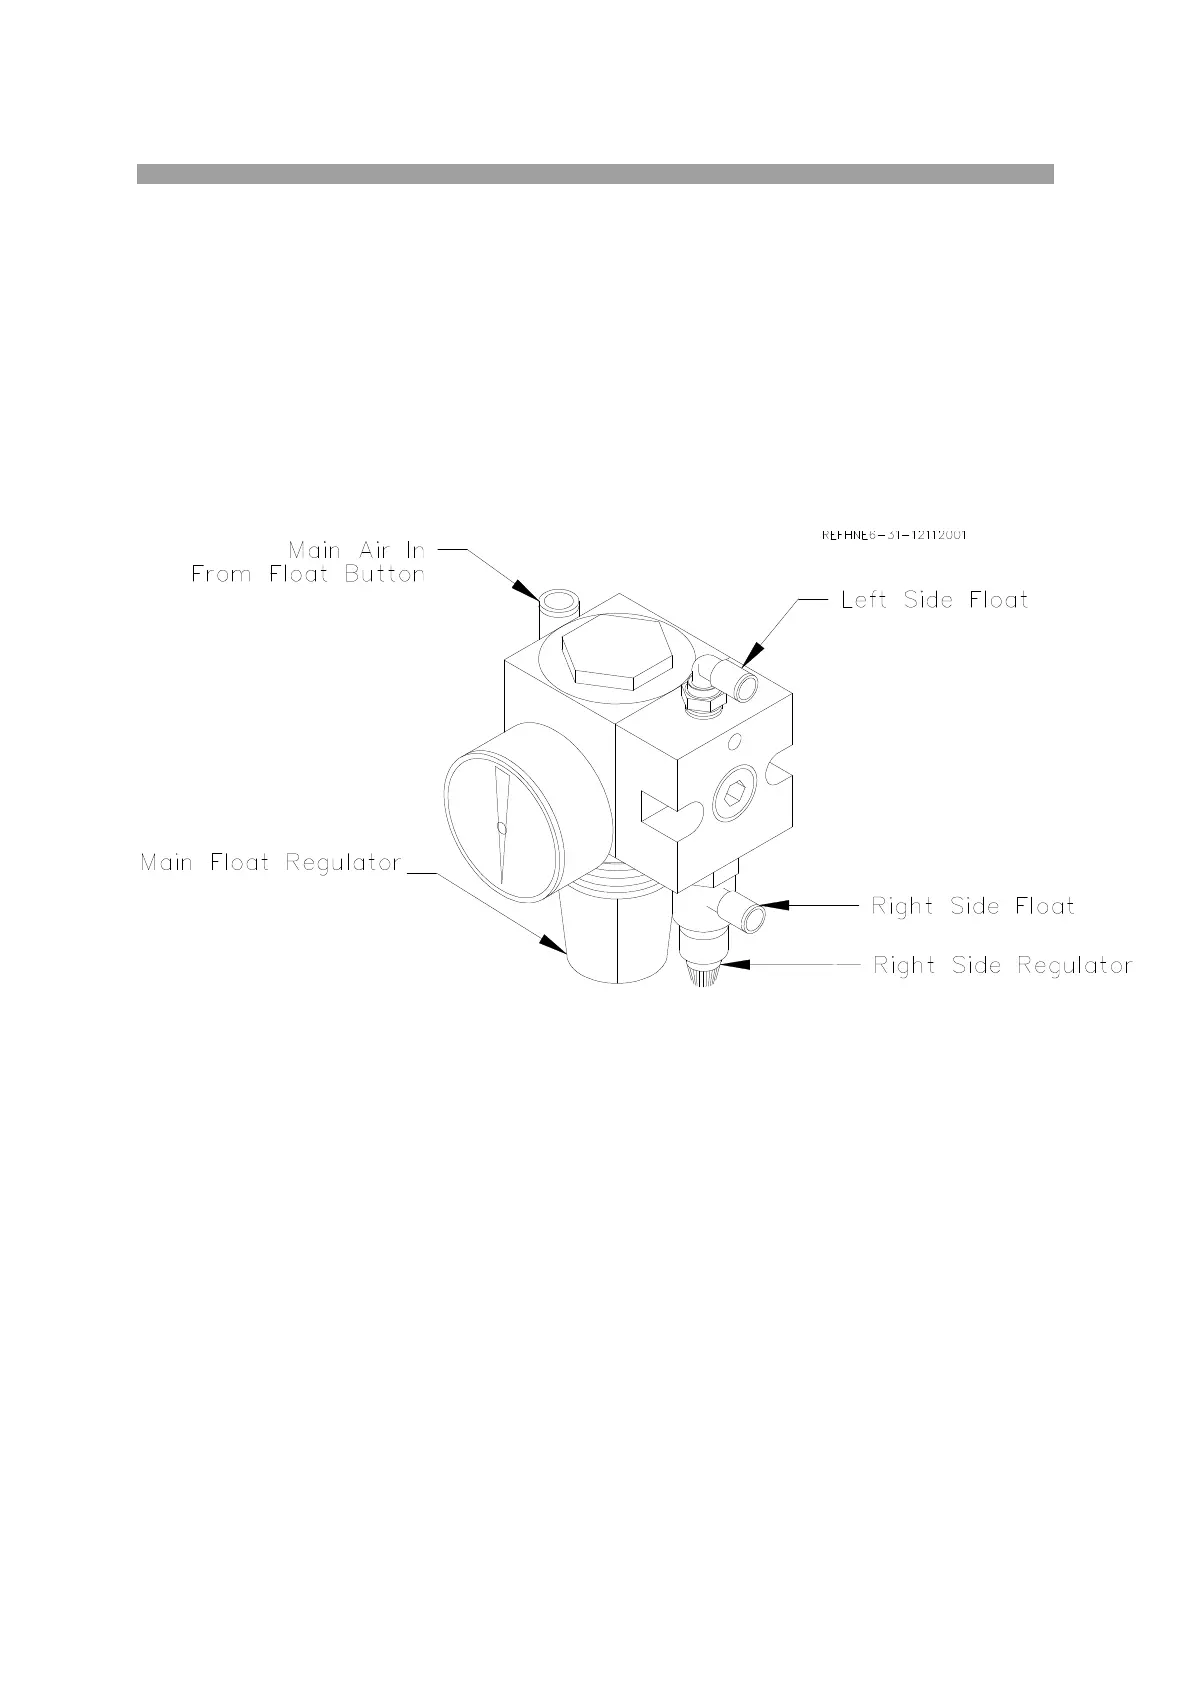
Press the air float button, located on the right hand side of the carriage. This allows air to flow to the main
float regulator. This regulator sets the pressure that goes to the left side float plate. It also sets the
pressure that goes to the right side regulator. From the right side regulator the air goes to the right side
float plate. Set the Main Float regulator to 20 – 25 PSI. When pressing the float button you should be
able to hear air coming from the bottom of the carriage base. If the air flow is uneven or comes out in
bursts lower the air pressure slightly until the flow evens out. Then adjust the Right Side Regulator until
you get a nice even float of the carriage. It may take a few times to get used to the adjustment.
Note: The float characteristic will change as the Rocker arm is raised and lowered as it changes
the center of gravity of the carriage. Make the float adjustment with the Rocker Arm in the
position you most be floating the carriage from cylinder to cylinder.
NOTE: Hone will not float correctly unless Carriage clamp is adjusted properly.
Clamp
With the carriage clamped (float button not depressed). The air flows from the float button to the air
clamp cylinder. This cylinder lifts the clamp lever, which pulls up on key in t-slot. It may be necessary to
adjust the air clamp system after the machine is installed.
Remove the four screws securing the carriage cover plate. Remove the cover. Disconnect the air supply.
Remove the Cotter Key from the Castle Nut located in the center of the carriage. Back the nut off and
then hand tighten. Loosen nut approximately 1/4 turn. Insert cotter pin. Reconnect air supply. If the rod
of either clamp cylinder sticks in the up position, turn nut one notch tighter until rod no longer stick. This
means the clamp cylinder rod was over extended.