Do you have a question about the RVS AIR VUE RVS-7MCM and is the answer not in the manual?
Lists included items in the product package.
Precautions and warnings related to product installation.
Environmental, handling, and care guidelines for the monitor.
Guidelines for operating the system safely.
Detailed explanation of remote control buttons and functions.
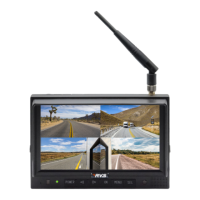
Overview of the monitor's main interface and touch screen gestures.
Instructions for navigating the home menu and its icons.
How to adjust the audio volume and mute the system.
How to adjust screen brightness and auto dim settings.
Explanation of different display modes and split setup access.
Detailed settings for multi-camera display layouts and audio configuration.
How to select the CVBS video output mode.
Access point for various system configuration menus.
Settings for individual camera channels like mirroring, power, audio, and image adjustments.
On-screen keyboard for editing camera channel names.
How to enable, disable, or auto-display parking lines.
Procedure for adjusting the shape and position of parking lines.
How to change the system display language.
Configuration for trigger inputs, delay, priority, and display images.
Input interface for setting trigger delay values.
Interface for setting camera trigger priority levels.
Selecting preferred display images for trigger events.
Configuration for automatic scanning of camera channels.
Settings for display behavior upon system startup.
Automatic or manual configuration of camera input formats.
Interface for selecting video format and resolution.
System settings including dimmer, menu lock, and buzzer options.
Configuration for automatic screen brightness adjustment based on ambient light.
Steps for connecting the wireless camera transmitter and display.
Visual representation of wiring and component connections.
Status indicators and messages for wireless channel pairing.
Process for obtaining warranty repairs.
Limitations and exclusions of warranty coverage.
| Screen Size | 7 inches |
|---|---|
| Type | TFT LCD |
| Resolution | 800 x 480 pixels |
| Video System | NTSC/PAL |
| Touch Screen | No |
| Contrast Ratio | 500:1 |
| Power Supply | 12V DC |
| Aspect Ratio | 16:9 |
| Response Time | 30 ms |
| Brightness | 400 cd/m² |
| Viewing Angle | U: 50°, D: 60°, L/R: 70° |
| Operating Temperature | -20°C to 60°C |
| Weight | 0.5 kg |
| Storage Temperature | -30°C to 70°C |