English
7
20
7.5 Coffee Grind Adjustment
Regardless of the coffee blend, a very fine
grind (notch on low values) increases the
density, the crema quantity and the
brewing time of the beverage. On the
contrary, a coarse grind (notch on high
values) decreases the density, the crema
and the brewing time.
Do not turn the knob counter-clockwise
to the limit stop. This operation causes the
grinders tightening and the consequent
machine block.
In case a foreign body in the coffee blend
causes the grinders block and,
subsequently, the block of the machine
(the display will show: “Grinder error”),
contact an Authorised Service Centre.
The grinding is pre-set by the manufacturer on standard values, but it
can be changed with the following procedure:
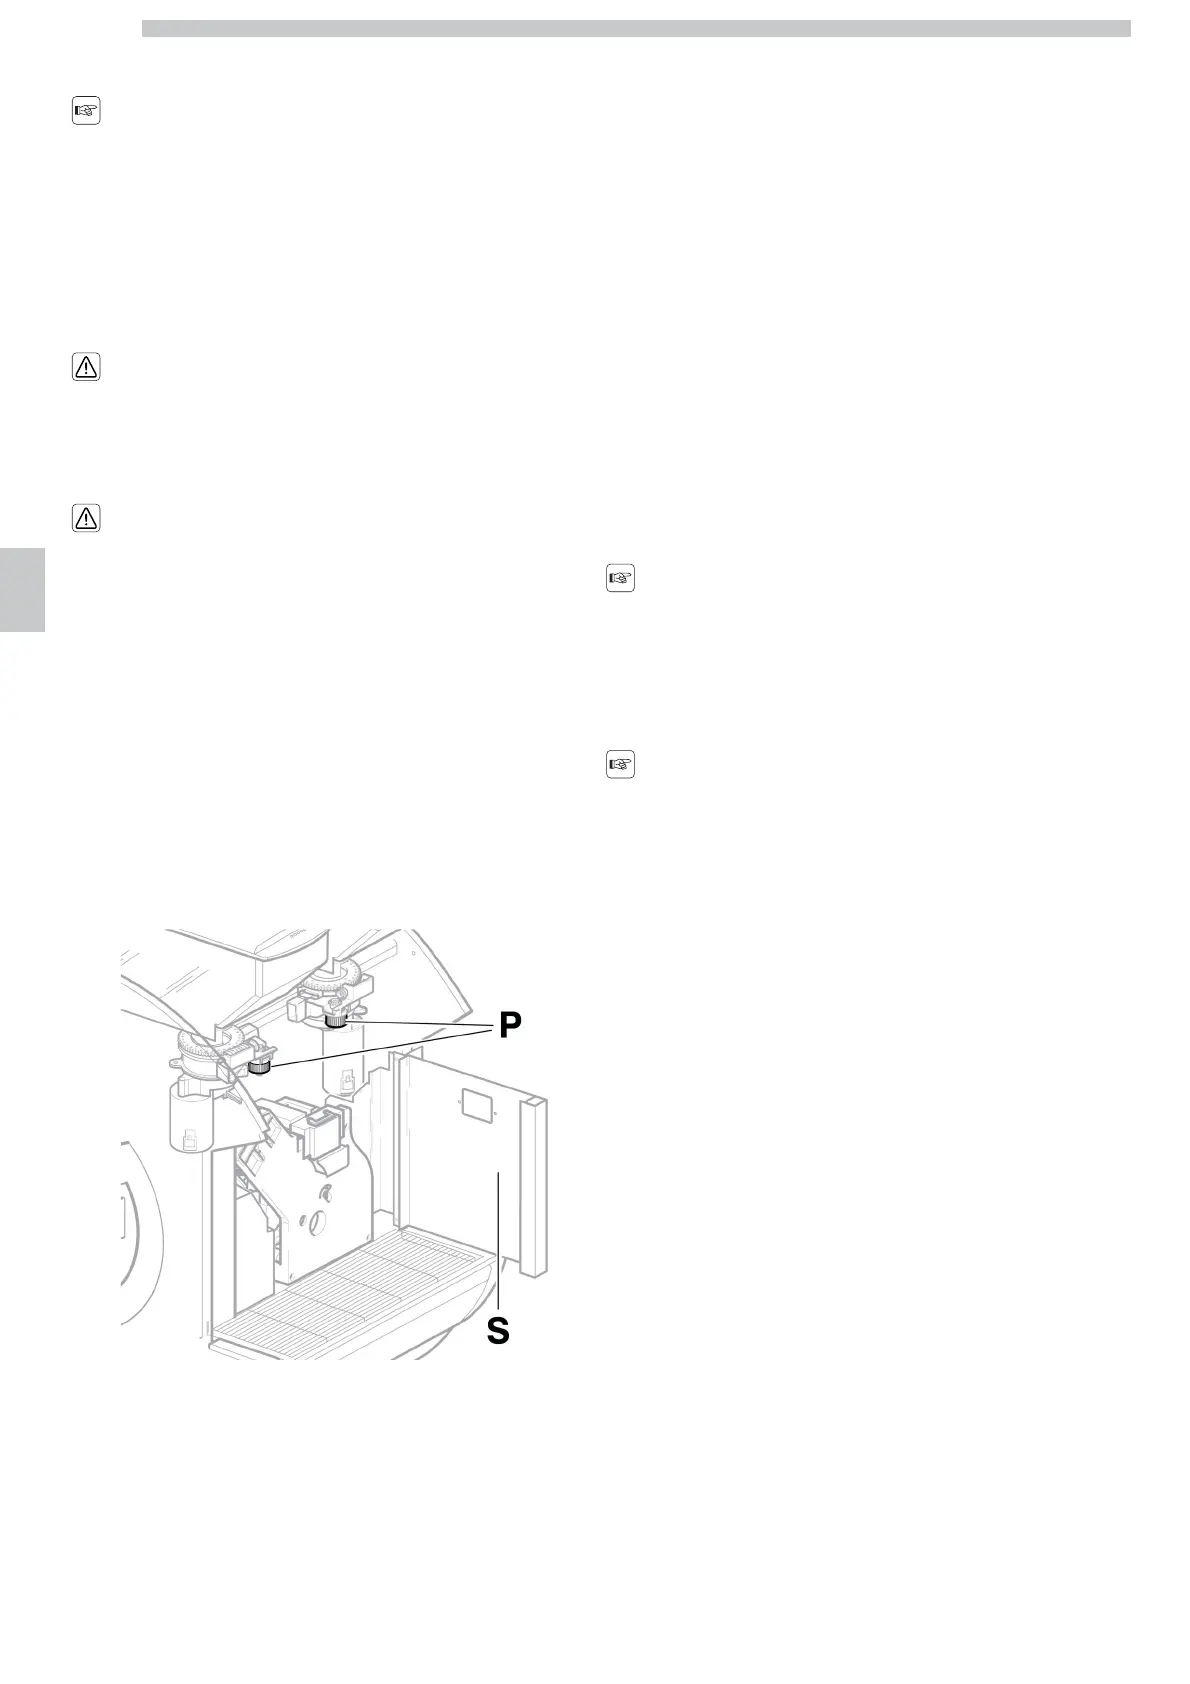
• Open the door, rotate the knob counter-clockwise to set a finer
grind (the notch moves on a lower value), or clockwise to set a
coarser grind (the notch moves to a higher value). Use the 10 mm
wrench supplied as an accessory to perform adjustment.
P Adjustment knob
S Door
7.6 First Appliance Start-up
• Check if the removable components are correctly placed and if the
door is closed.
Otherwise, when the machine is switched-on, the display will indicate
which component is in the wrong position.
• Refill the appliance (follow the instructions above) and connect the
plug to the electric network (see section “Connection to the Electric
Network”).
• Turn the all-pole switch to “I”.
• Switch on the machine by means of the power button.
The message “HEATING WAIT” will be displayed.
Once the warm-up phase is over, the display will show: “READY FOR
USE”.
• Adjust the dispensing spout so as to obtain the suitable height for the
containers used.
• Place one or two containers under the dispensing spout.
• Press the button corresponding to the beverage selected.
Although all buttons are previously
programmed on standard values, check if
the dispensed beverage has the desired
features.
If not, brew buttons must be
reprogrammed (see chapter “Brew
Buttons Programming”).
7.7 Washing the Parts coming into Contact with Food
Wash all appliance parts coming into contact with food.
• Thoroughly wash your hands.
• Prepare a chlorine-based, antibacterial disinfecting solution (the
products can be purchased at the chemist's) following the
concentrations indicated on the product.
• Remove all product containers from the appliance.
• Remove the container lids and product chutes. Immerse all these
parts in the previously prepared solution.
7.8 Using the Appliance
The beverage selection modes are indicated in chapter "Operation
and Use".




 To Next Page