4 Disassembly and Assembly
4-2 SAM4S ER-350 SERIES
4-1 Disassembling the Case Upper Block
4-1-2 ERP-200N Printer Disassembling
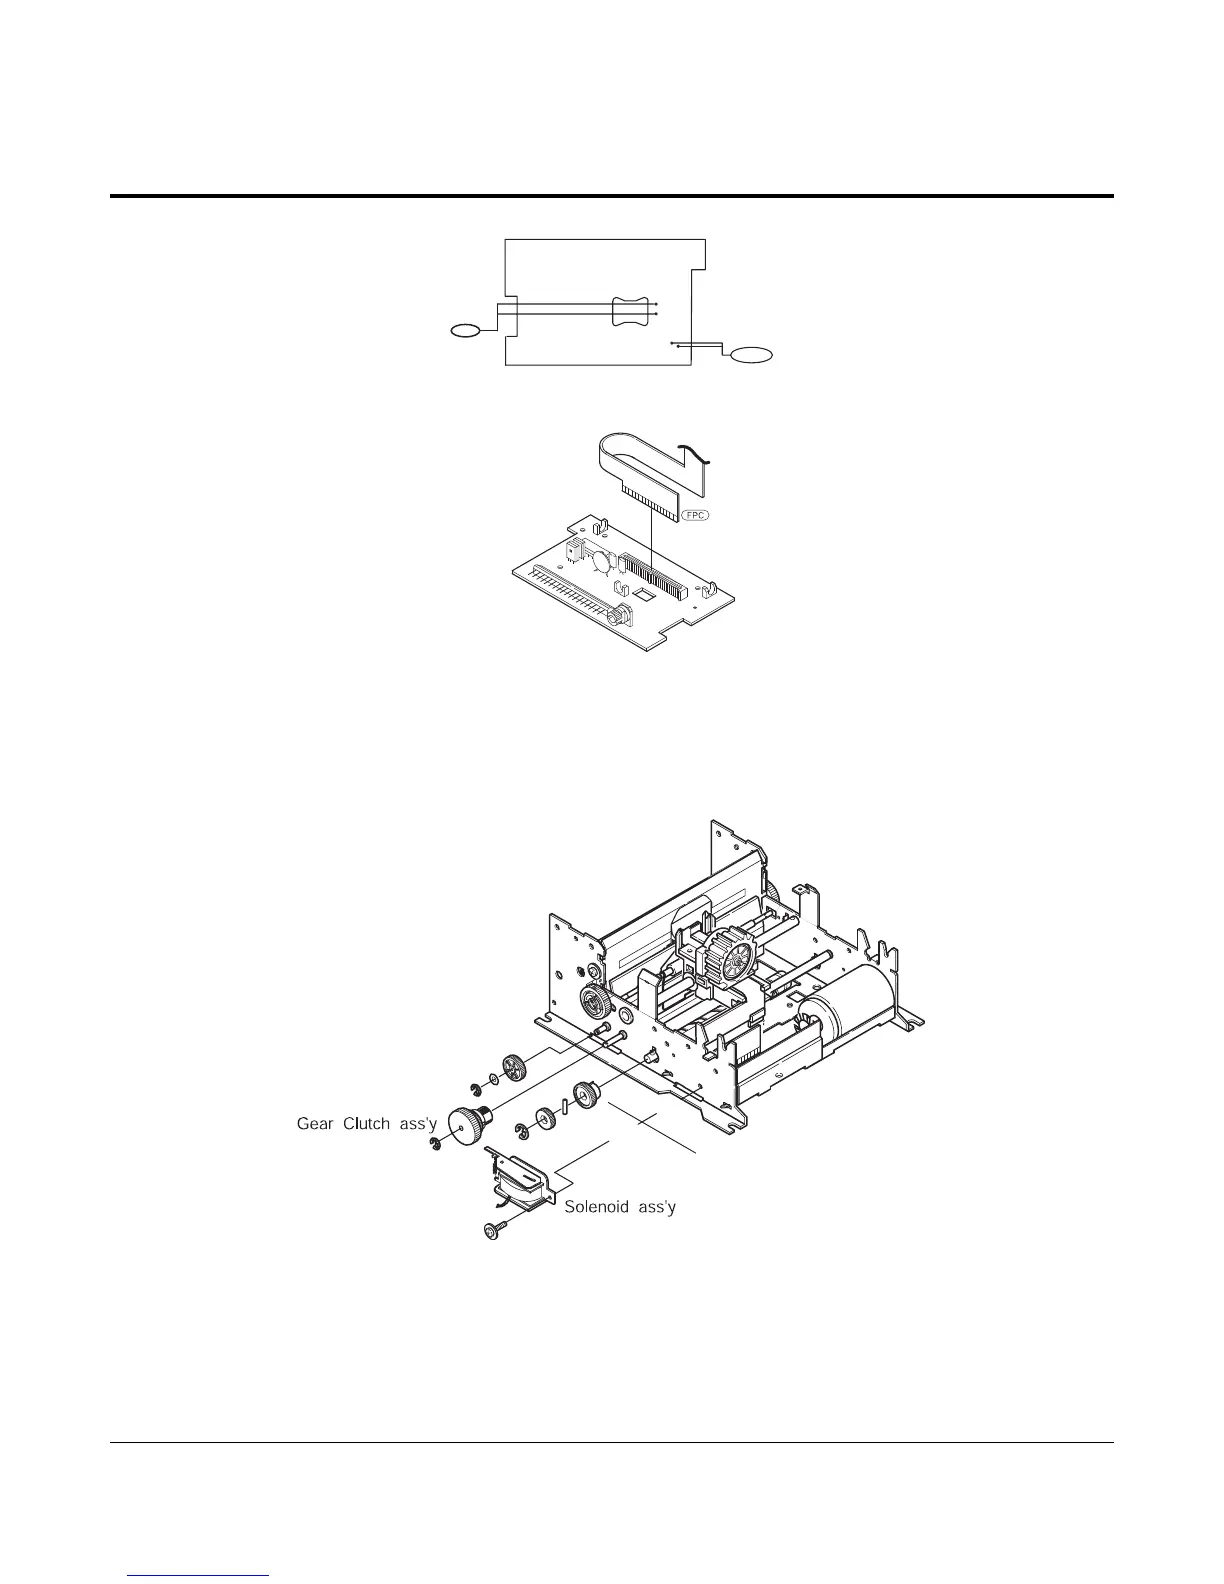
M+
M-
Motor
Solenoid
S-
S+
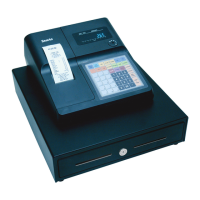
Figure 4-3
4. Separate the FPC of head from the connector on the Printer PCB.(Figure4-3)
5. Separate the Motor Wire and Solenoid Wire under the Printer PCB. (Figure4-3)
6. Remove the 3 screws under the Printer PCB for separating the PCB from the Frame Assembly. (Figure4-3)
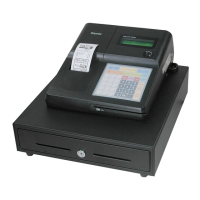
Gear PF Idle
RE(2.5)
PWS(2.6)
RE(2.5)
RE(4.0)
Gear Ratchet
Gear HF-2
PP
Figure 4-4 Disassembling Clutch Assembly
7. Dissemble the Gear Clutch assy and the Gear PF idle from the Shafts.(Figure4-4)
8. Dissemble the Solenoid assy from the Frame Assembly. (Figure4-4)
9. After disassembling the Gear HF-2, disassemble the PP in the Lead Cam Hole. (Figure4-4)
10. Disassemble the Gear Ratchet from the “L” part of the Lead Cam. (Figure4-4)