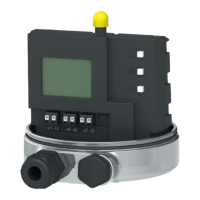
4.4 Attachment to rotary
actuators
The positioner is mounted to the rotary actu-
ator using a mounting bracket.
Refer to Table 4 on page 27 for the re-
quired mounting parts as well as the acces-
sories.
Before attaching the positioner onto the
SAMSON Type 3278 Rotary Actuator
(160 cm²) or VETEC Type S160 Actuator,
first mount the adapter (13) to the free end
of the shaft end using four screws (11, 12).
NOTICE
On attaching the positioner as described be-
low, it is imperative that the actuator's direc-
tion of rotation is observed.
1. Place follower clamp (3) on the slotted
actuator shaft or adapter (13).
2. Place coupling wheel (4) with flat side
facing the actuator on the follower
clamp (3). Refer to Fig. 12 to align slot
so that it matches the direction of rota-
tion when the valve is in its closed posi-
tion.
3. Fasten the coupling wheel (4) and fol-
lower clamp (3) tightly onto the actuator
shaft using screw (4.1) and disk spring
(4.2).
4. Mount connecting plate (6) or pressure
gauge bracket (7) with pressure gauges
to the positioner, making sure both
O-rings are seated properly.
5 Fasten the mounting bracket (10) to the
actuator using four screws (10.1).
6. Unscrew the standard follower pin (2)
from the positioner's lever M (1). Use the
metal follower pin (Ø5) included in the
mounting kit and screw tight into the
bore for pin position 90°.
7. Place positioner on the mounting bracket
(10) and screw tight. Considering the
actuator's direction of rotation, adjust le-
ver (1) so that it engages in the slot of
the coupling wheel (4) with its follower
pin (see Fig. 13). It must be guaranteed
that the lever (1) is parallel to the long
side of the positioner when the actuator
is at half its angle of rotation.
8. Stick the scale label on the coupling
wheel so that the arrow tip indicates the
closed position and it can be easily read
when the valve is installed.
24 EB 8394 EN
Attachment to the control valve – Mounting parts and accessories
Fig. 12 · Direction of rotation

 Loading...