-17-
Mechanical Disassembly
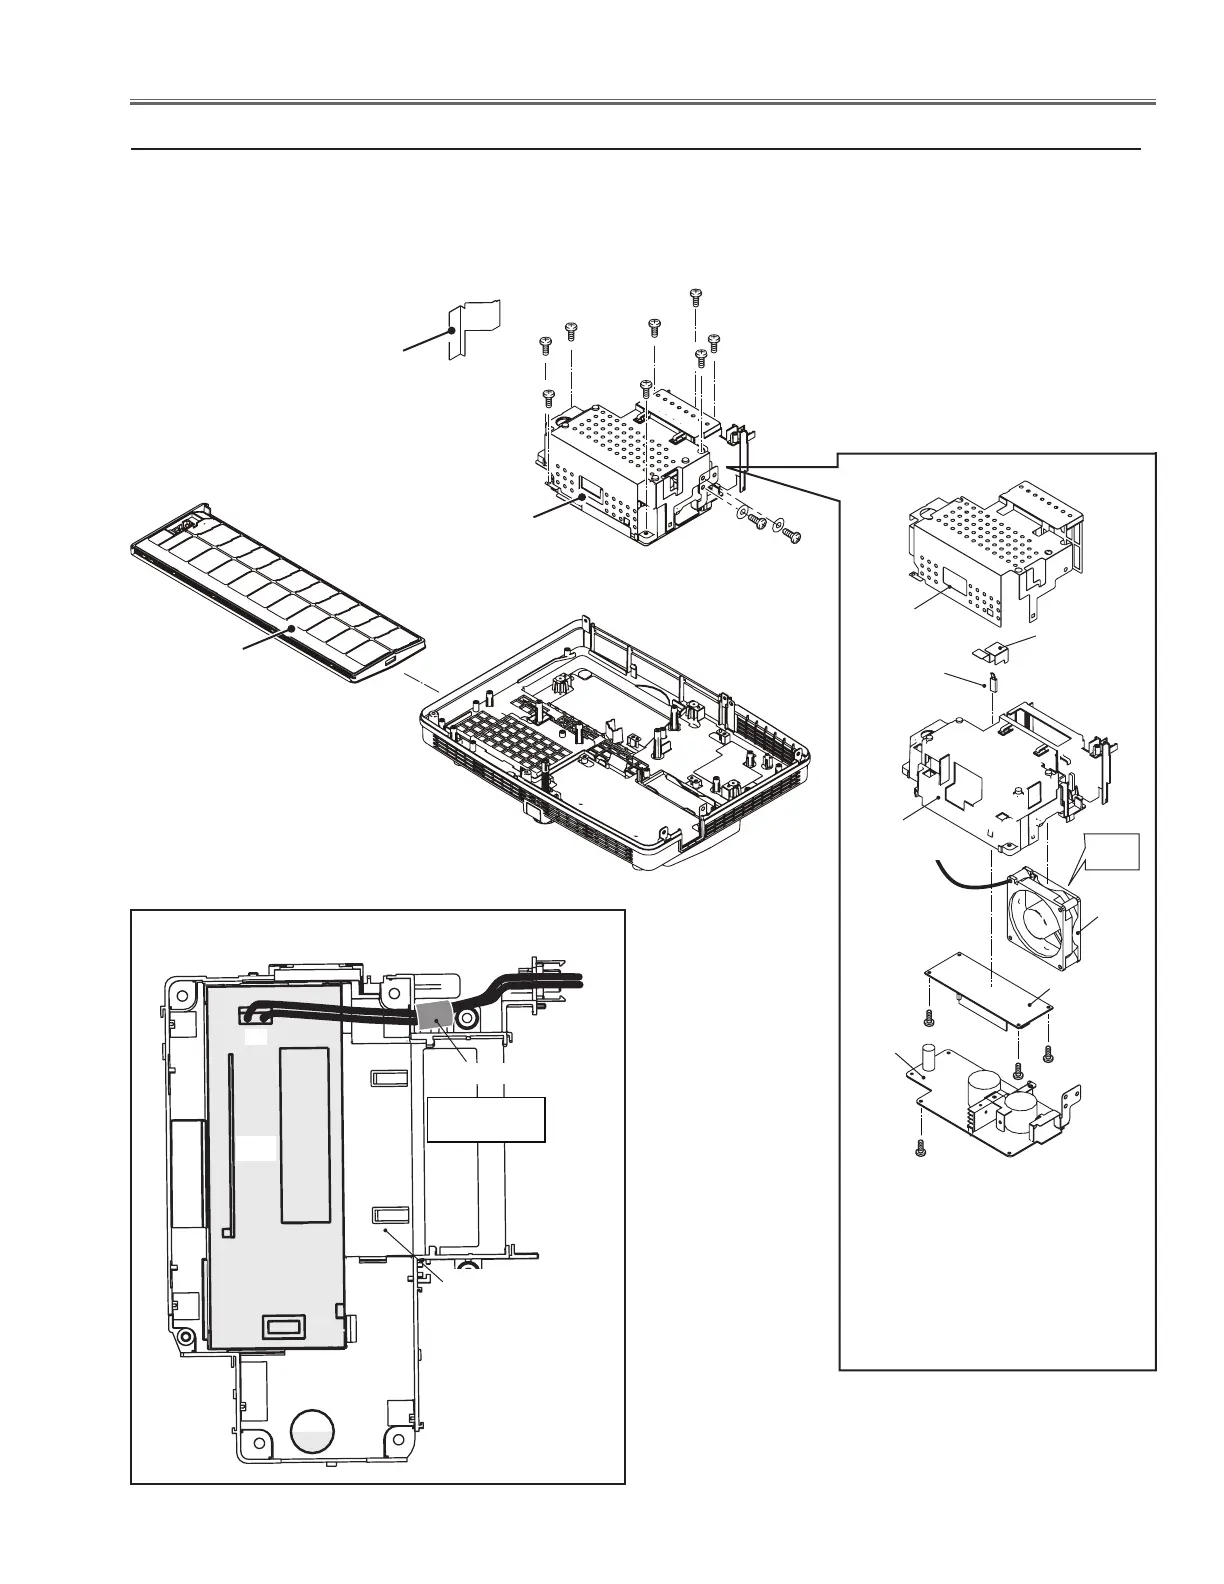
Fig.5
b Power board, Fan(FN002) and Filter Ass'y removal
1. Remove the Power board spacer sheet.
2. Remove 8 screws A(M3x8) and 2 screws B(M4x6) to remove the Power box.
3. Remove the Filter Ass'y.
Power board
spacer sheet
A (M3x8)x8
A
A
A
A
A
A
A
Filter Ass'y
B
B(M4x6)x2
Power box bottom view
X3
Ballast
board
Ferrite core
Fix the ferrite
core here.
Power top holder
Power shield
TEMP spacer
shield
SW601
Power top
holder
FN002
Ballast board
(T3x8)x3
T3x8
Power
board
Label
side
Note:
Please pay attention to the install
direction of SW601, the side with
text facing to the projector back.
Power box
 Loading...