28
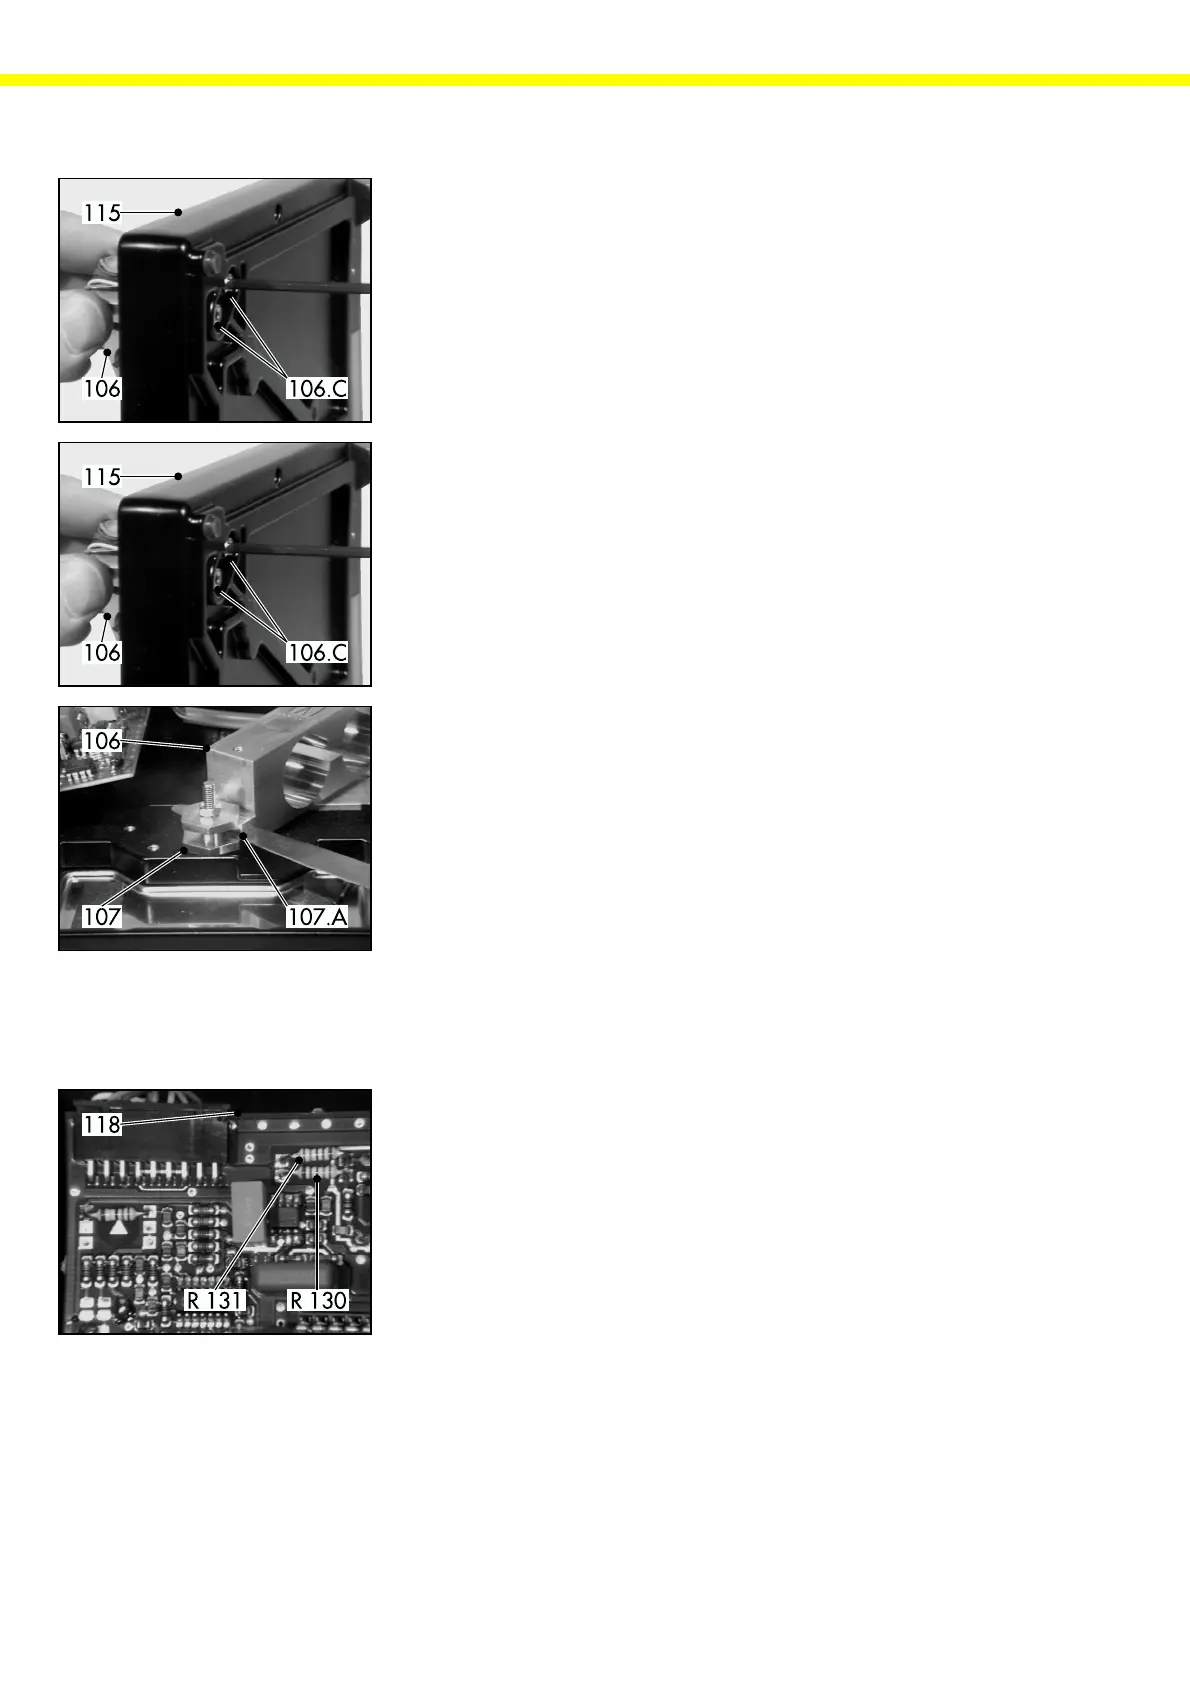
- Hold the strain gauge system (106) with one hand, and rotate the two
system fastening screws (106.C) and remove them from the housing base
(115).
- Remove the old strain gauge system (106) from the housing base (115).
- Place the new strain gauge system (106 in the housing base (115) and
fasten it loosely with the screws.
- Position the weighing system (106), and tighten the two screws (106.C) to
7.5 (+0.4) Nm.
- Place the balance/scale in an upright position.
- Adjust for a clearance of 0.6 mm between the lower stop (107.A) of the
strain gauge system (106) and the overload stop lock nut (107).
Important Note:
Preadjustment of the zero point offset value of the new weighing system (106) was performed at the factory. The
corresponding resistor has been installed in the weighing system (106). This resistor must be transferred to the main
PCB (118).
- Desolder the old resistors, R130 and R131, from the main PCB (118) to
adjust the zero point offset.
- Solder the new resistor to position R130 on the main PCB (118).
- Perform the final adjustment of the zero point offset value after you have
installed the new weighing system (106).
 Loading...