6 Installation of Options
148
CL4NX/CL6NX Service Manual
32
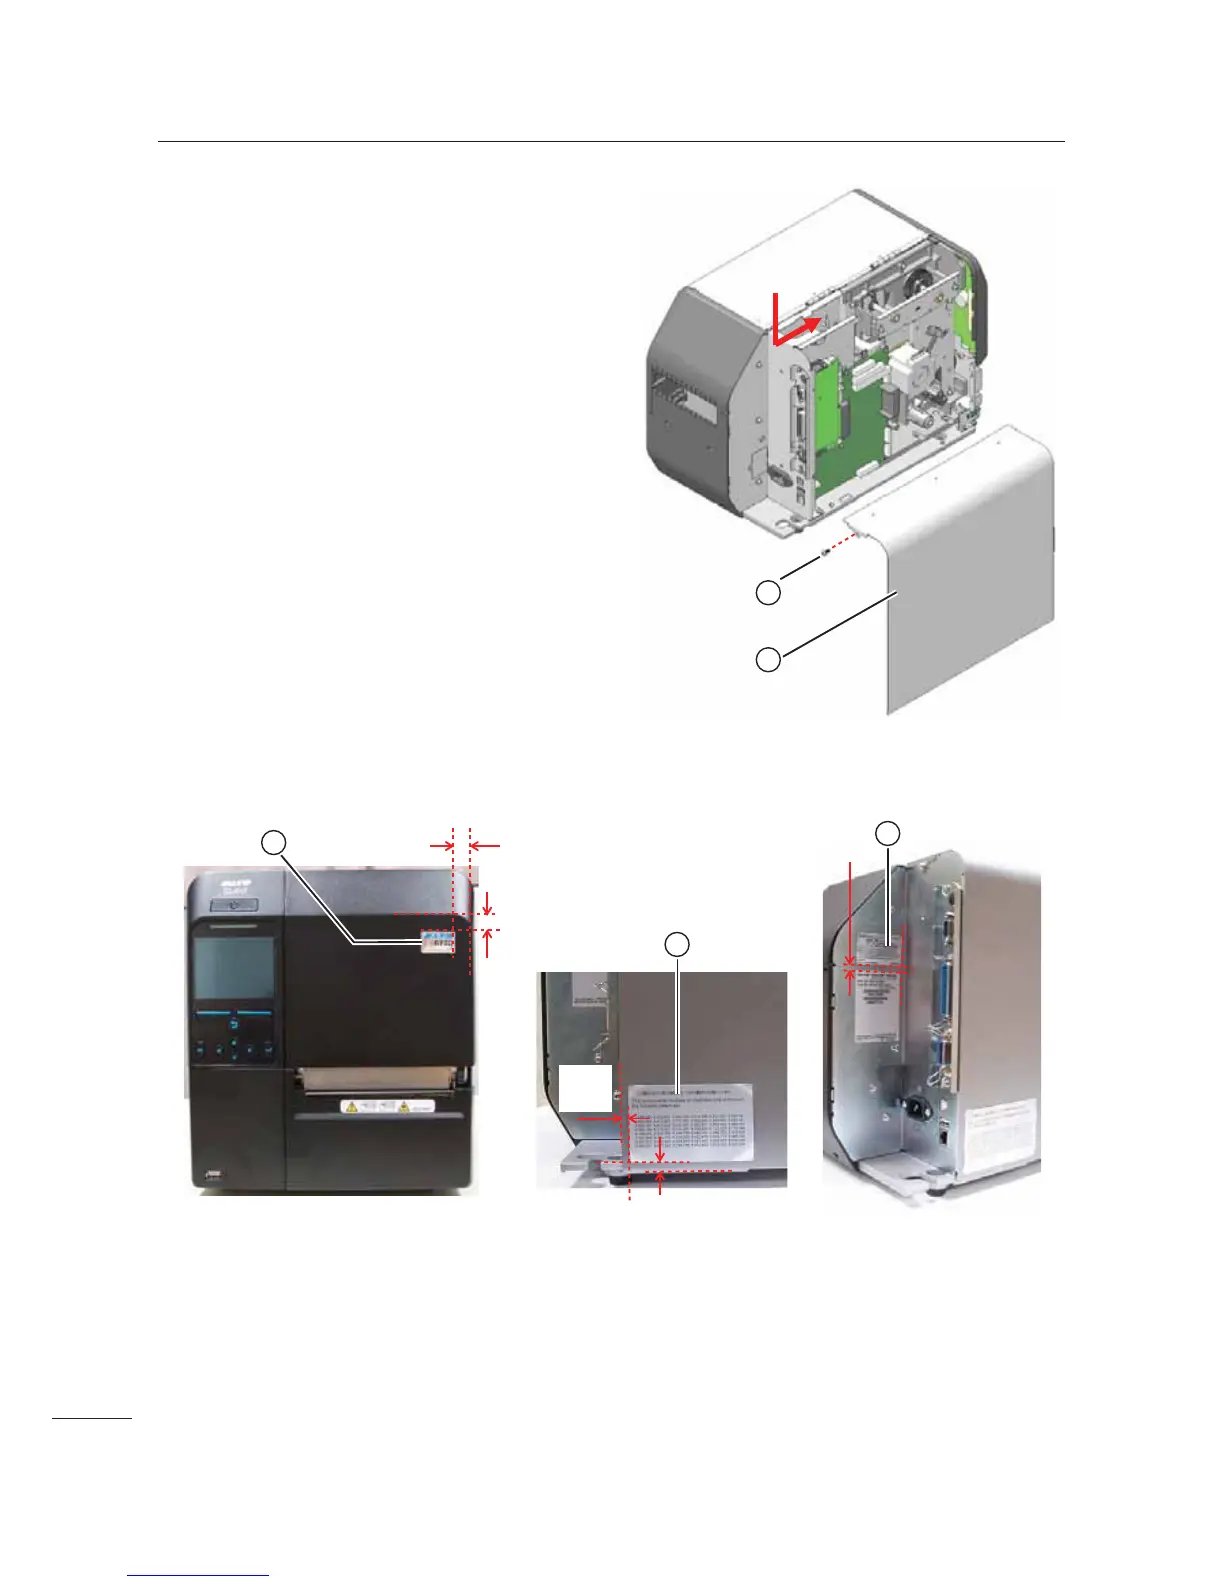
Attach the left housing cover 2 and
tighten the screw
4.
33
Paste three stickers to the position as shown.
• Paste the SATO RFID solutions sticker on the front of the printer as shown above.
• Paste the patent label
on the left housing cover as shown above.
• Paste the FCC sticker
beside the connector panel as shown above.
7
6
Slide
5 mm (0.2”)
5 mm
(0.2”)
37
38
5 mm (0.2”)
15 mm (0.6”)
15 mm (0.6”)
36

 Loading...


