4 Checking and Performing Printer Adjustments
56
CL4NX/CL6NX Service Manual
4.9.2
Adjusting the Head Pressure Balance with Adjustment Dials
Criteria of the head pressure balance adjustment
• Set the head pressure according to the media thickness, including the liner.
• Set the pressure balance according to the media width.
Head pressure setting
The adjustment procedure for the head pressure balance is as follows:
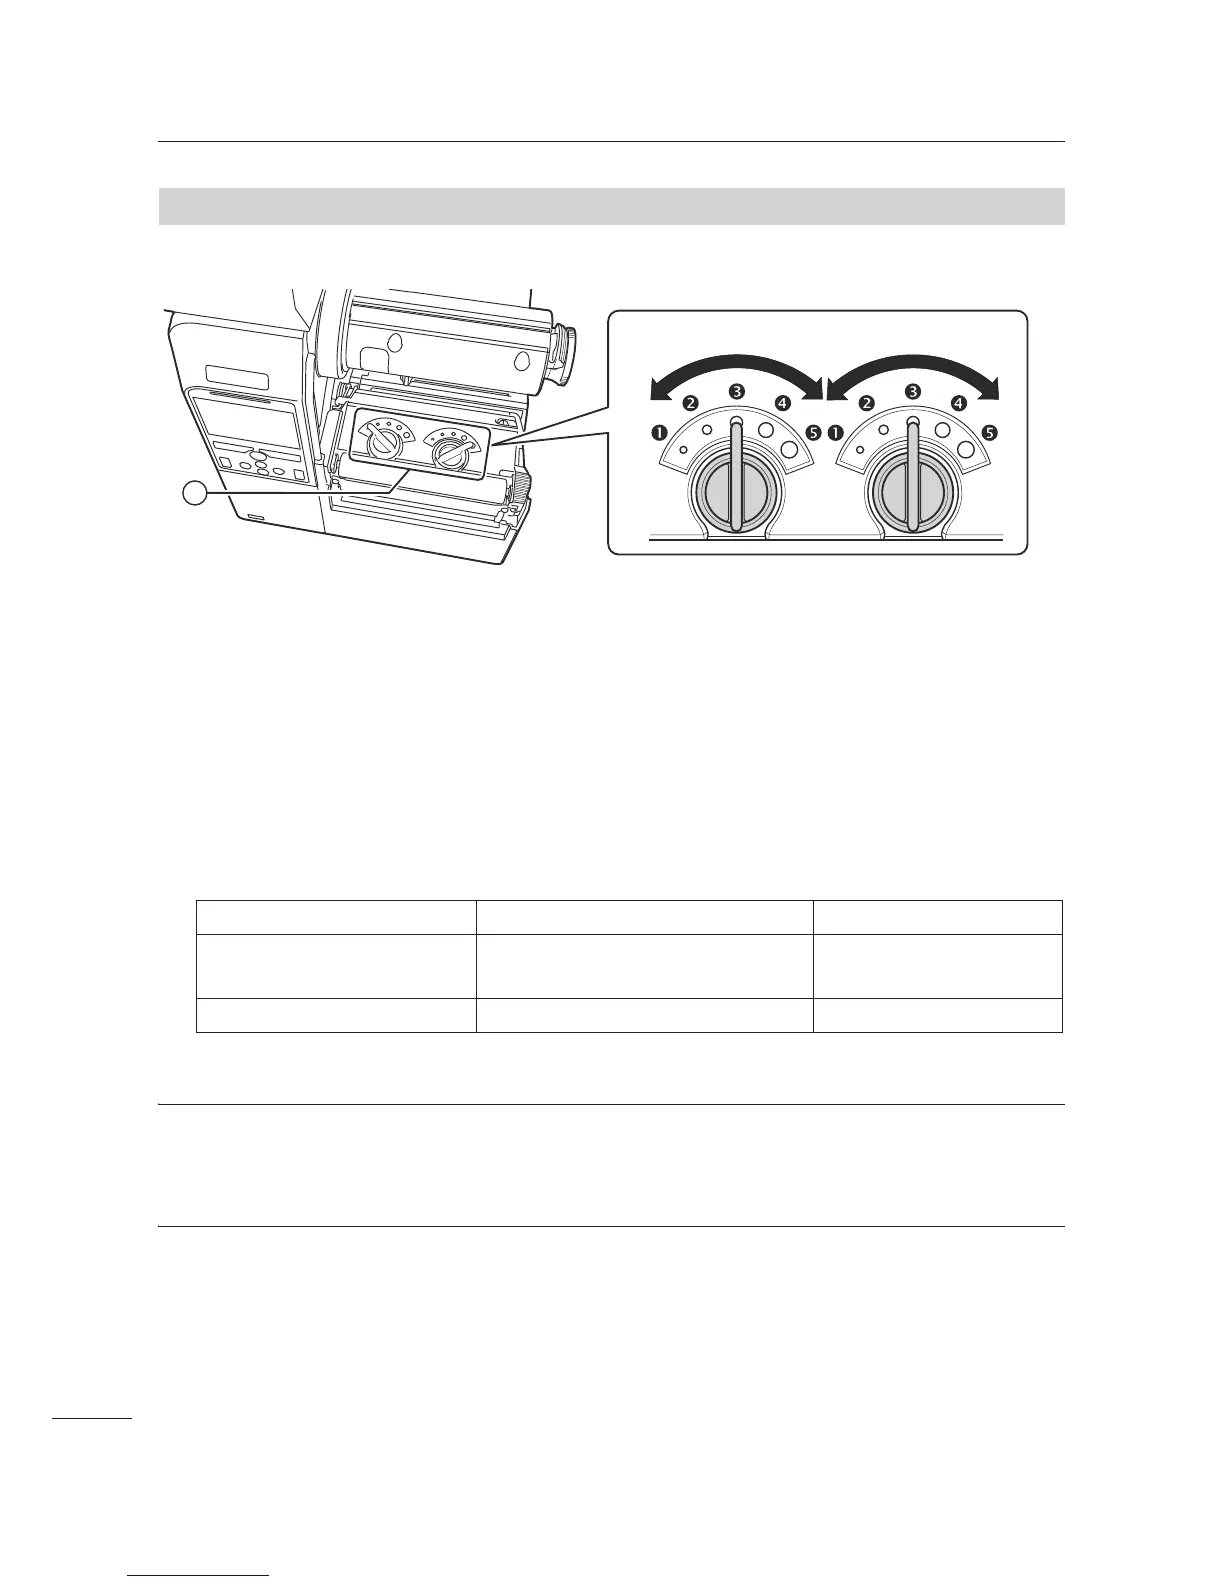
1 Open the top cover of the printer.
2 Find the adjustment dials . on the top of the print head assembly as shown.
3 Turn the adjustment dials . to match the media thickness.
4 Be sure to perform the pressure balance setting as explained below, after step 3.
Note
• The factory default setting is Left p and Right p.
For CL6NX dispenser model, the factory default setting is Left
q and Right q.
• The thickness of the media includes the liner.
Media Thickness (mm) 0.060 - 0.200 0.200 - 0.268
Pressure Balance Gradation
p (Left and Right, CL4NX only)
p or q (Left and Right, CL6NX only)
q or r (Left and Right)
Reference
Thin paper/normal label, etc. Thick paper/tag, etc.
1
Left Right

 Loading...


