4 Checking and Performing Printer Adjustments
57
CL4NX/CL6NX Service Manual
Pressure balance setting
The adjustment procedure for the pressure balance is as follows:
1 Open the top cover of the printer.
2 Find the adjustment dials . on the top of the print head assembly as shown.
3 Turn the adjustment dials . according to the media width and set the pressure
balance.
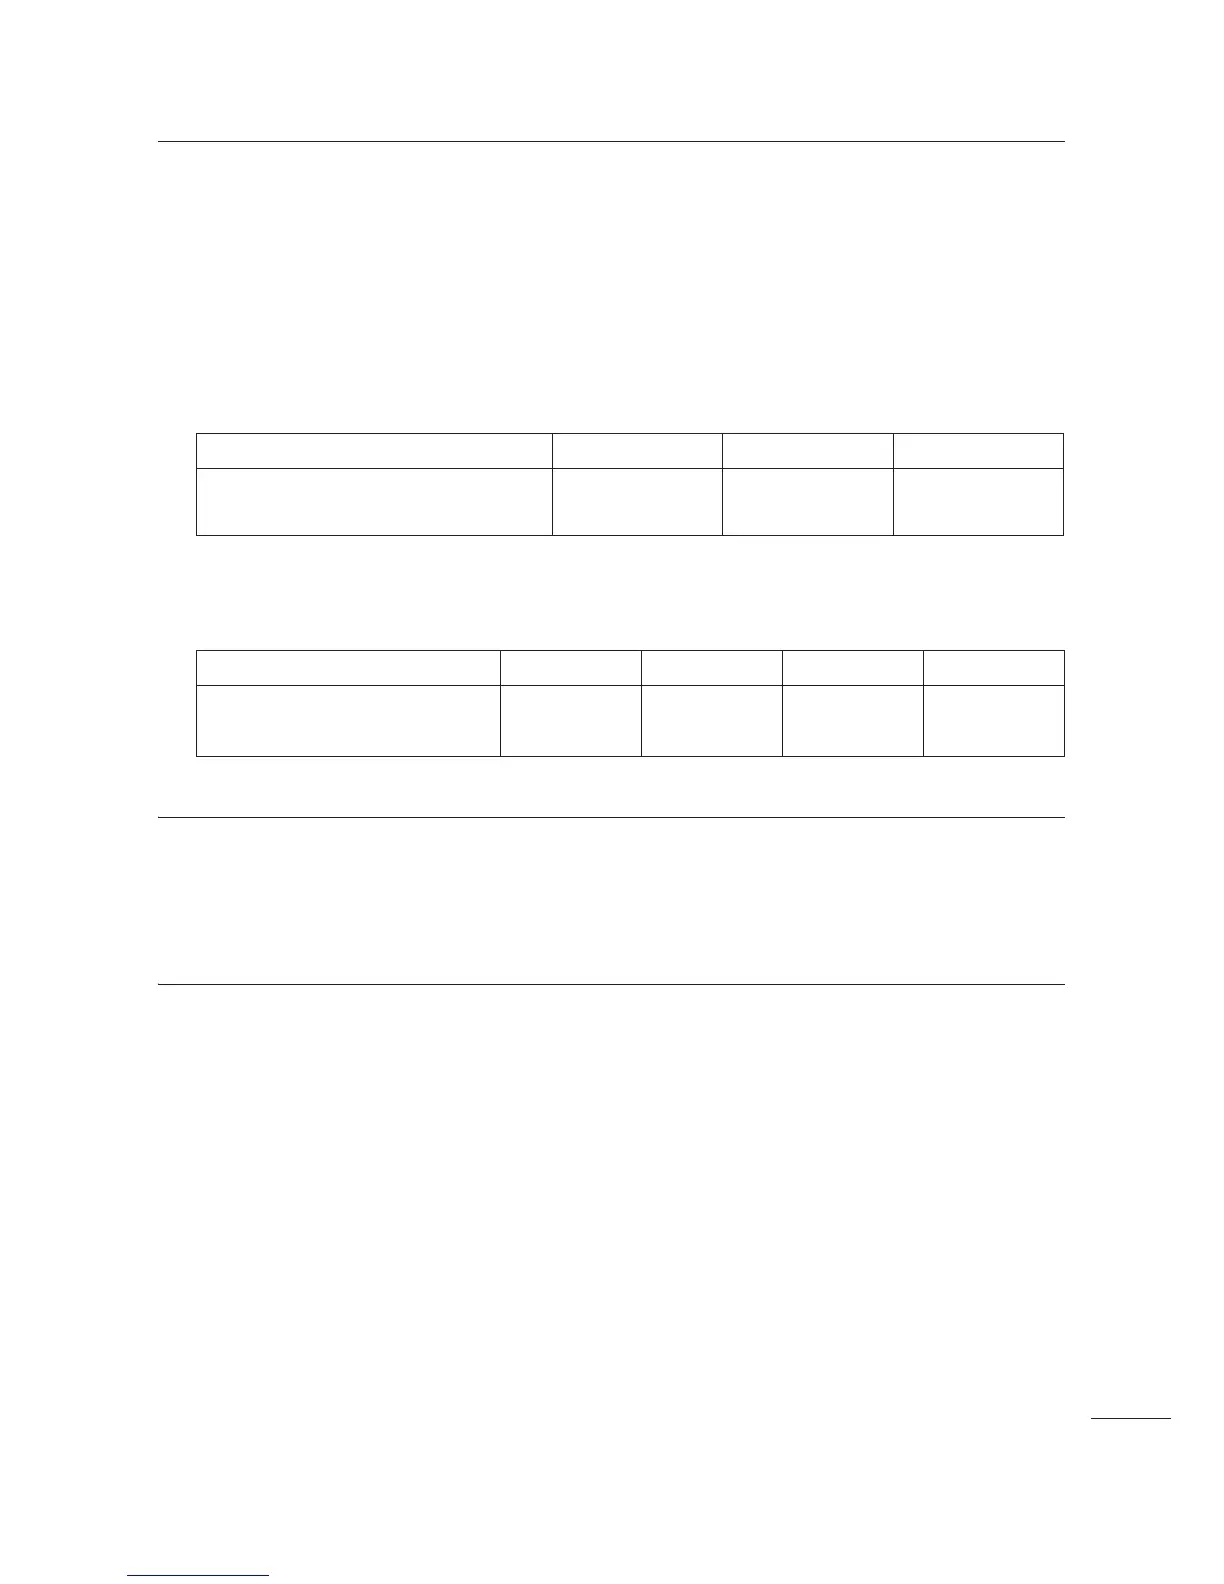
For CL4NX:
*First use the gradation setting for the head pressure and then adjust according to the media width.
Above table shows an example when the head pressure is Left
p.
For CL6NX:
*First use the gradation setting for the head pressure and then adjust according to the media width.
Note
• The factory default setting is Left p and Right p.
For CL6NX dispenser model, the factory default setting is Left
q and Right q.
• If the media is shifted to the right after adjusting the dial, turn the head pressure balance adjustment screw
to counterclockwise. (If media is shifted left, turn to clockwise.) Refer to Section 4.9.1 Adjusting the Head
Pressure Balance with Adjustment Screw for details.
Media Width (mm)
25 - 54 54 - 83 83 - 131
Pressure Balance Gradation
Left
p
Right n
Left p
Right o
Left p
Right p
Media Width (mm)
50 - 120 120 - 140 140 - 160 160 - 180
Pressure Balance Gradation
Left
r
Right n
Left p or q
Right n
Left p or q
Right o
Left p or q
Right p or q

 Loading...


