WS4-TT-r01-30-12-16TM
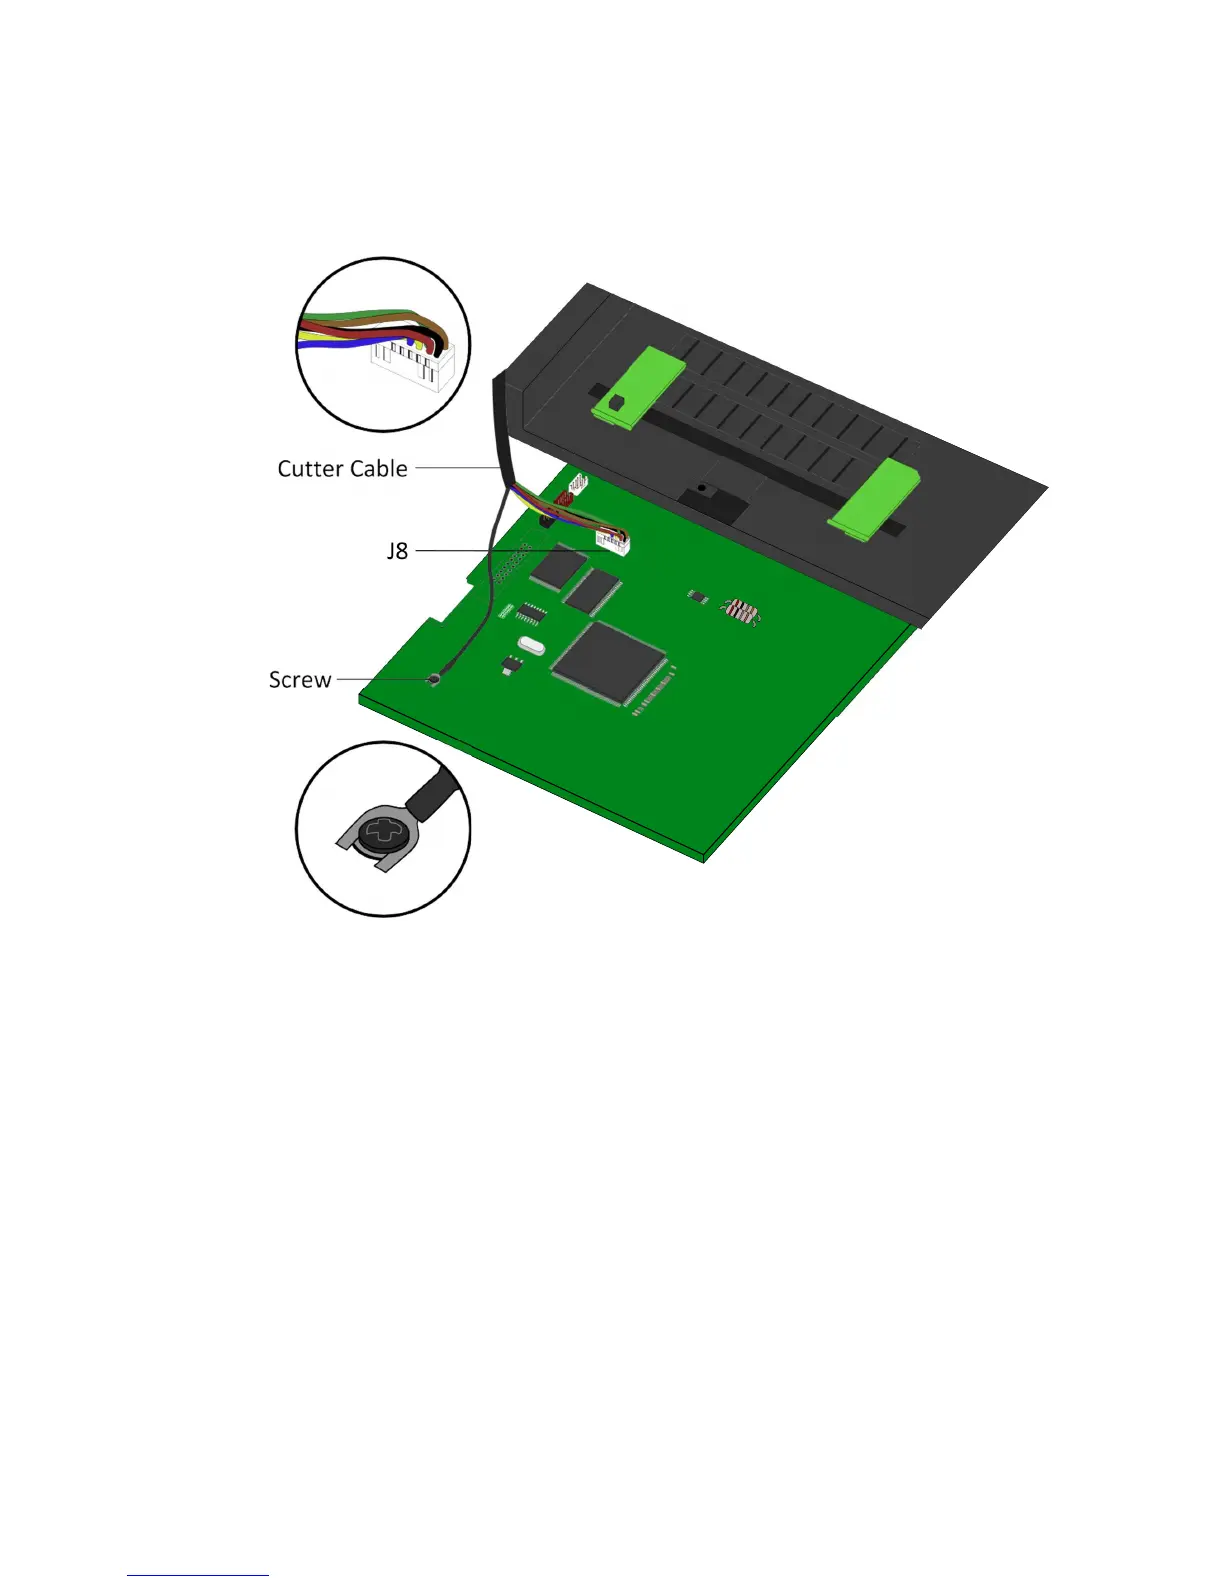
located to the right of the main board. Connect the ground wire (fork terminal)
to the screw on the bottom-left corner after loosening the screw a bit and
then tighten the screw to secure the wire.
3. Put the cutter on the print module.
4. Reinstall the middle frame along with the top cover. Make sure the cutter
cable is inside the middle frame.
5. Reverse step 7-8 to secure the middle frame to the printer.
6. Position the cutter in front of the printer. Align the three screw holes of the
cutter with the screw holes on each side of the platen roller and secure the
cutter with three screws.

 Loading...